
MX-6 V6-2496cc 2.5L DOHC (1996)
^
Spring
^
Check ball
8.
Assemble headlight switch into combination switch.
NOTE:
Remember to install check ball and spring.
9.
Verify that the new switch operates smoothly and does not bind.
10.
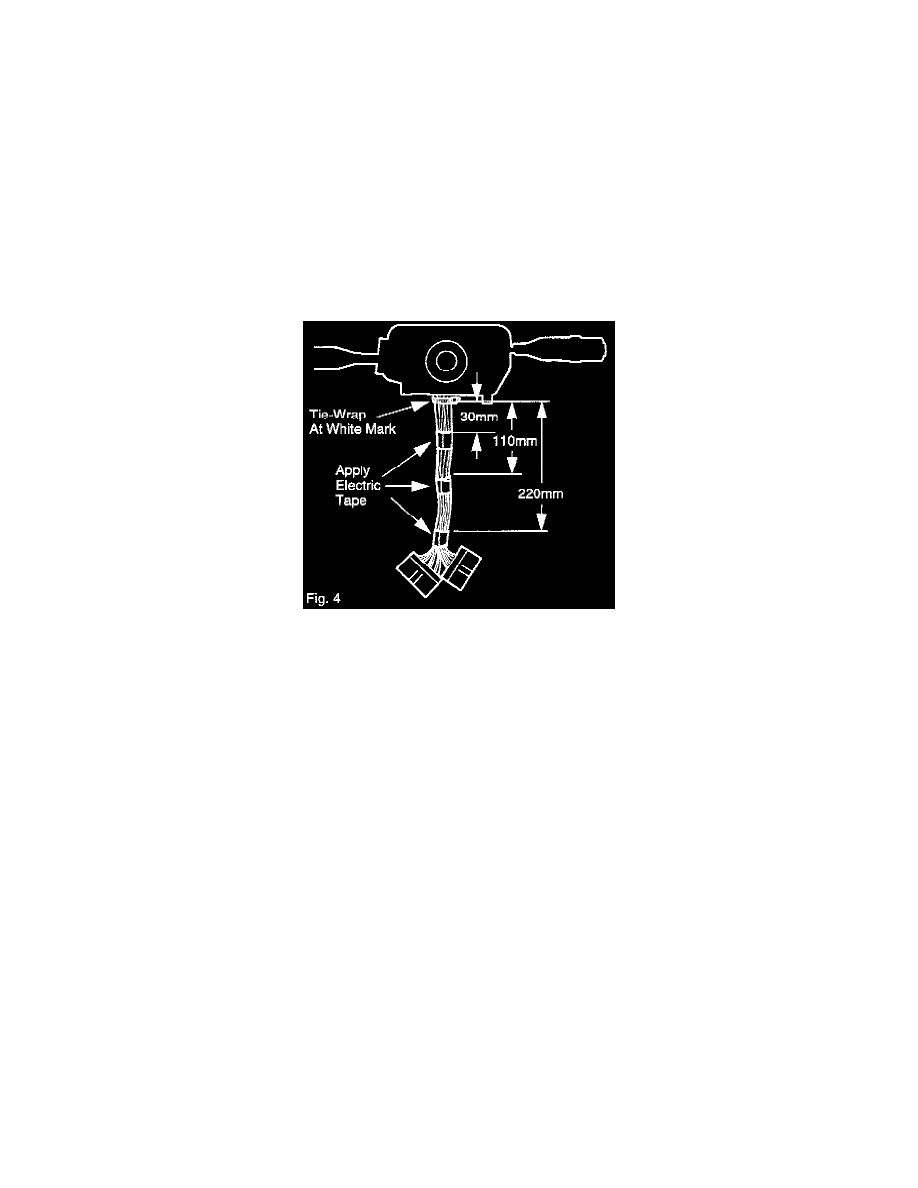
Route the headlight switch harness and install the tie-wrap at the white mark location on the harness. Refer to Fig. 4
CAUTION:
If the harness is not tie-wrapped at the white mark location, the harness may be too tight to permit smooth turn signal lever movement.
11.
Measure the following distances from the tie-wrap toward the connectors and wrap one (1) piece of electrical tape around the harness at those
locations. Refer to Fig. 4.
^
30 mm +/- 3 mm
^
110 mm +/- 5 mm
^
220 mm +/- 5 mm
NOTE:
When complete, three (3) locations on the harness will be wrapped instead of the original two (2) locations.
12.
Install the red, green and black wires into the blue connector.
^
Close gates on connector.
NOTE:
Ensure that the wires are in the correct locations and secure inside the connector.
13.
Install the following components. Refer to the BETM "Installation Notes" in section Z4.
^
Combination Switch
^
Clock Spring
^
Column Covers
^
Steering Wheel
^
Air Bag Module