
MX-6 V6-2496cc 2.5L DOHC (1996)
5.
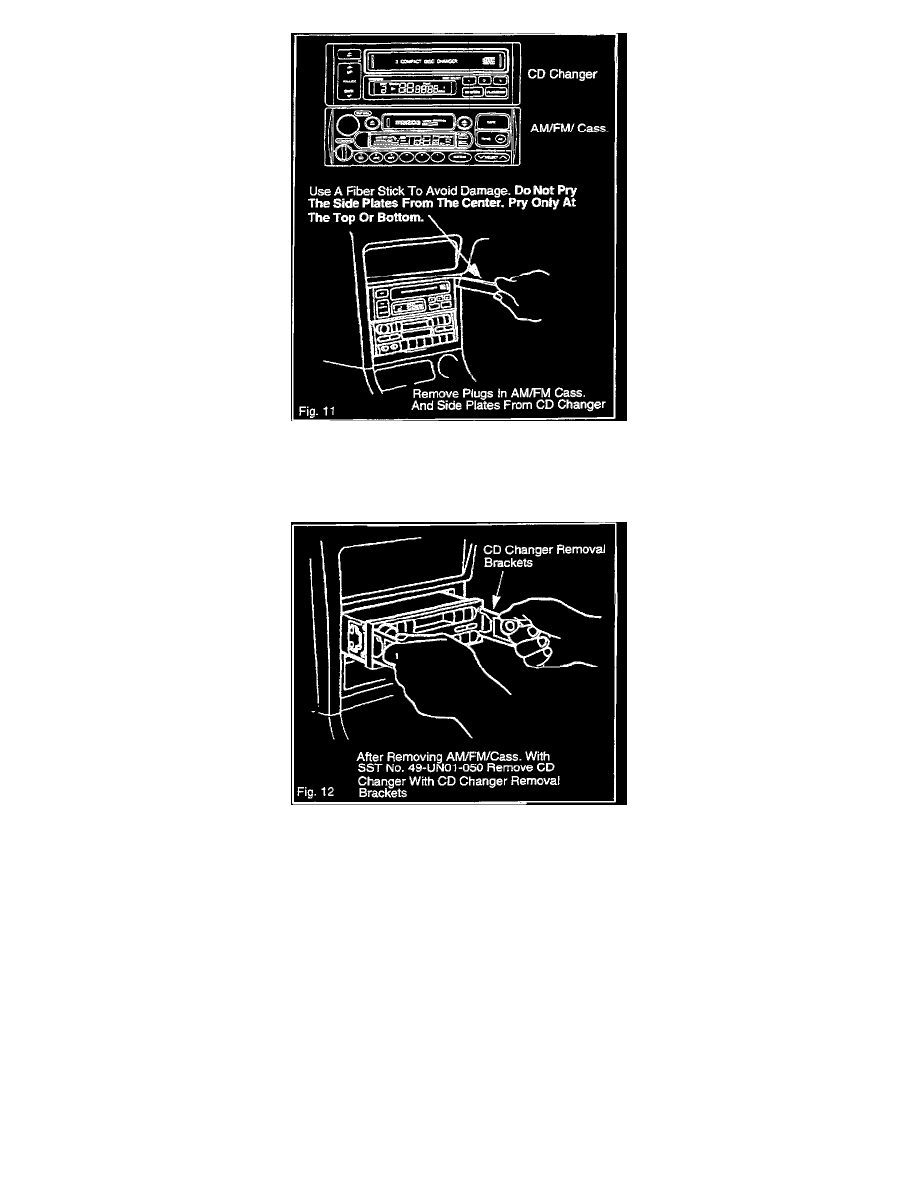
Gently pry and remove the AM/FM/Cassette plugs and the side covers from the CD changer using a fiberstick. Both sides.
CAUTION:
To avoid damage to side covers, pry gently at the top or bottom. Do NOT pry at the center of the side covers.
6.
Insert the radio removal tools (SST No. 49-UN01-050) about one (1) inch into the holes in the front panel of the player.
7.
Pull the radio removal tools toward the outside of the vehicle while slowly pulling the audio unit from the center console.
NOTE:
Pull the audio unit out only far enough to access the four (4) electrical connectors and the antenna cable.
8.
Disconnect the electrical connectors and the antenna cable from the back of the audio unit.
^
Remove player from dash.
CAUTION:
Avoid damage to the center console.
9.
Insert the CD changer removal brackets into the slots on the CD changer.
10.
Unlock CD changer and remove from center console.
11.
Remove the three (3) transportation screws from the upper side of the CD changer.