
MX-6 V6-2496cc 2.5L DOHC (1996)
^
Store the three (3) screws in the small storage bag and place in the glovebox.
12.
Insert the CD changer half-way into the center console opening.
NOTE:
DO NOT fully install the CD changer at this time. Due to interference with the electrical connectors and vertical reinforcement members of the dash
frame, AM/FM/Cassette installation may be difficult.
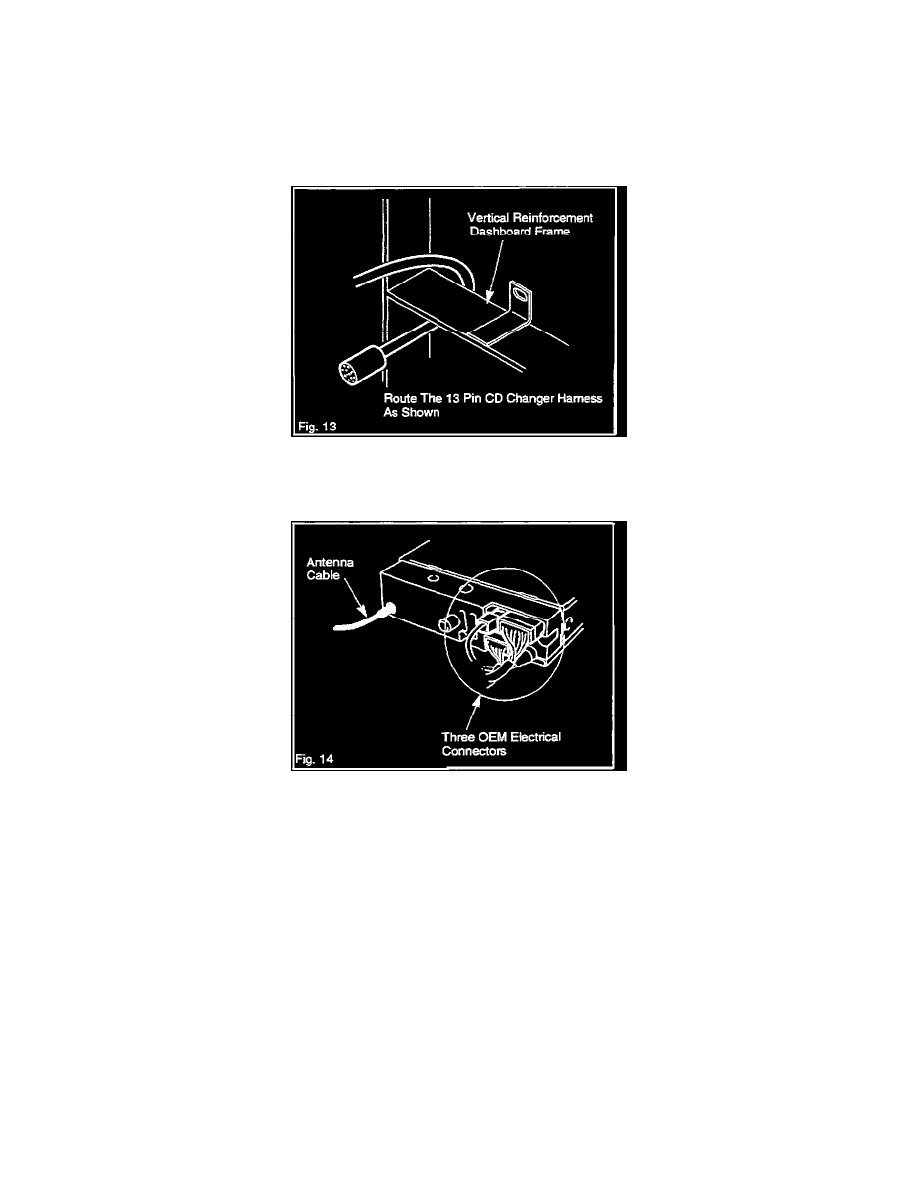
13.
Route the 13 pin CD changer electrical harness from above the vertical reinforcement dash-board frame to below the reinforcement.
^
Allow connector to hang at the lower center dash opening.
14.
Access the three OEM audio connectors, antenna cable and the 13 pin CD changer connector from the lower center dashboard opening.
^
Connect all electrical connectors and antenna cable securely into the back of the AM/FM/Cassette player in the following order:
a)
13 pin connector from CD changer
b)
Three OEM electrical connectors
c)
Antenna cable
CAUTION:
Avoid scratching the switch panel during this procedure.
15.
Verify all connectors are secure.
16.
Insert the player into the lower side of the center dashboard until the locking tabs securely locks into the dash board.
NOTE:
When tabs are locked into position, a "click' sound will be heard.
CAUTION: