
MX-6 LS V6-2.5L DOHC (1997)
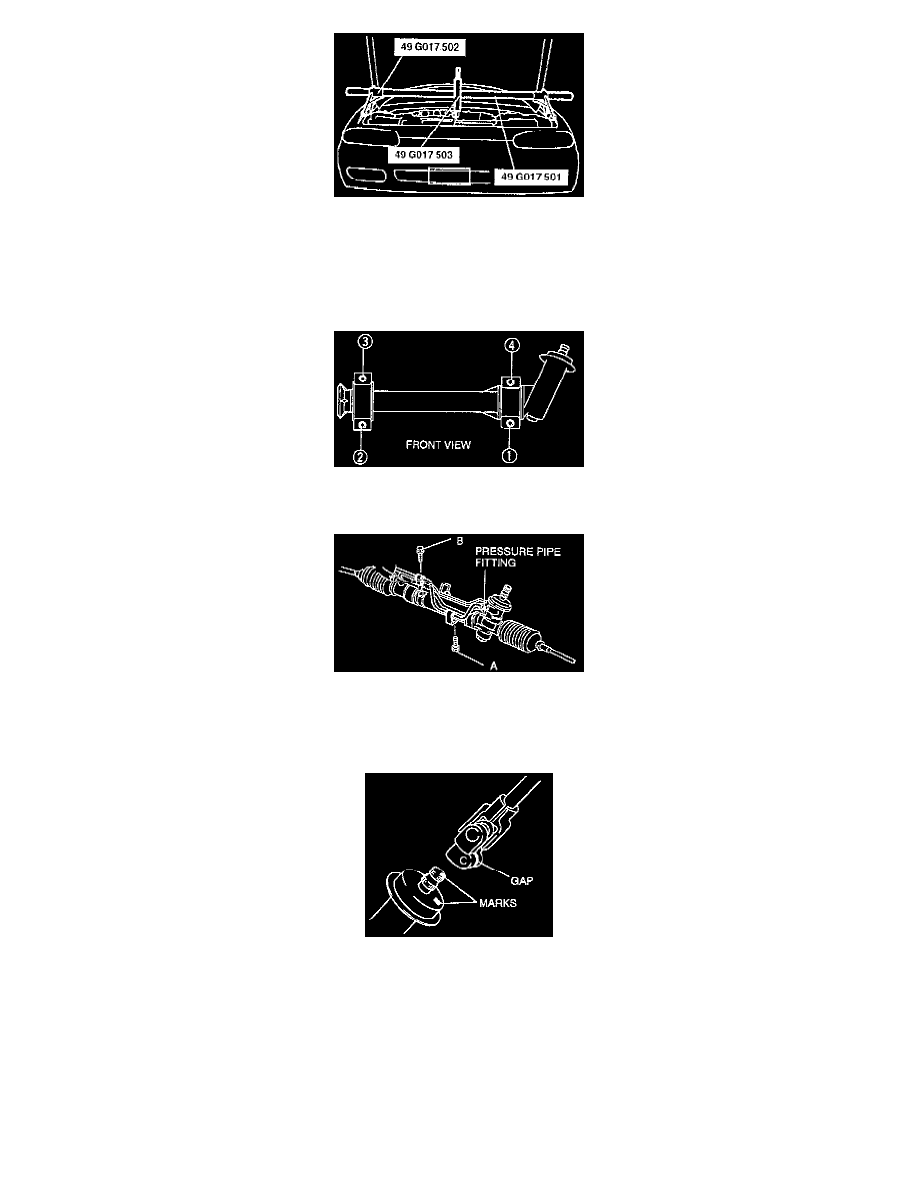
6. Use the SST as shown.
7. Remove the engine mount.
8. Pull the steering gear from the right side to remove it.
INSTALLATION
1. Install in the reverse order of removal, referring to the following steps.
2. Loosely tighten nuts 4 and 3.
3. Tighten the mounting bracket nuts and bolts to 38 - 51 Nm (28 - 38 ft. lbs.) in the order shown.
4. Hand-tighten the pressure pipe fitting to the gear housing, being careful not to damage the O-ring.
5. Hand-tighten bolt A.
6. Tighten bolt B to the specified torque.
7. Tighten bolt A and the pressure pipe fitting to the specified torque.
8. Align the marks as shown.
9. Install the intermediate shaft so that the universal joint gap is aligned with the marks.
10. Tighten the bolt to 18 - 26 Nm (13 - 20 ft. lbs.).
11. Install the wheels and tighten lug nuts to 80 - 117 Nm (65 - 86 ft. lbs.).
12. After Installation:
a. Check for fluid leakage.
b. Bleed air from the system.
c. Check the steering angle and toe-in, and adjust if necessary.