
MX-6 LS V6-2.5L DOHC (1997)
11. Verify that the lower coil of the spring is properly seated on the step of the lower seat.
CAUTION: Use protective plates in the jaws of the vise.
12. Secure the shock absorber in a vise.
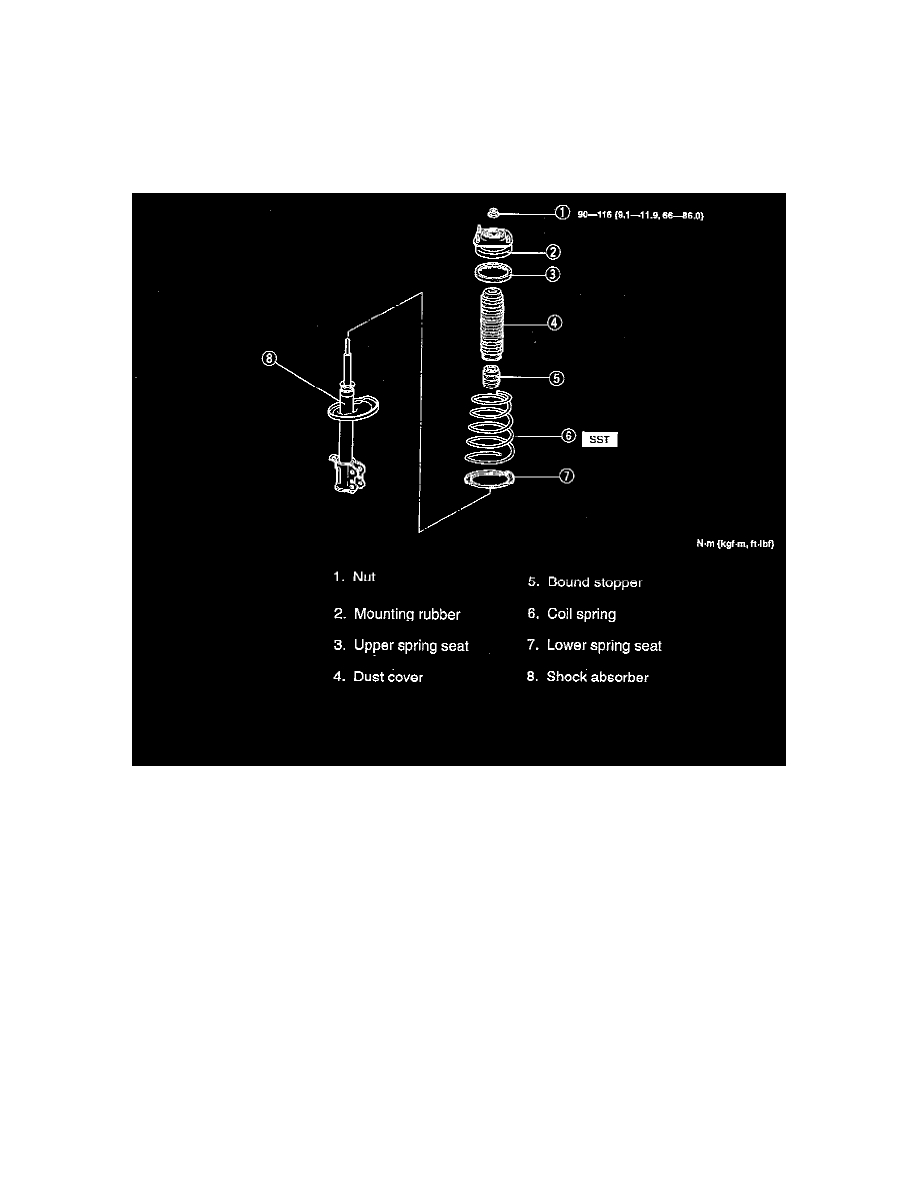
13. Tighten the nut to 90 - 116 Nm (66 - 86 ft. lbs.).
Using Special Service Tool 49 G034 1A0
DISASSEMBLY
1. Disassemble in the order shown in the illustration, referring to the following note:
Piston Rod Nut
WARNING: Removing the piston rod nut is dangerous. The shock absorber and spring could fly off under tremendous pressure and
cause serious injury or death. Secure the shock absorber in the Special Service Tool (SST) before removing the piston rod nut.
CAUTION: To prevent damage to the shock absorber, use protective plates in the vise jaws.
A. Secure the shock absorber in a vise.
B. Loosen the nut several turns, but do not remove it.