
Protege L4-1.5L DOHC (1995)
^
Three (3) Tie-Wraps
^
Vinyl Tape
^
Sponge
9.
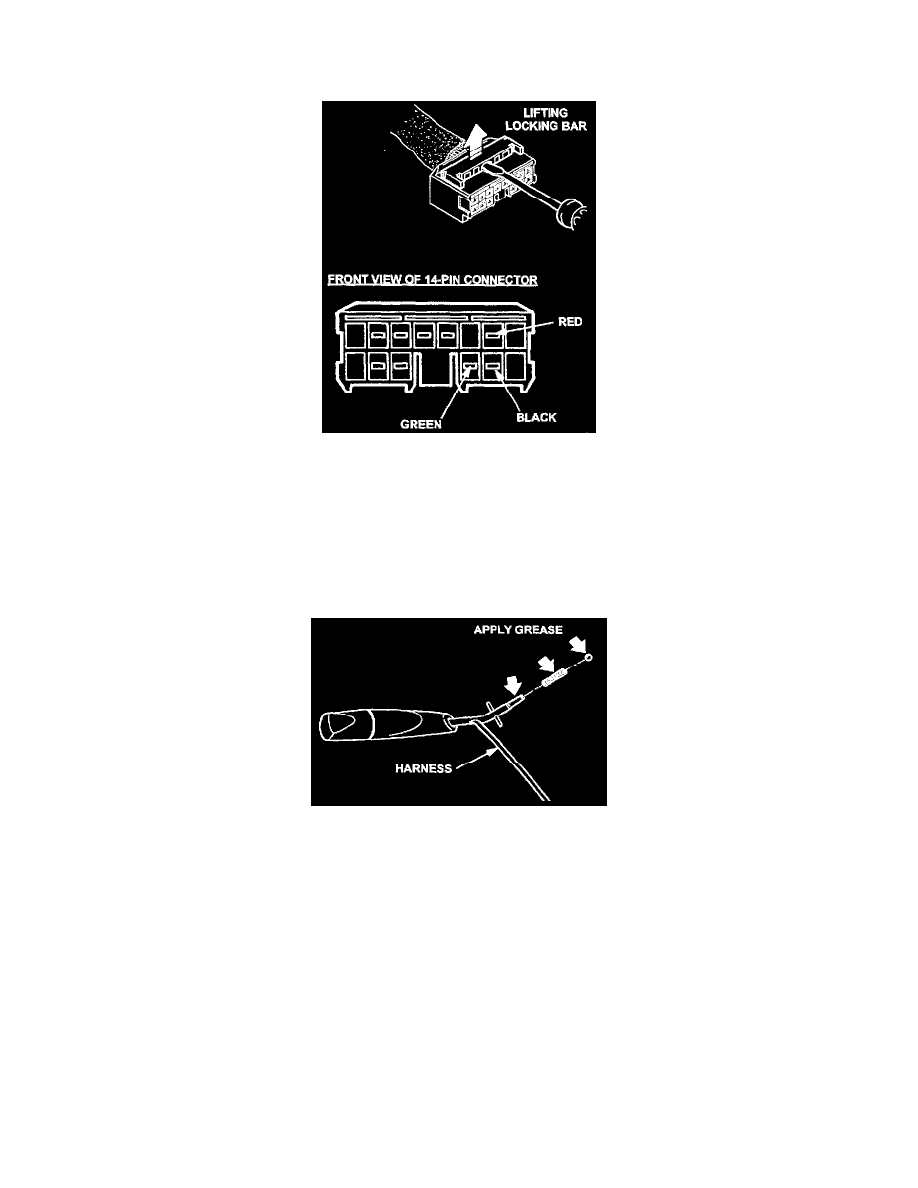
Disconnect the headlight switch harness from the blue 14-pin connector by using the following procedure. Refer to the illustration.
A.
Use a small screwdriver (or equivalent), lift the locking bar at the top of the connector.
B.
Remove the black, green, and red wire terminals from the connector by lifting the tab with a suitable tool and slide out terminals.
Refer to illustration.
Caution:
^
Be careful not to break locks while removing terminals.
10.
Begin installing replacement headlight switch by applying a small amount of grease (provided in kit) to the following components. Refer to
the illustration.
^
End of new headlight switch lever
^
Spring
^
Check ball
11.
Assemble the spring and ball bearing onto replacement switch.
12.
Install headlight switch assembly onto the combination switch body with original cover and two (2) screws.
13.
Verify that the new switch operates smoothly and does not bind.
Note:
^
Be sure to install check ball and spring.
14.
Route the replacement headlight harness in the same position as the original harness (see STEP 8).