
Protege L4-2.0L DOHC (2003)
Radio/Stereo: Reading and Clearing Diagnostic Trouble Codes
Displaying and Reading Trouble Codes
STARTING PROCEDURE FOR ON-BOARD DIAGNOSTIC TEST MODE
NOTE: All DTCs displayed in the on-board diagnostic test mode should be entered on the Audio Exchange Order Form.
1. Turn the ignition switch to the ACC or ON position.
2. First press the POWER button and hold it, then press the AM button and CLOCK button for 2 seconds or more.
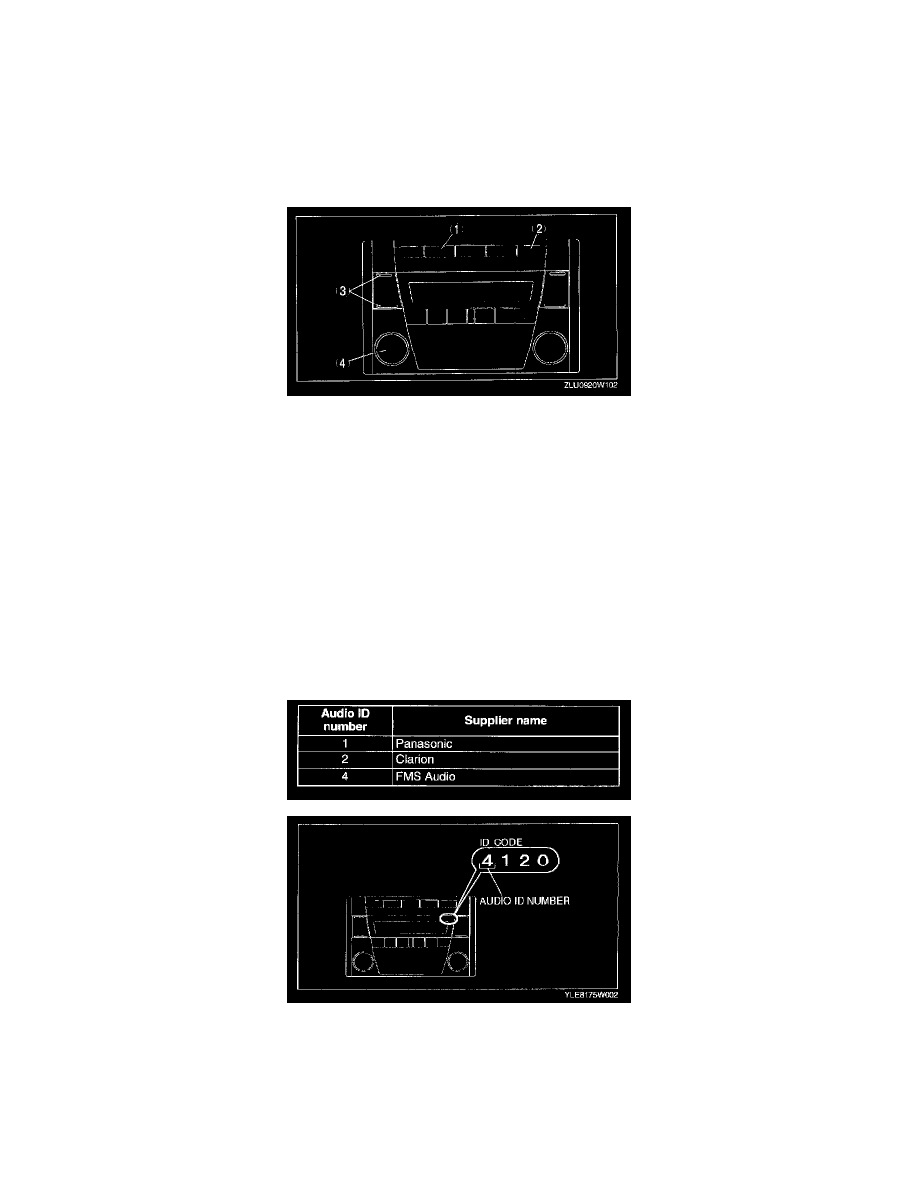
1. AM button
2. CLOCK button
3. SEEK button
4. POWER button
NOTE: If several DTCs are in the memory, they can be displayed by the SEEK button.
3. To stop the on-board diagnostic test mode, turn the ignition switch to the LOCK position.
SUPPLIER IDENTIFICATION PROCEDURE
NOTE: When asking the supplier (service center) for repair or replacement, verify which supplier the module belongs to and enter on the Audio
Exchange Order Form. (See Warranty Bulletin Category AD, number 32.) Use the table and illustration below to determine the audio supplier.
Identification With Printed Numbers/Label Base unit
1. To identity the supplier name, compare the leftmost number of the ID code (4 digits), printed on the upper right corner of the LCD, with the table.
Upper/lower module
1. Remove the audio unit.
2. Verify the supplier name written on the label attached on each module.