Protege DX L4-1.6L DOHC (2000)

Front Cross-Member: Service and Repair
FRONT CROSSMEMBER REMOVAL/INSTALLATION
1. For the MTX models, remove the change control rod and extension bar.
2. Remove the front exhaust pipe.
3. Remove the steering gear and linkage.
4. Remove the front lower arm.
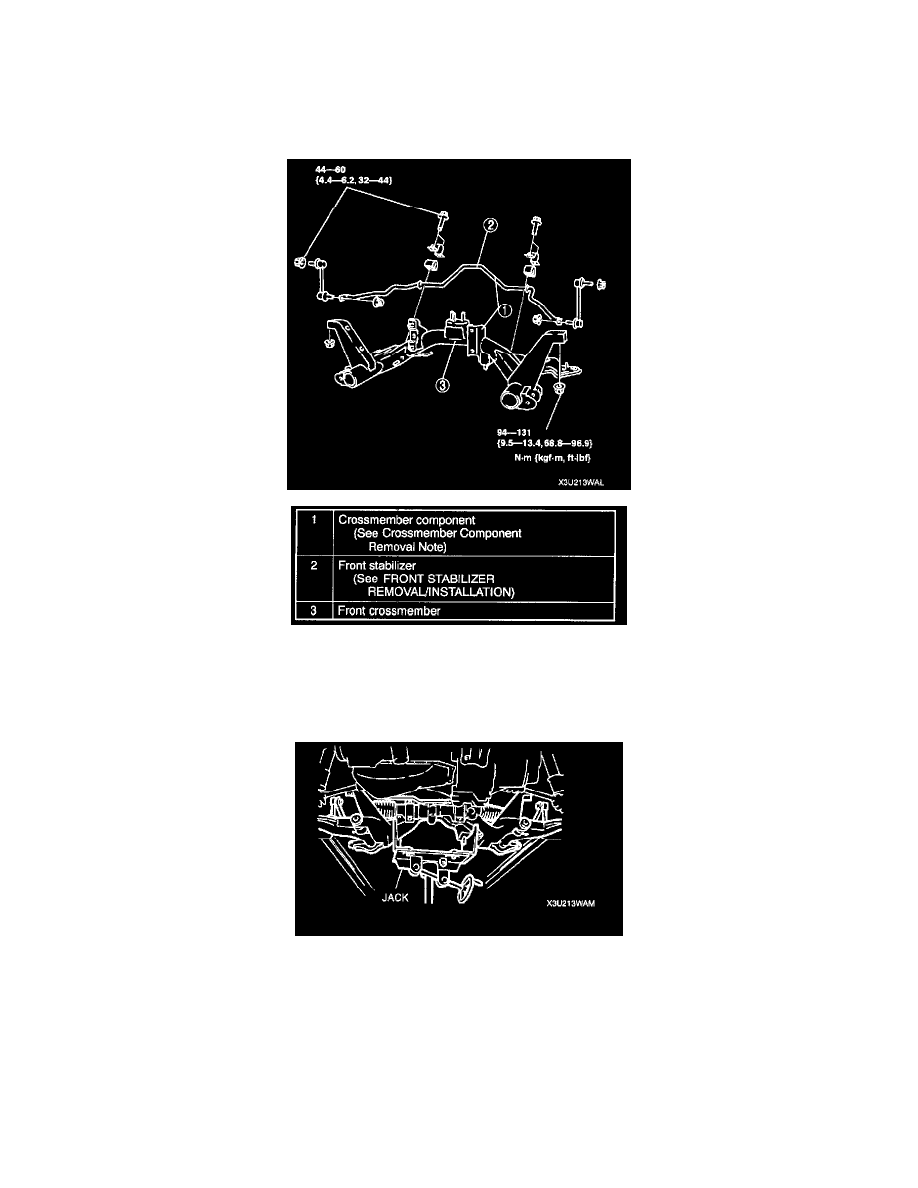
5. Remove in the order indicated in the table.
6. Install in the reverse order of removal.
7. Inspect the front wheel alignment as necessary.
CROSSMEMBER COMPONENT REMOVAL NOTE
1. Support the crossmember using a jack and remove the bolts and nuts.
2. Remove the crossmember component.
