
Protege DX L4-1.6L DOHC (2000)
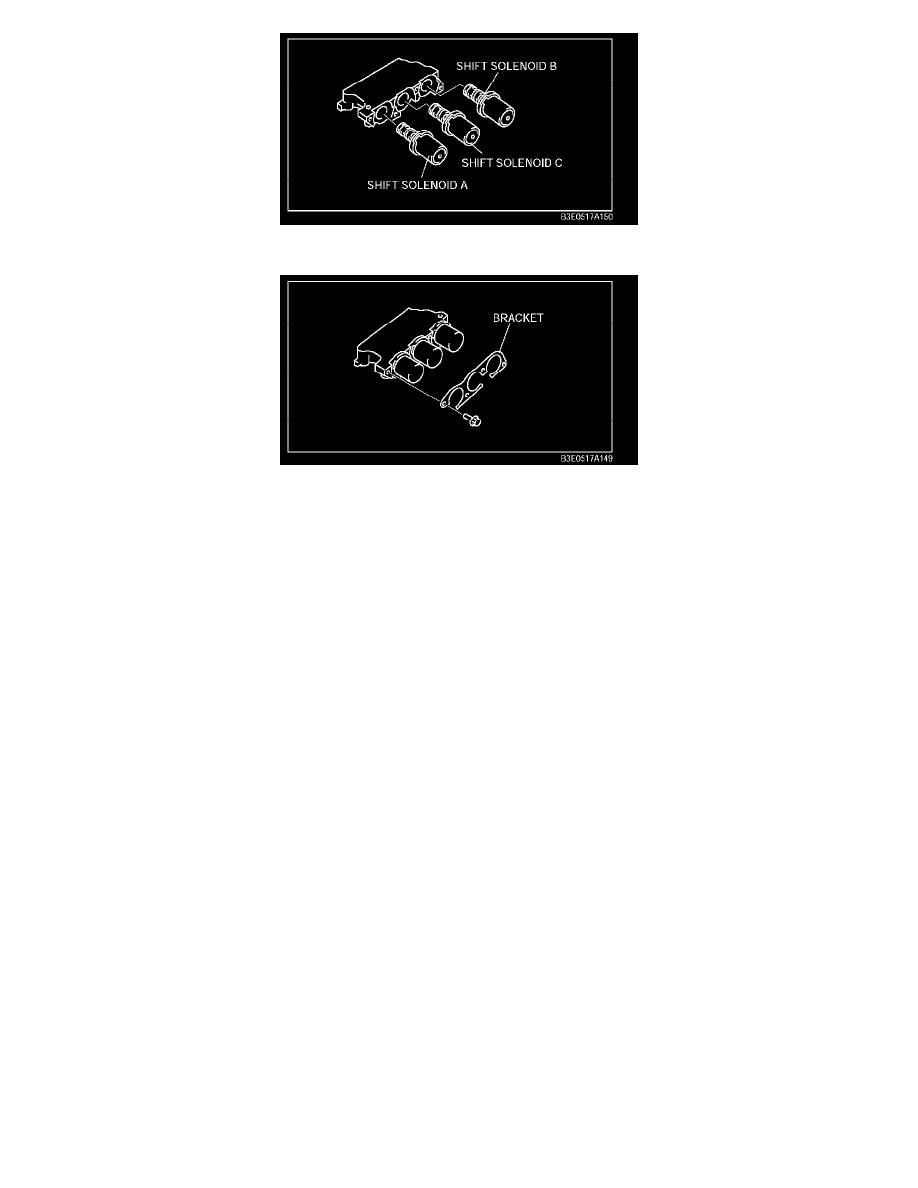
11. Install the shift solenoid A, B, C.
12. Install the bracket.
Tightening torque:
7.8-10.8 Nm (80-110 kgf-cm2, 69-95.5 in. lbf.)
13. Install the packing.
14. Apply ATF to new O-ring and install it onto the oil strainer.
15. Install the oil strainer onto the main control valve body.
Control Valve Body (Disassembly/Inspection)
CONTROL VALVE BODY (DISASSEMBLY/INSPECTION)
Disassembly/inspection
Caution:
^
Be especially careful when handing the control valve because it consists of the most precise and delicate parts of the transaxle.
^
Neatly arrange the removed parts to avoid confusing the similar parts.
^
Clean the removed parts with cleaning solvent, and dry them with compressed air. Clean out all holes and passages with compressed
air.
1. Disassemble in the order shown in the figure, referring to Disassembly procedure.