
Protege DX L4-2.0L DOHC (2002)
2. Remove the splash shield.
3. Remove in the order indicated in the table.
4. Install in the reverse order of removal.
REMOVAL/INSTALLATION NOTES
Drive Shaft Removal Note
1. Remove the clinch bolt and nut.
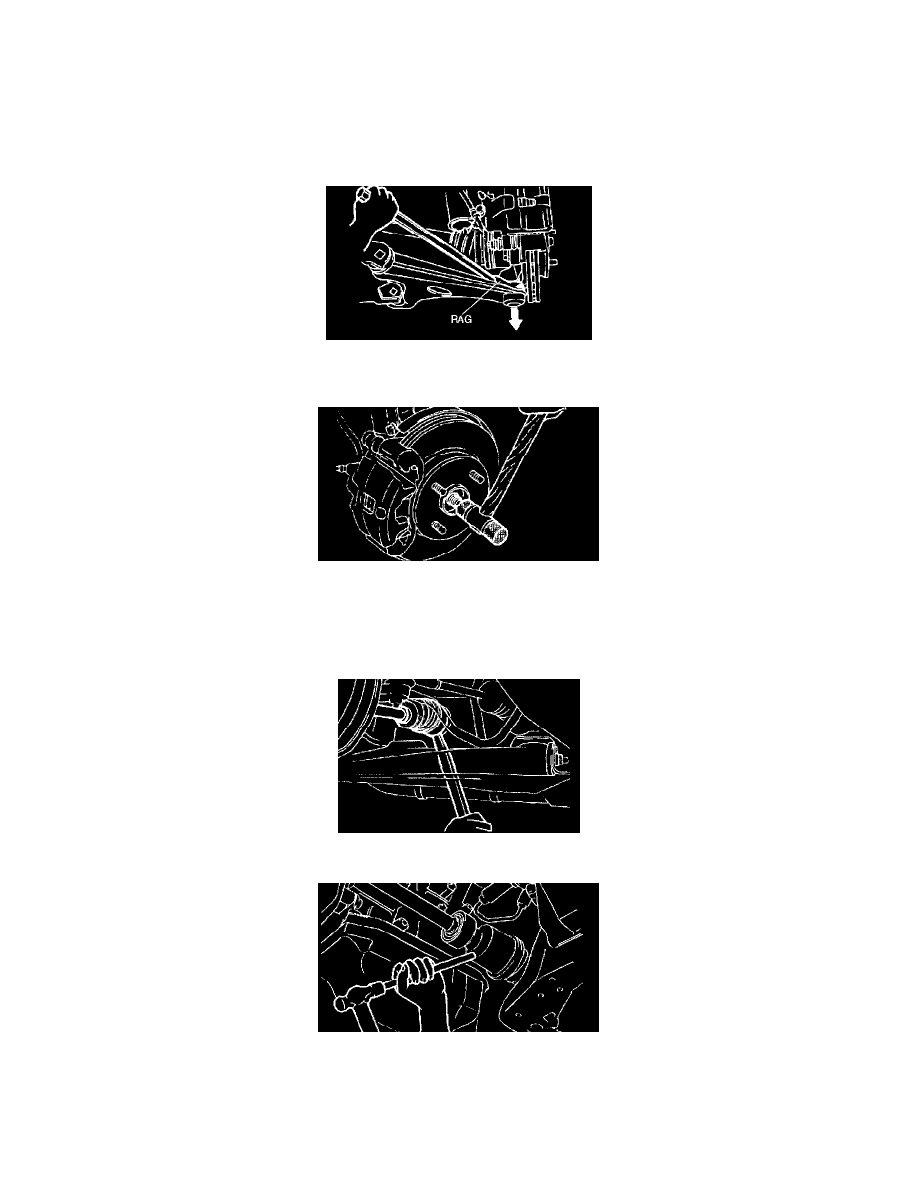
2. Wrap a rag around the ball joint dust boot.
3. Pry the lower arm out of the knuckle.
4. Install a spare nut onto the drive shaft so that the nut is flush with the end of the drive shaft.
5. Tap the nut with a copper hammer to loosen the drive shaft from the front wheel hub.
6. Separate the drive shaft from the wheel hub.
Caution:
^
The sharp edges of the drive shaft can slice or puncture the oil seal. Be careful when removing the drive shaft from the transaxle.
7. Separate the left side drive shaft from the transaxle by prying with a bar inserted between the outer ring and the transaxle, as shown in the figure.
8. Separate the right side drive shaft from the joint shaft by hammering on a bar inserted between them.