Protege DX L4-2.0L DOHC (2002)

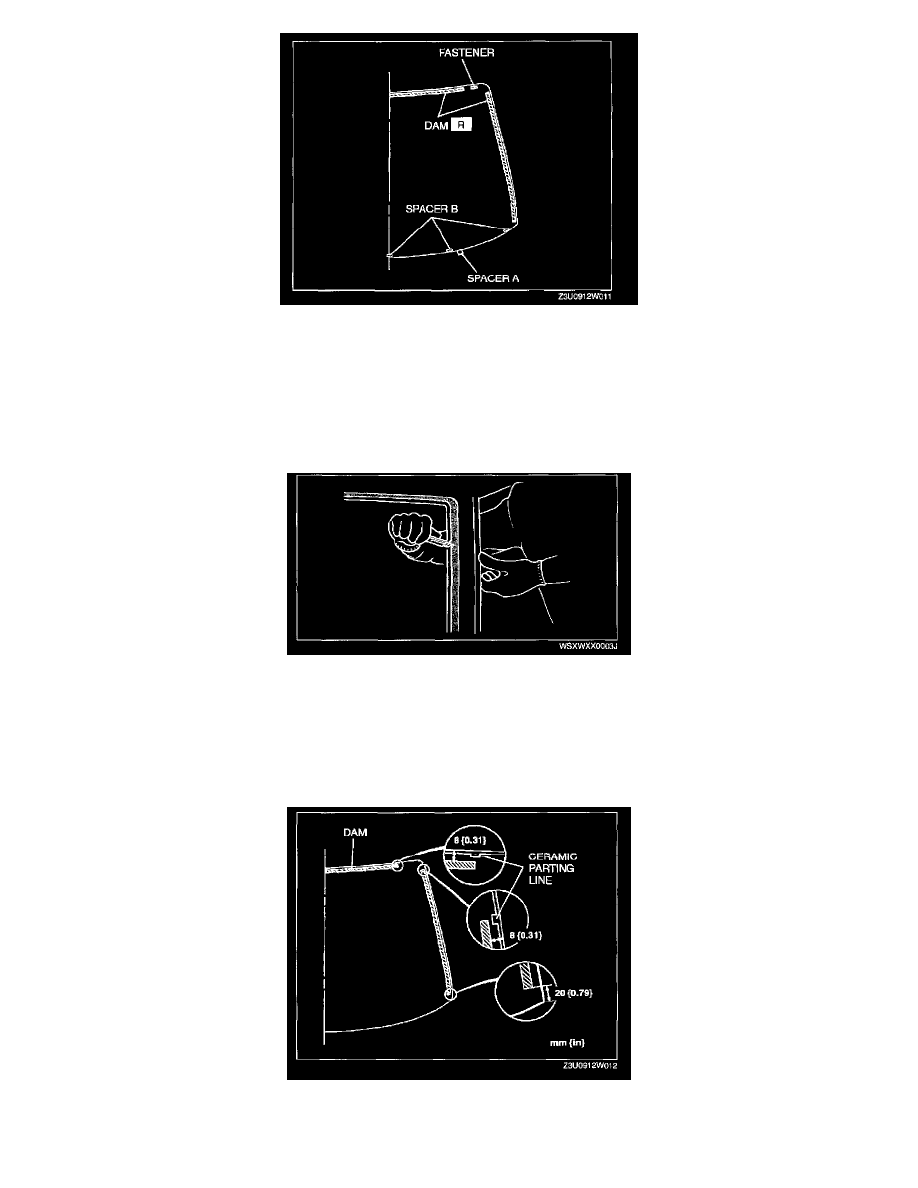
6. Remove the dam from the windshield.
7. Remove the fasteners.
8. Remove spacers A and B.
WINDSHIELD INSTALLATION
CAUTION: To prevent the sealant from cracking or the glass from being pushed out by air pressure if a door is closed, open all of the windows and
leave them open until the sealant has hardened.
1. Cut away the old sealant using a razor so that 1 - 2 mm {0.04 - 0.07 in} thickness of sealant remains around the circumference of the frame.
-
If all the sealant has come off in any one place, apply some primer after degreasing, and allow it 30 minutes to dry. Then put on new sealant to
create 2 mm {0.08 in} layer.
WARNING: Using a razor with bare hands can cause injury. Always wear gloves when using a razor.
2. Clean and degrease an approximately 50.0 mm {1.97 in} wide strip around the circumference of the glass and the bonding area on the body.
3. Securely bond a dam along the circumference of the glass 8.0 mm {0.31 in} from the edge.
