
Protege LX L4-1.6L DOHC (2000)
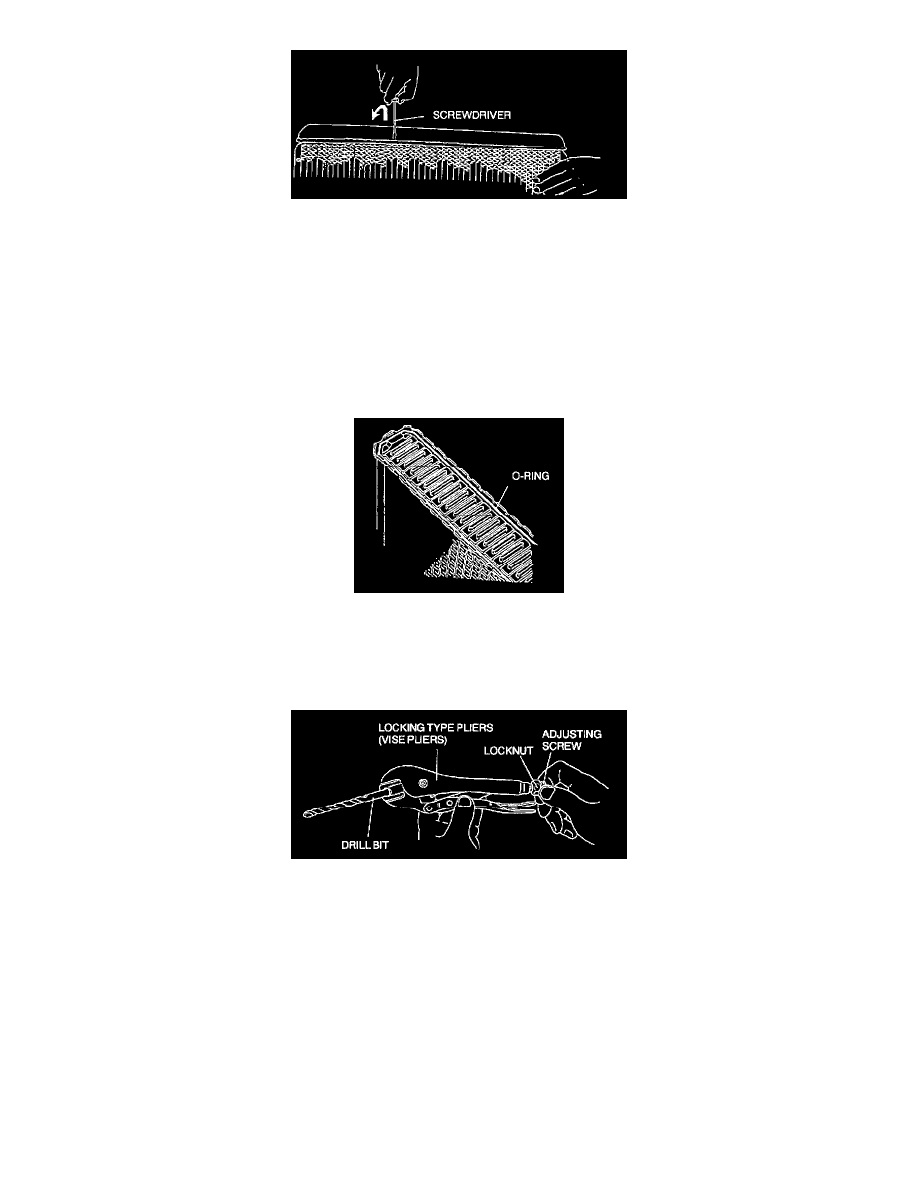
3. Pivot the screwdriver to pry the tab away from the tank and repeat the procedure for each tab.
4. Remove the radiator lower tank and O-ring (gasket) from the core header when all of the tabs are opened.
Note: If any header tabs are missing from the core, replace the radiator.
5. Verify that the gasket surface of the radiator core header is clean and free of foreign material or damage.
6. Inspect the radiator lower tank for warping.
-
If it is warped, replace the radiator tank.
Radiator Lower Tank (In Tank Oil Cooler) Installation Note
1. Install a new O-ring and ensure it is not twisted.
Note: The old O-ring must be replaced.
2. Position the radiator tank in the original direction to the core using care not to scratch the tank sealing surface with the header tabs.
Note: Step 3 will set jaw opening to the correct specification.
3. With the jaws of locking-type pliers (vise grips) closed and locked, turn the adjusting screw to position the jaws against the drill bit with the
diameter measured (height) in removal procedure.
-
Tighten the lock nut on the adjusting screw against the handle to lock the adjustment in place.