
Protege LX L4-1489cc 1.5L DOHC MFI (1998)
Valve Clearance: Adjustments
1. Remove the cylinder head cover.
2. Verify that the engine is in cold condition.
3. Measure the valve clearance.
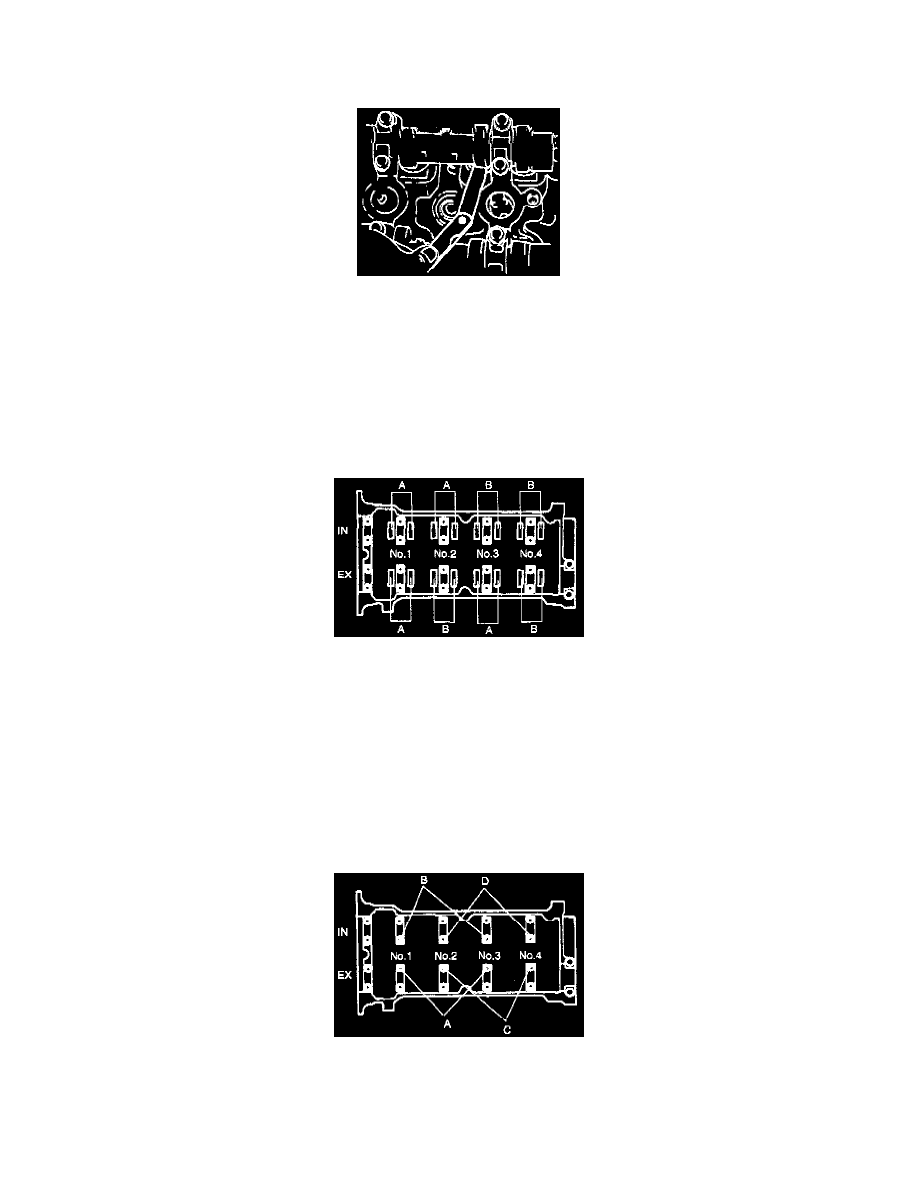
1) Turn the crankshaft clockwise so that the No.1 piston is at TDC of the compression stroke.
2) Measure the valve clearance at A in the image.
Standard:
IN: 0.25 - 0.31 mm (0.010 - 0.012 inch) [Engine cold]
EX: 0.25 - 0.31 mm (0.010 - 0.012 inch) [Engine cold]
3) If the valve clearance exceeds the standard, replace the adjustment shim.
4) Turn the crankshaft 360° clockwise so that the No.4 piston is at TDC of the compression stroke.
5) Measure the valve clearance at B in the image.
Standard:
IN: 0.25 - 0.31 mm (0.010 - 0.012 inch) [Engine cold]
EX: 0.25 - 0.31 mm (0.010 - 0.012 inch) [Engine cold]
6) If the valve clearance exceeds the standard, replace the adjustment shim.
4. Install the cylinder head cover.
VALVE CLEARANCE ADJUSTMENT
Perform this same procedure for all camshafts requiring valve clearance adjustment.
1. Turn the crankshaft clockwise so that the cams on the camshaft requiring valve clearance adjustment are positioned straight up.
2. Remove the camshaft cap bolts as necessary. Remove only one pair of cap bolts at a time. Install the cap bolts again before removing the next pair.
A: For EX side No.1, 2, 3 cylinder adjustment shim removal.
B: For IN side No.1, 2, 3 cylinder adjustment shim removal.
C: For EX side No.2, 3, 4 cylinder adjustment shim removal.
D: For IN side No.2, 3, 4 cylinder adjustment shim removal.