
Protege LX L4-1489cc 1.5L DOHC MFI (1998)
16. Tighten the screws.
Tightening torque
1.3 - 1.8 Nm (13 - 19 kgf-cm, 12 - 16 in-lbf)
17. Set the upper control valve body onto the main control valve body.
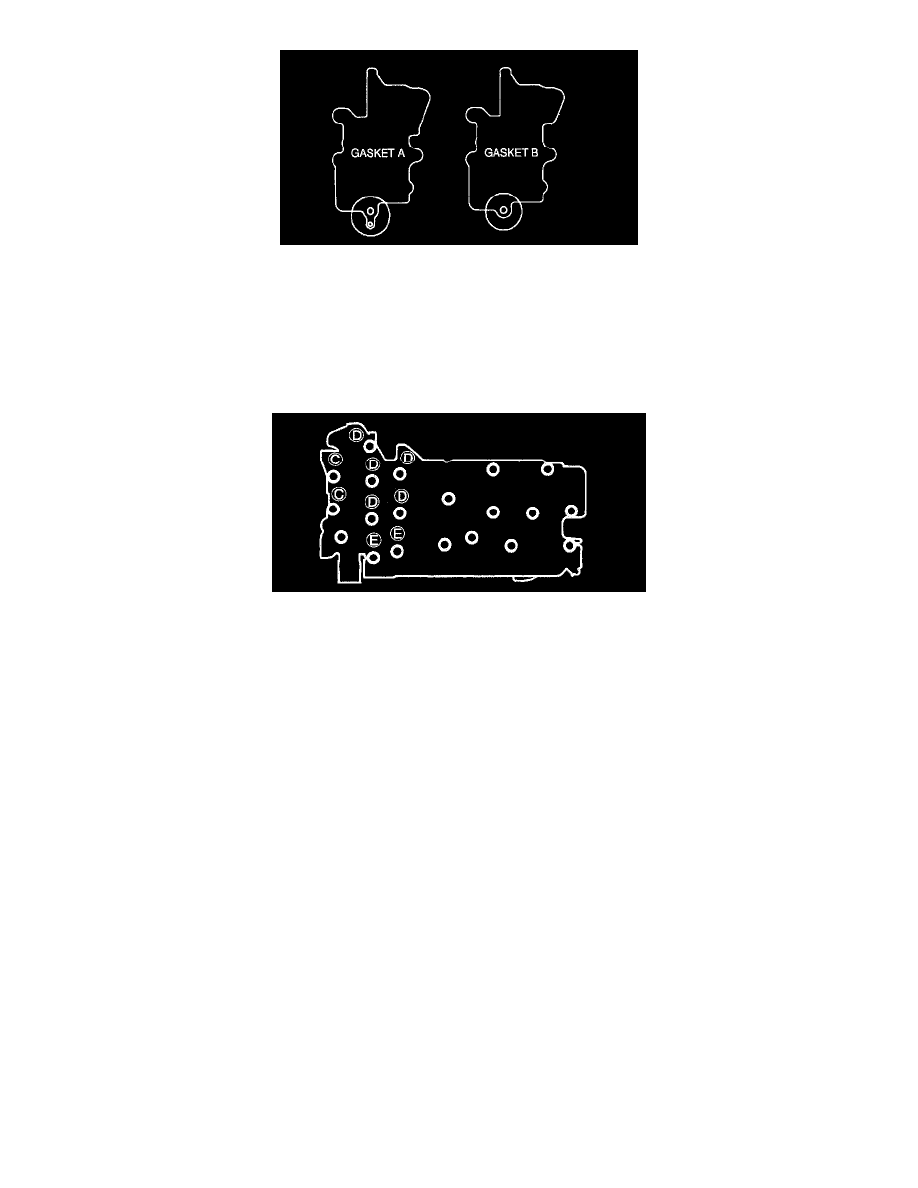
18. Install and hand-tighten the bolts shown in the figure. Each type of bolt has a different letter on its head. Match the bolt letter with the letter
stamped next to its installation hole on the valve body.
19. Tighten the Upper, main, and lower control valve body.
Tightening torque
7.9 - 10.7 Nm (80 - 110 kgf-cm, 70 - 95.4 in-lbf)
20. Apply ATF to new O-rings and install them onto the solenoid valve.
21. Install the solenoid valve.
Tightening torque
7.9 - 10.7 Nm (80 - 110 kgf-cm, 70 - 95.4 in-lbf)
22. Apply ATF to new O-rings and install them onto the oil pipe.
23. Install the oil pipe.
Tightening torque
7.9 - 10.7 Nm (80 - 110 kgf-cm, 70 - 95.4 in-lbf)
24. Apply ATF to new O-rings and install them onto the oil strainer.
25. Install the oil strainer.
Tightening torque
7.9 - 10.7 Nm (80 - 110 kgf-cm, 70 - 95.4 in-lbf)