
RX7 2RTR- 1308cc 1.3L FI (1987)
DISASSEMBLY
1.
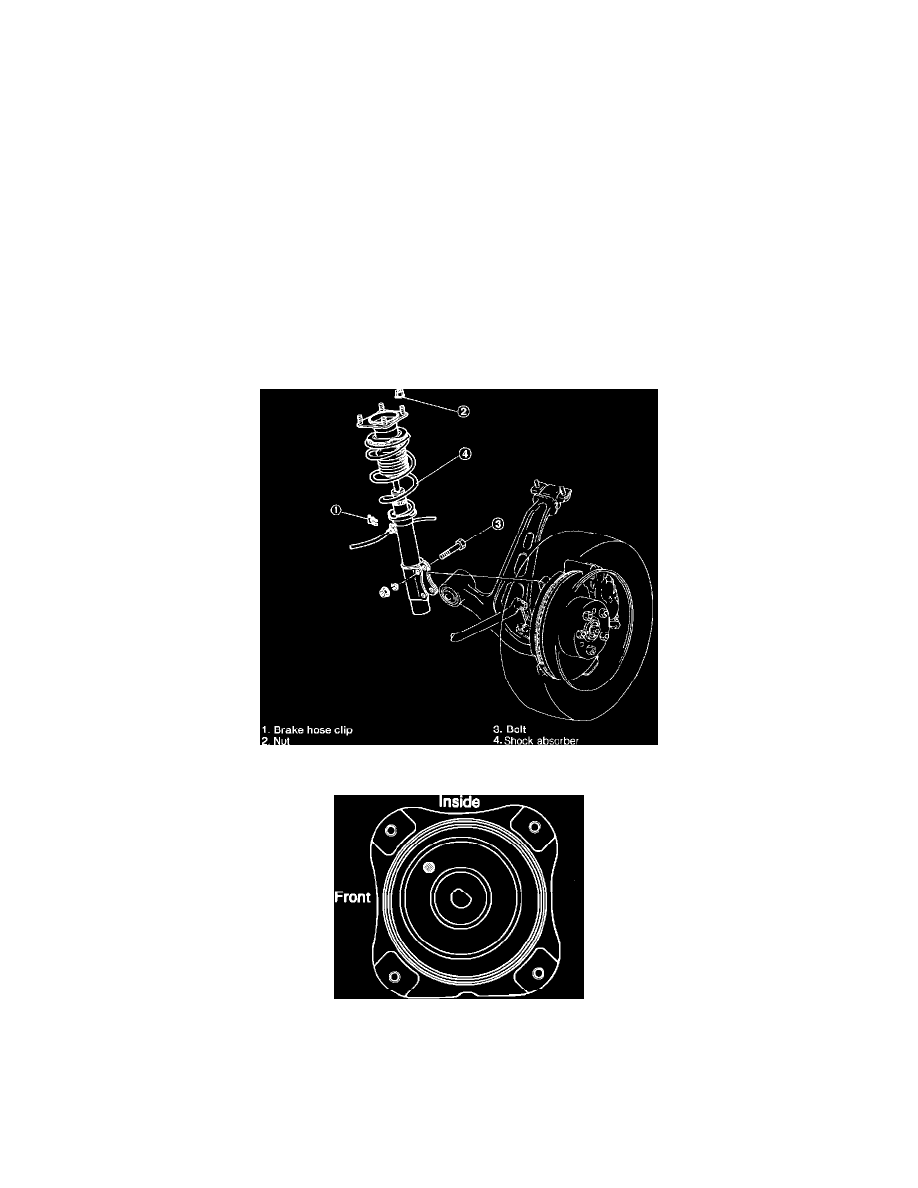
Disassemble shock absorber and related components in numerical sequence shown in Fig. 2.
2.
When removing coil spring and mounting blocking proceed as follows:
a. Loosen piston rod upper attaching nut several turns. Do not remove piston rod upper nut.
b. Using tools 490223640B and 490370641 or equivalents, compress coil spring assembly, then remove attaching nut.
c. Remove coil spring assembly.
INSPECTION
Check shock absorber for oil leakage or for abnormal noise. Check shock absorber control rod for smooth rotation. Replace any worn or damaged
component as required.
ASSEMBLY
Reverse numerical sequence shown in Fig. 2 and note the following:
1.
Using tools 490223640B and 490370641 or equivalents, compress coil spring assembly.
2.
Install mounting block into a suitable vise.
3.
Torque piston rod upper attaching nut to 47-59 ft.lbs. Ensure spring is properly seated in the upper and lower seats.
Fig. 1 Shock absorber & spring assembly. 1986-88 RX-7
Fig. 3 Positioning mounting block. 1986-88 RX-7
INSTALLATION
Install shock absorber and spring assembly into vehicle by reversing numerical sequence shown in Fig. 1. When installing mounting block, place
mounting block onto suspension tower so that the white mark on the mounting block is between the front and inside positions on mounting block, Fig. 3.