
RX8 2RTR-1.3L (2006)
3.
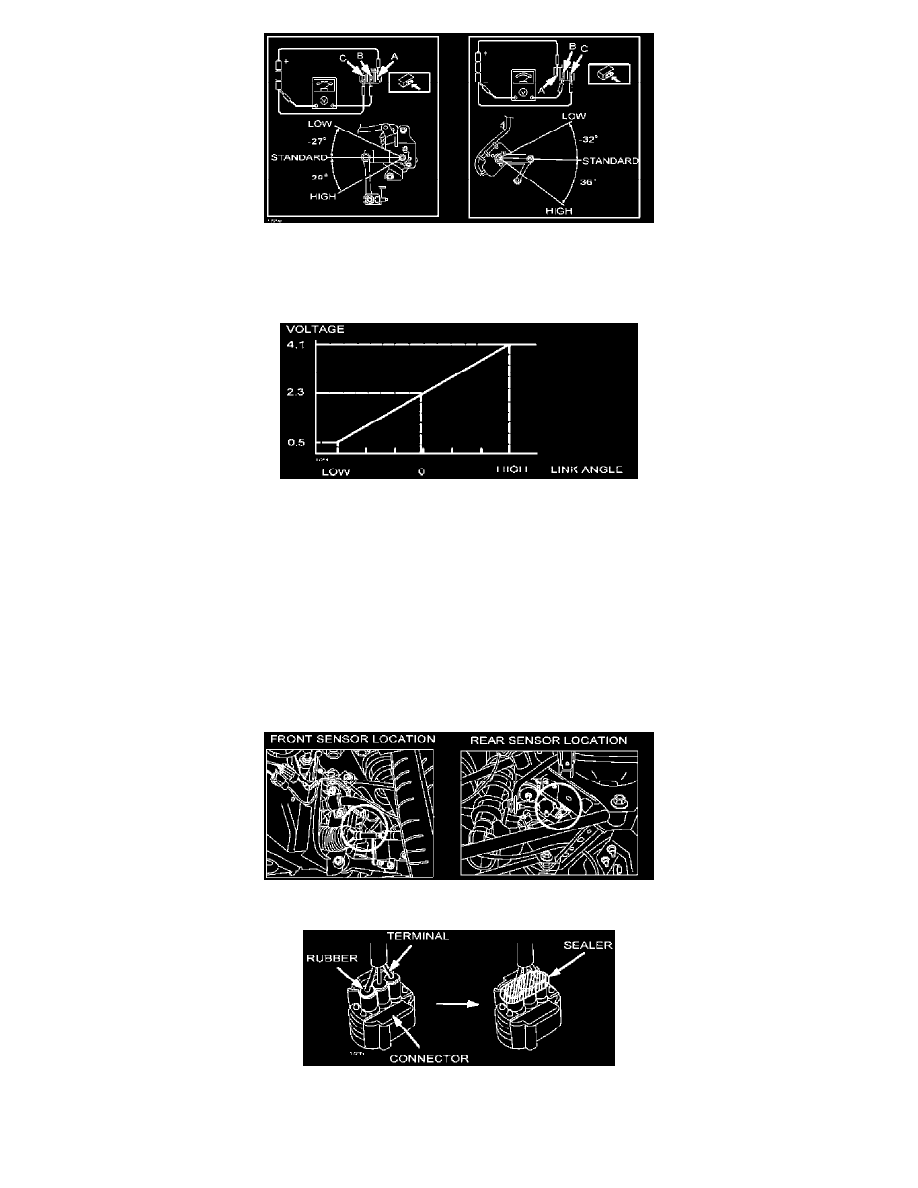
Connect the tester as shown.
4.
Measure voltage while slowly moving the link up and down. The voltage should be liner (smooth) during movement in the range between 0.5 V
and 4.1 V.
^
If OK, apply waterproof urethane sealer to the short harness connectors. See WATERPROOF SEALER APPLICATION procedure. Then
re-install the sensors.
^
If one or both sensors are not OK, replace the sensor(s) with a new one along with short harness (short harness is included with new sensor).
For short harness replacement, refer to SHORT HARNESS REMOVAL/INSTALLATION procedure.
IMPORTANT:
^
If replacing sensor with part number FE03-51-21YC or FE03-51-22YB, apply waterproof urethane sealer to the short harness connector
before installing the part in the vehicle. See WATERPROOF SEALER APPLICATION procedure.
WATERPROOF SEALER APPLICATION
1.
Clean the back side short harness connector terminal.
2.
Apply waterproof urethane sealer (locally sourced) between the harness and the connector as shown to prevent water intrusion.
3.
Allow to cure following waterproof urethane manufacturers instructions.
4.
Reconnect front/rear auto-leveling sensors.