
Tribute 2WD L4-2.3L (2005)
Canister Purge Control Valve: Service and Repair
EVAPORATIVE EMISSION CANISTER PURGE VALVE
Removal and Installation
WARNING:
-
Do not smoke or carry lighted tobacco or open flame of any type when working on or near any fuel-related component. Highly flammable
mixtures are always present and may be ignited, resulting in possible personal injury. Failure to follow these instructions may result in
personal injury.
-
The evaporative emission system contains fuel vapor and condensed fuel vapor. Although not present in large quantities, it still presents
the danger of explosion or fire. Disconnect the battery ground cable from the battery to minimize the possibility of an electrical spark
occurring, possibly causing a fire or explosion if fuel vapor or fuel liquid is present in the area. Failure to follow these instructions may
result in personal injury.
1. Disconnect the battery.
2. Disconnect the EVAP vapor management valve electrical connector.
CAUTION: When reusing liquid or vapor tube connectors, make sure to use compressed air to remove any foreign material from the connector
retaining clip area before separating the tube.
NOTE: If the vapor tube retainer clip is broken or damaged, install a new clip using a suitable fuel line disconnect tool to separate the retainer
clip legs. Once the retainer clip legs have been separated, lift the clip out of the connector housing, lifting from the stamped side of the connector
body.
3. Disconnect the fuel vapor tube.
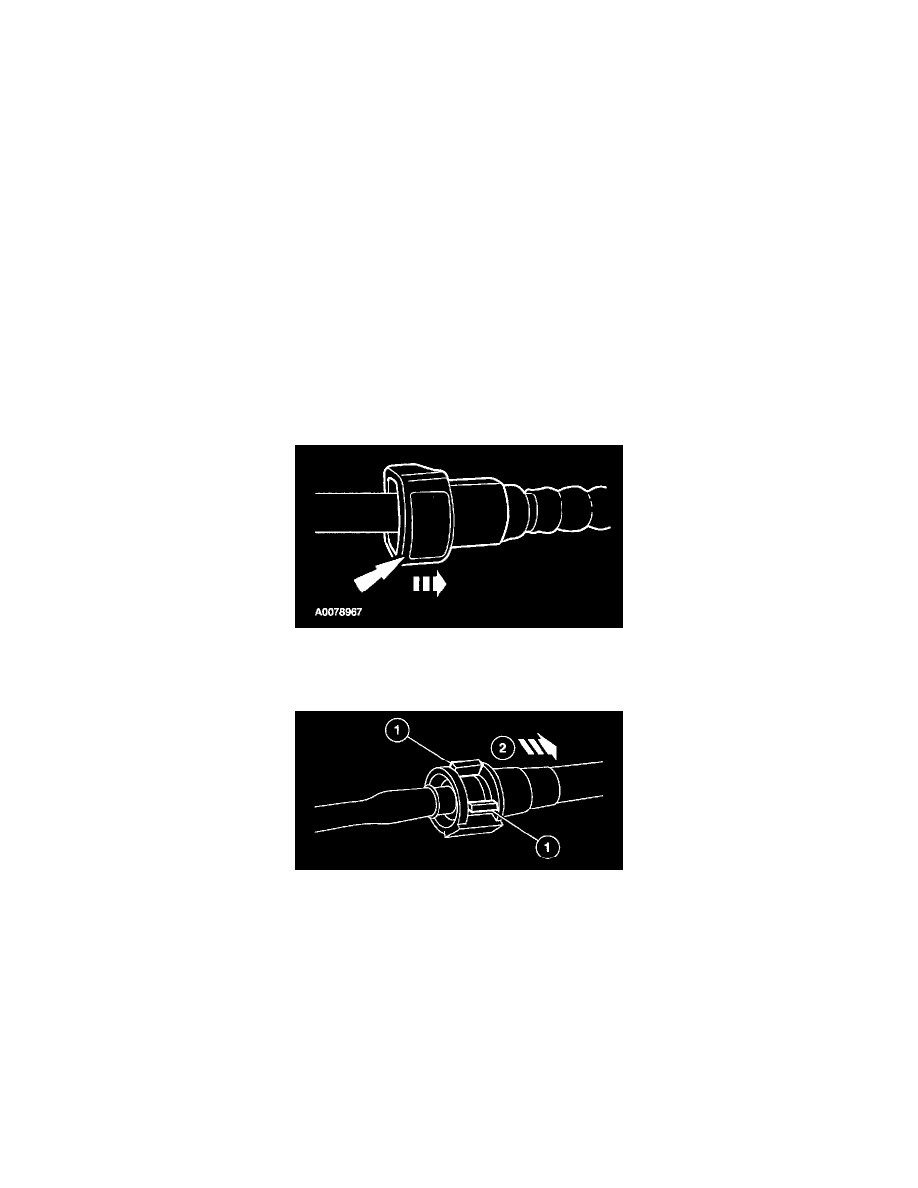
-
Push the connector toward the tube to release pressure.
-
Press the vapor tube quick release coupling button and pull the tube to disconnect.
4. Disconnect the fuel vapor tube.
1. Press the fuel vapor tube quick connect coupling lock tabs.
2. Disconnect the fuel vapor tube quick connect coupling.
NOTE: To remove the EVAP vapor management valve, press the tab and release it from the bracket.
5. Remove the EVAP vapor management valve.
NOTE:
-
Lubricate all O-ring seals with clean engine oil.
-
When installing the vapor management valve on the bracket, make sure the tab snaps and locks into place.
6. To install, reverse the removal procedure.
-
Carry out a leak test. See EVAPORATIVE EMISSION SYSTEM LEAK TEST.
-
Carry out the evaporative emission repair verification drive cycle.