
Tribute 2WD V6-3.0L (2008)
Wheel Cylinder: Overhaul
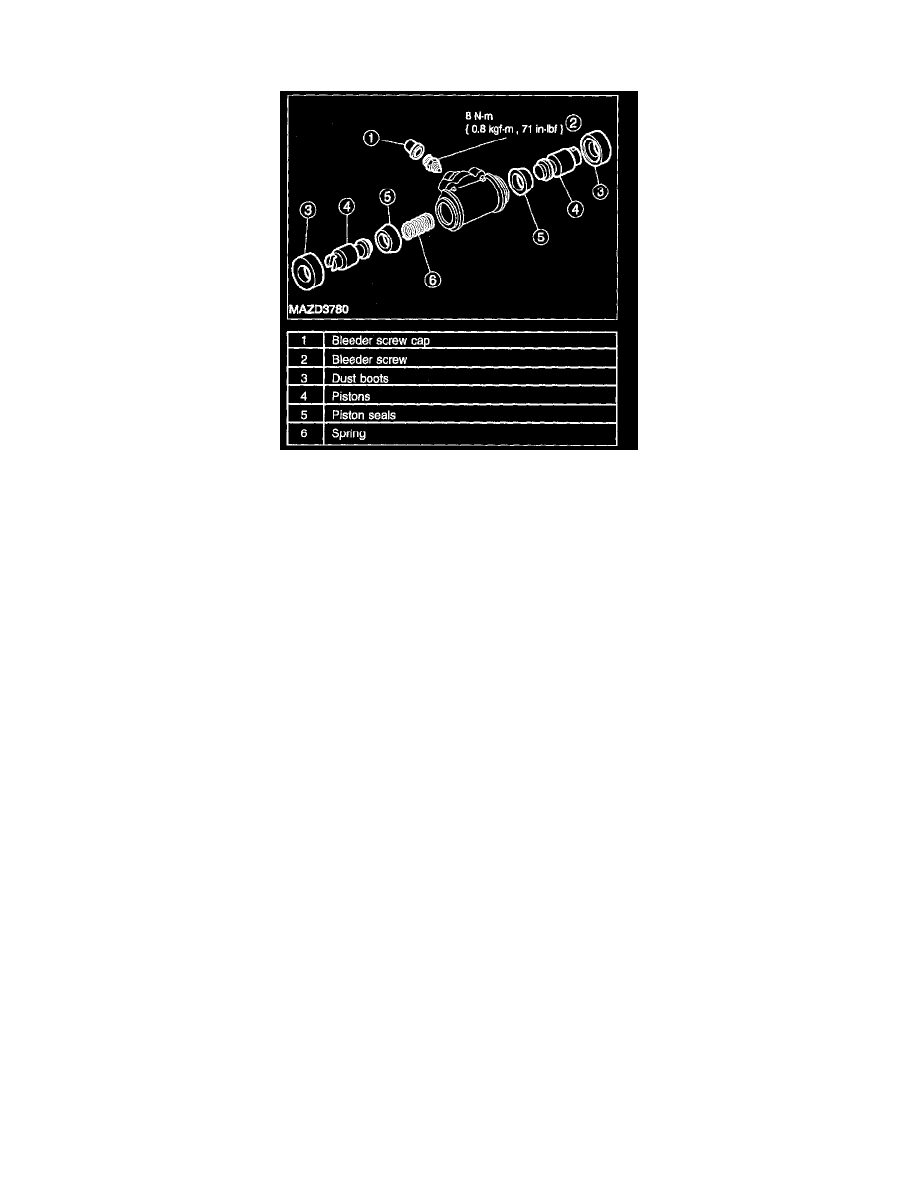
WHEEL CYLINDER DISASSEMBLY/ASSEMBLY
Warning
^
Use of any other than approved DOT 3 ,motor vehicle brake fluid will cause permanent damage to brake components and will render
the brakes inoperative. Failure to follow these instructions may result in personal injury.
Warning
^
Carefully read cautionary information on product label. For EMERGENCY MEDICAL INFORMATION seek medical advice. For
additional information, consult the product Material Safety Data Sheet (MSDS) if available. Failure to follow these instructions may
result in personal injury.
Caution
^
Brake fluid is harmful to painted and plastic surfaces. If brake fluid is spilled onto a painted or plastic surface, immediately wash it
with water.
1. Remove the rear drum brake wheel cylinder.
2. Remove the bleeder screw cap and the bleed screw.
3. Remove bleeder screw.
^
To install, tighten to 8 N-m (0.8 kgf-m, 71 in-lbf).
4. Remove the 2 dust boots.
5. Remove the 2 pistons.
6. Remove the 2 piston seals.
^
To install, lubricate the piston seals with clean brake fluid.
7. Remove the spring.
8. To assemble, reverse the disassembly procedure.
Note
^
Inspect the wheel cylinder bore for excessive wear, corrosion or pitting. If any of these conditions exist, a new wheel cylinder must be
installed.