
Tribute 4WD L4-2.3L Hybrid (2008)
Valve Guide Seal: Service and Repair
-
VALVE SEALS REMOVAL/INSTALLATION - HYBRID
Removal
CAUTION: During engine repair procedures, cleanliness is extremely important. Any foreign material (including any material created while cleaning
gasket surfaces) that enters the oil passages, coolant passages or the oil pan may cause engine failure.
1. With the vehicle in NEUTRAL, position it on a hoist. See See: Maintenance/Vehicle Lifting/Service and Repair/Lifting.
2. Remove the camshafts. See - See: Camshaft, Lifters and Push Rods/Camshaft/Service and Repair.
3. Remove and inspect the valve tappets. See - See: Camshaft, Lifters and Push Rods/Lifter / Lash Adjuster/Service and Repair and - See: Camshaft,
Lifters and Push Rods/Lifter / Lash Adjuster/Testing and Inspection.
NOTE: If the camshafts and valve tappets are to be reused, mark the location of the valve tappets to make sure they are assembled in their original
positions.
NOTE: The number on the valve tappets only reflects the digits that follow the decimal. For example, a tappet with the number 0.650 has the thickness
of 3.650 mm.
4. Remove the spark plugs. - See: Tune-up and Engine Performance Checks/Spark Plug/Service and Repair.
5. Connect the compressed air supply to the No. 1 cylinder.
CAUTION: Use compressed air at 7 to 10 bars (100-150 psi). Do not disconnect the compressed air from the cylinder until the valve spring, valve
spring retainer and valve collet is installed. Any loss of air pressure will allow the valve to fall into the cylinder.
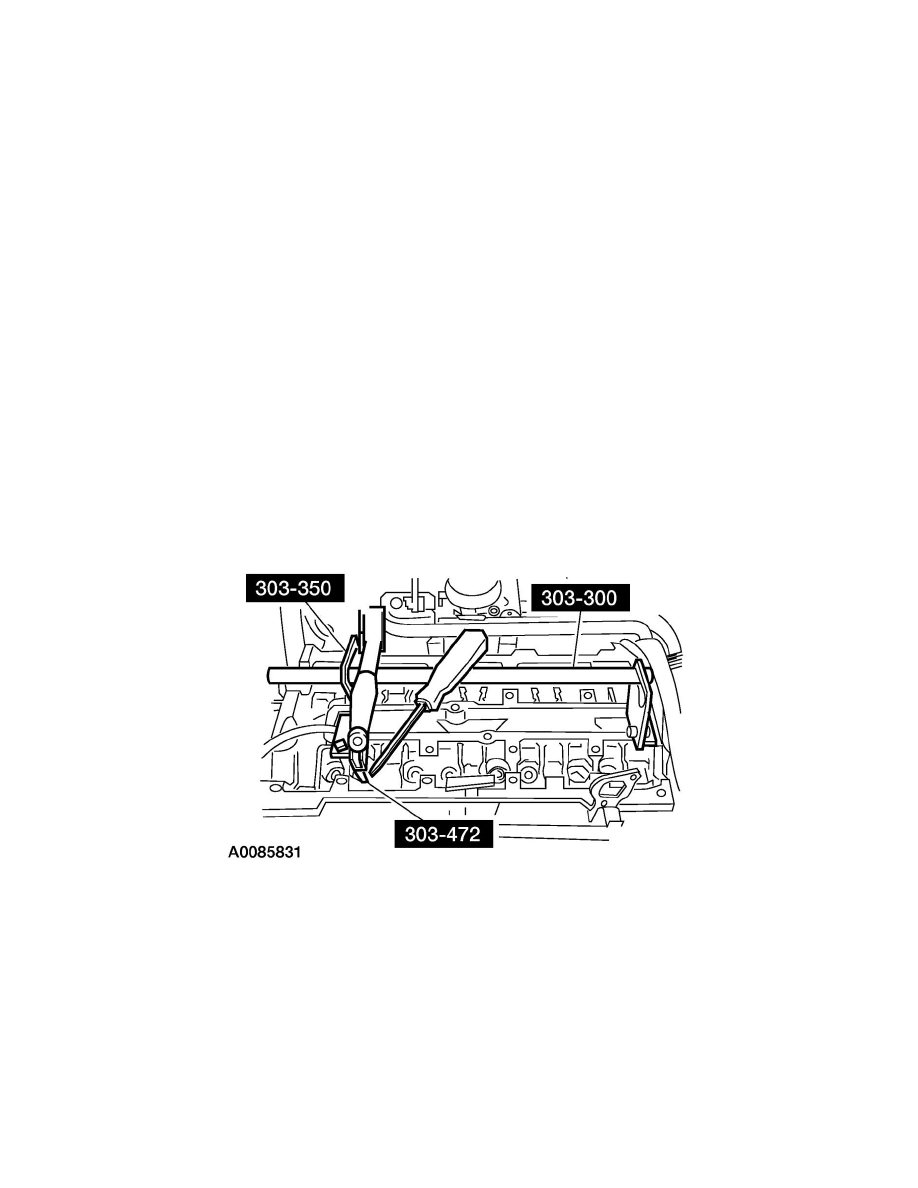
6. Apply compressed air to the cylinder and remove the valve spring.
-
Using the special tools, compress the valve spring and remove the valve collet, using some grease and a small screwdriver.
-
Remove the valve spring retainer and the valve spring.
NOTE: Place all parts in order to one side.