
Tribute 4WD L4-2.3L Hybrid (2008)
11. Remove the power steering coupler bolt. Discard the bolt.
-
To install, tighten to 25 Nm {2.5 kgf-m, 18 ft-lbf}.
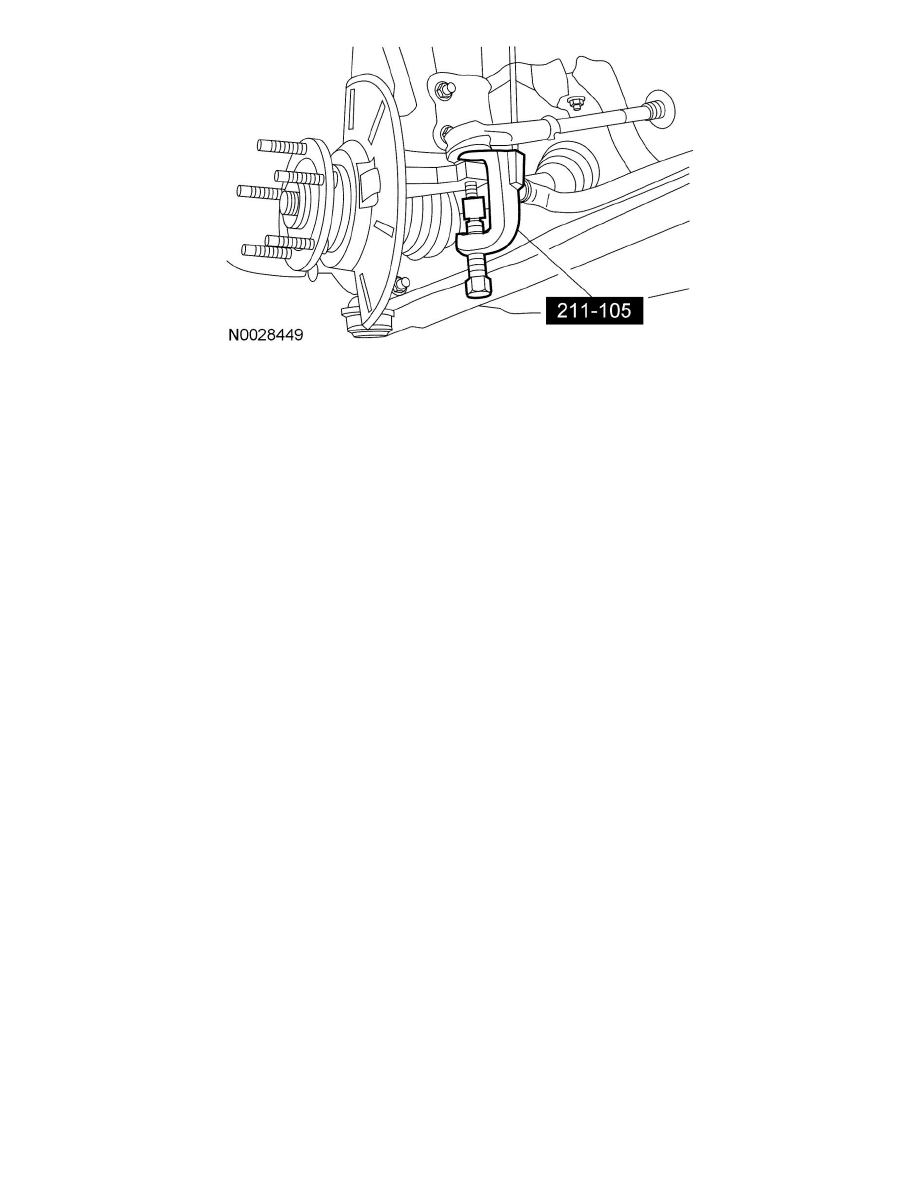
12. Using the special tool, separate the tie rod from the wheel knuckle.
13. Remove the 2 lower stabilizer bar link nuts. Discard the nuts.
NOTE: Use the hex holding fixture to prevent the ball stud from turning while removing and installing the stabilizer link nut.
-
To install, tighten to 55 Nm {5.5 kgf-m, 41 ft-lbf}.
14. Remove the 2 lower control arm ball joint pinch bolt nuts and pinch bolts. Discard the nuts and the bolts.
-
To install, tighten to 63 Nm {6.3 kgf-m, 46 ft-lbf}.
15. Using a suitable lift, support the front subframe.
16. Loosen the 2 front subframe rear bolts.
-
To install, tighten to 175 Nm {17.8 kgf-m, 129 ft-lbf}.
NOTE: Do not allow the front subframe rear bolts to come out of the lower control arm bushing.
NOTE: When installing the front subframe rear bolts, make sure both of the front subframe rear bolts are fully engaged in their cage nuts before
tightening to specification.
17. Remove the 2 front subframe nuts.
-
To install, tighten to 150 Nm {15.2 kgf-m, 111 ft-lbf}.
18. With an assistant, remove the front subframe.
NOTE: The lower control arm ball joints must be disconnected from the spindles at the same time the subframe is lowered.
19. To install, reverse the removal procedure.
-
Transfer the components as necessary.