
Tribute DX 4WD L4-2.0L (2001)
17.
Align the marks on the propeller shaft and the differential yoke to maintain driveline alignment. Install the straps and new bolts to secure the
propeller shaft to the differential yoke.
Tightening torque
23 Nm (17 ft-lb)
Caution
^
Install new propeller shaft bolts or damage to the vehicle will occur.
^
Propeller shaft must be bolted to the differential before center bearing support nuts are installed.
18.
Raise the center bearing support onto the studs.
19.
Install new nuts to the center bearing support.
Tightening torque
48 Nm (35 ft-lb)
20.
Remove the safety stand.
21.
Remove the fill plug from the differential cover.
22.
Fill differential with approximately 2 pints of rear axle lubricant (P/N 0000-77-80W9-CA). Fluid level should be between 6 mm (1/4 inch) and 14
mm (9/16 inch) from bottom of filler plug opening.
Tightening torque
27 Nm (20 ft-lb)
23.
Lower the vehicle.
24.
Verify repair
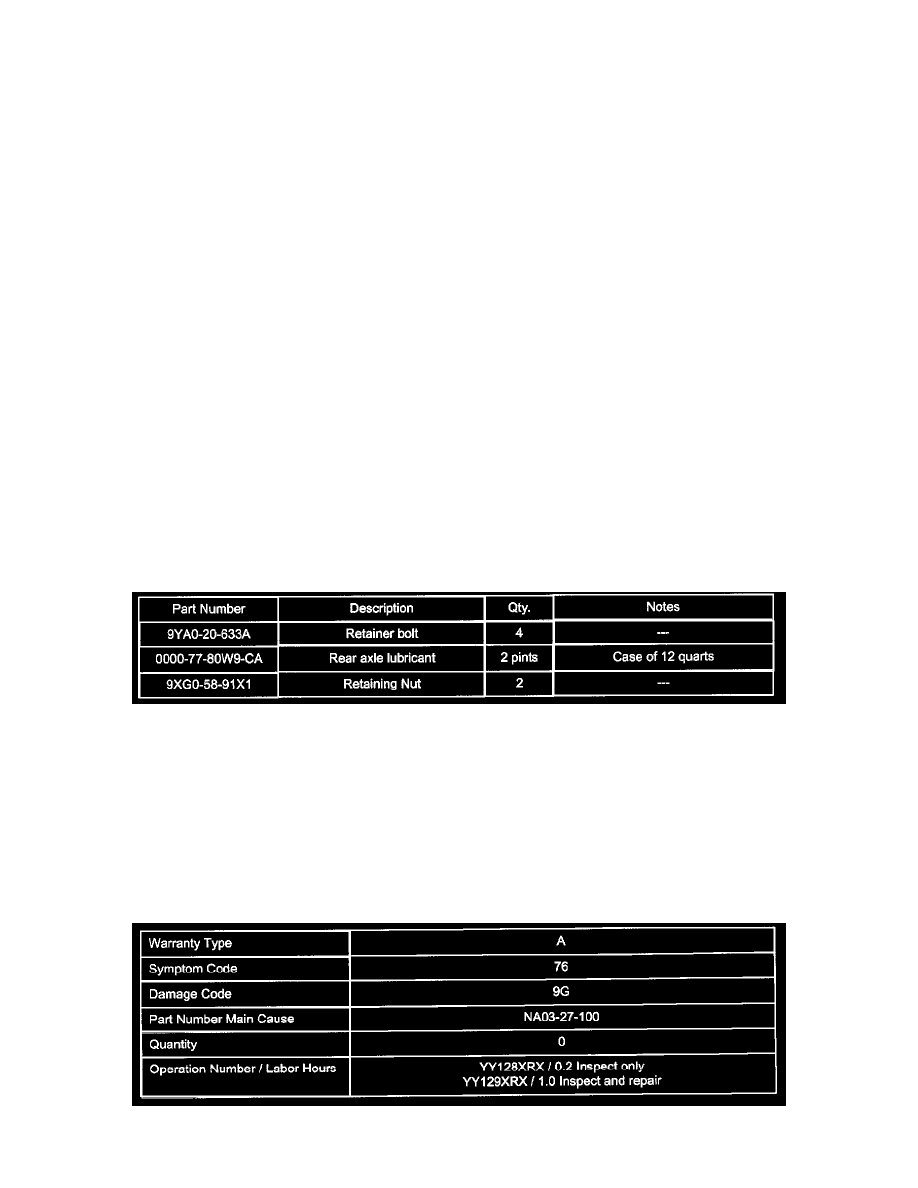
PART(S) INFORMATION
Note
^
Permatex Pro Strength Brake & Parts Cleaner (P/N 82606 [U.S.] or 29214 [Canada]) and Permatex The Right Stuff (P/N 25223 [U.S.] or 25892
[Canada]) can be sourced through your local Permatex dealer.
To locate your local dealer, contact Permatex at:
U.S. Dealers - (877) 376-2839
Canada Dealers - (800) 924-6994
WARRANTY INFORMATION
Note