
Capri L4-140 2.3L SOHC Turbo (1983)
Timing Belt Tensioning and Replacement Procedures
Removal
CAUTION: With the timing belt removed and pistons at T.D.C., DO NOT rotate the camshaft. If the camshaft must be rotated, align the crankshaft
pulley 90 degrees B.T.C.
1.
Raise the hood and secure it in the open position.
2.
Install protective covers on the fenders.
3.
Disconnect the cable from the battery negative terminal.
4.
Remove the accessory drive belts.
5.
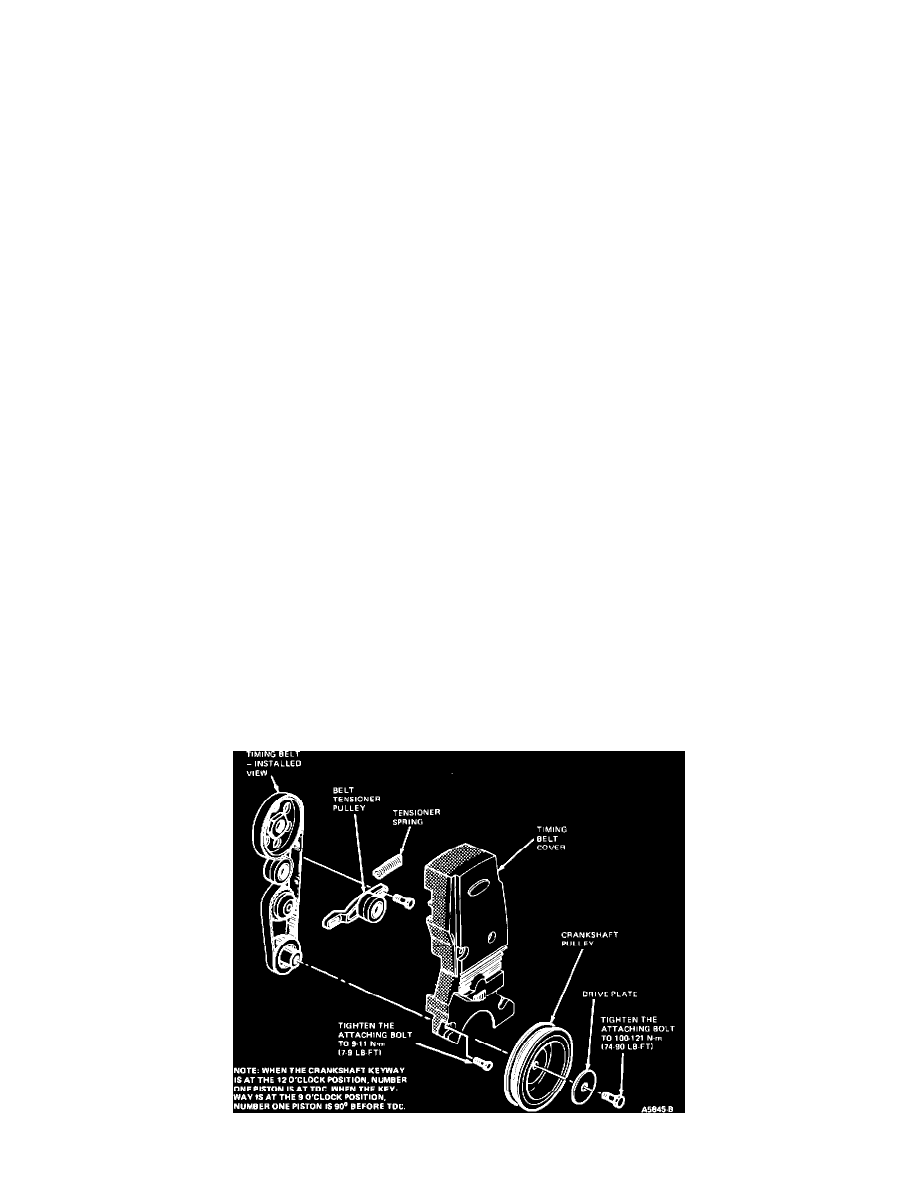
Remove the timing belt cover.
NOTE:
Align timing mark on the camshaft sprocket with the timing mark on the cylinder head.
6.
Install the timing belt cover and confirm that the timing mark on the crankshaft pulley aligns with the T.D.C. on the front cover.
7.
Remove the timing belt cover.
8.
Loosen both timing belt tensioner attaching bolts using Torque Wrench Adapter T81P-6254-A or equivalent.
9.
Pry the belt tensioner away from the belt as far as possible and tighten one of the tensioner attaching bolts.
10.
Remove the crankshaft pulley. (Only if timing belt is to be replaced.)
Tensioning/Installation
1.
Install the timing belt over the sprockets in a counterclockwise direction starting at the crankshaft. Keep the belt span from the crankshaft to the
camshaft tight as the belt is installed over the remaining sprocket.
2.
Loosen the belt tensioner attaching bolts and allow the tensioner to snap against the belt.
3.
Tighten one of the tensioner attaching bolts using Torque Wrench Adapter T81P-6254-A or equivalent.
4.
Install the crankshaft pulley, the drive plate and the pulley attaching bolt. (Only if timing belt is to be replaced.)
21-25-80 1.6L Engine
Hold the crankshaft pulley stationary using Crankshaft Belt Wrench YA-826 or equivalent and tighten the pulley attaching bolt to 100-121 N-m (74-90