
Capri L4-1597cc 1.6L DOHC (1992)
Clutch: Service and Repair
Clutch, A/T
WITH 4EAT
DISASSEMBLE
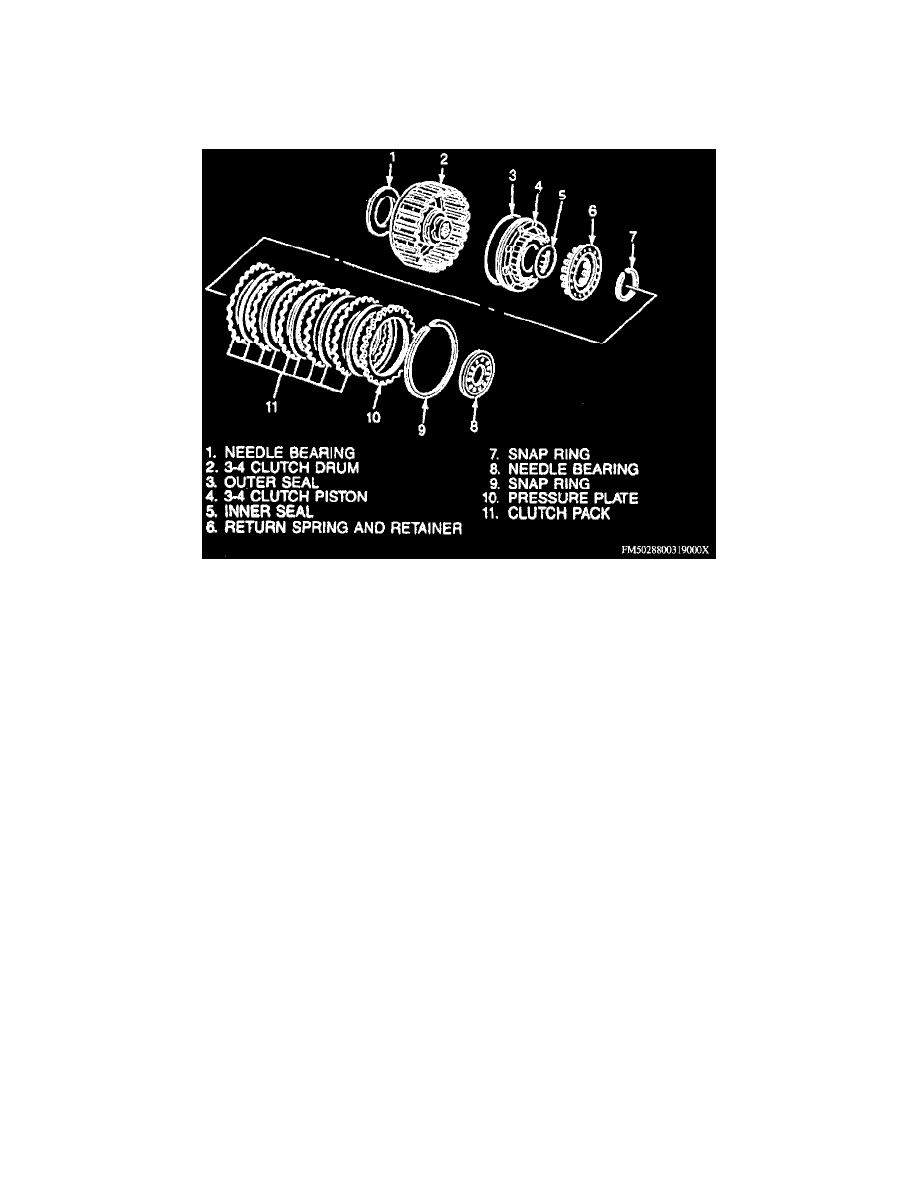
Exploded View Of 3-4 Clutch Assembly
NOTE: Refer to the Exploded View Of 3-4 Clutch Assembly image when disassembling the 3-4 clutch.
1. Using clutch spring compressor tool No. T65L-77516-A or equivalent, compress spring and retainer.
2. Remove snap ring, then the spring and retainer assembly.
3. Remove 3-4 clutch piston by applying compressed air through fluid passage.
4. Inspect drive or driven plates for damage or wear. Minimum thickness is 0.055 inch.
5. Inspect clutch piston for damage or cracks.
6. Check clutch drum for damage or deformation and seal contact areas for damage.
7. Check ball for leaking or sticking and spring and retainer assembly for separation or deformation.
8. Check free length of spring. Free length should be 1.307 inch.
9. Ensure snap ring is not worn or broken.
ASSEMBLE
1. Apply small amount of automatic transaxle fluid to inner and outer seals before installing 3-4 clutch piston.
2. Install piston by pushing evenly around circumference.
CAUTION: Use care not to damage seal rings.
3. Install spring and retainer assembly.
4. Compress spring and retainer using clutch spring compressor tool No. T65L-77515-A or equivalent.
5. Install snap ring, then remove compressor tool.