
Capri L4-1597cc 1.6L DOHC (1992)
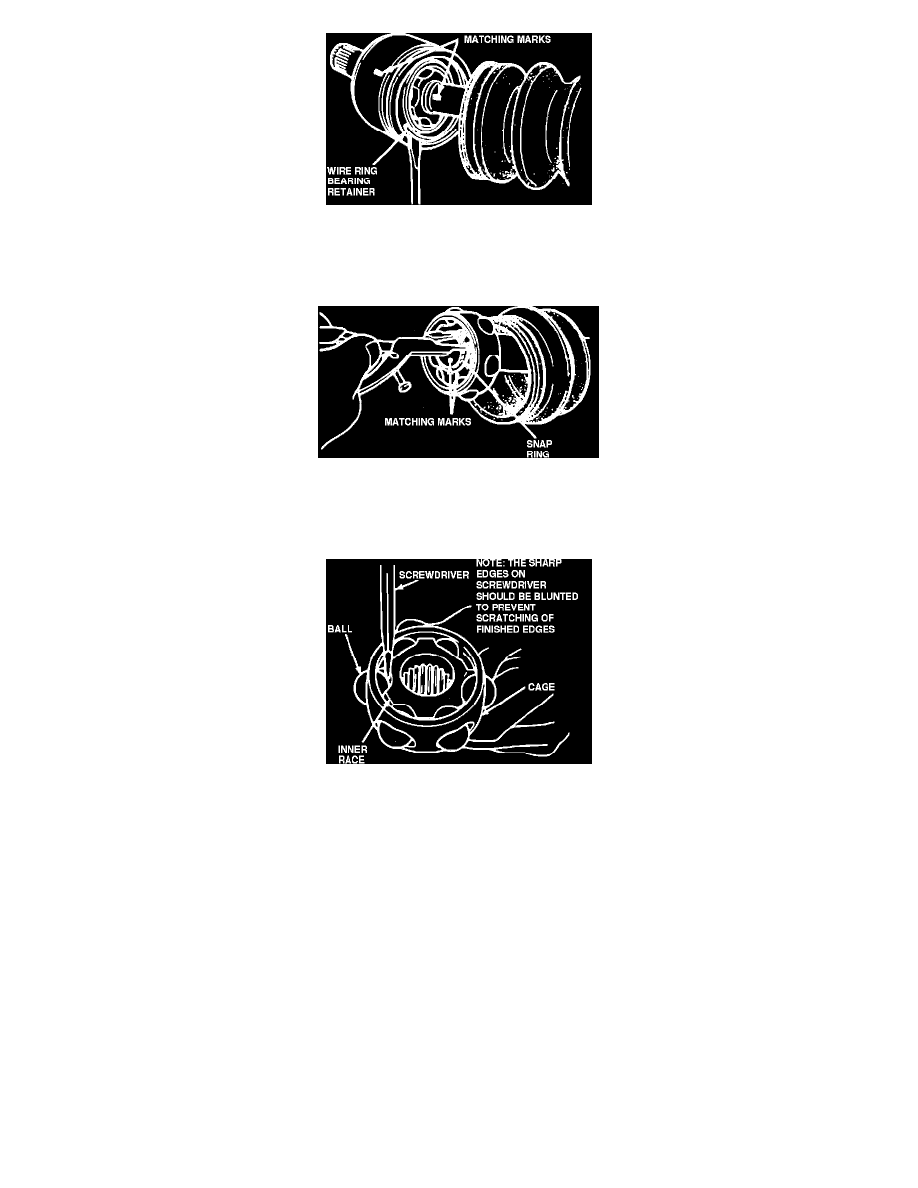
Fig. 10 Bearing Retaining Ring Removal
5.
Place alignment marks on bearing outer race and halfshaft, then remove bearing retaining ring, Fig. 10.
6.
Remove outer race.
Fig. 11 Inner Bearing Race Snap Ring Removal
7.
Place alignment marks on bearing inner race and halfshaft, then remove snap ring, Fig. 11.
8.
Remove inner race, bearing cage and ball bearing assembly.
Fig. 12 Ball Bearing Removal From Cage
9.
Using a screwdriver with sharp edges filed down, pry ball bearings from cage Fig. 12.
10.
Place alignment marks on bearing inner race and bearing cage.
11.
Rotate bearing cage inner race to align bearing lands, then remove inner race through large end of cage.
12.
If necessary, remove small clamp and boot from halfshaft. If boot is to be reused, wrap halfshaft splines with tape before removing.
13.
Check all bearing components for wear and damage. Bearing components are matched during the manufacturing process, therefore components
from another constant velocity should not be interchanged. If bearing is found to unsatisfactory, replace the constant velocity joint assembly.
14.
Cover halfshaft spline with tape and install boot, if removed.
15.
Lubricate inner race, bearing cage and ball bearings with lubricant E43Z-19590-A or equivalent.