
Capri L4-1597cc 1.6L DOHC Turbo (1991)
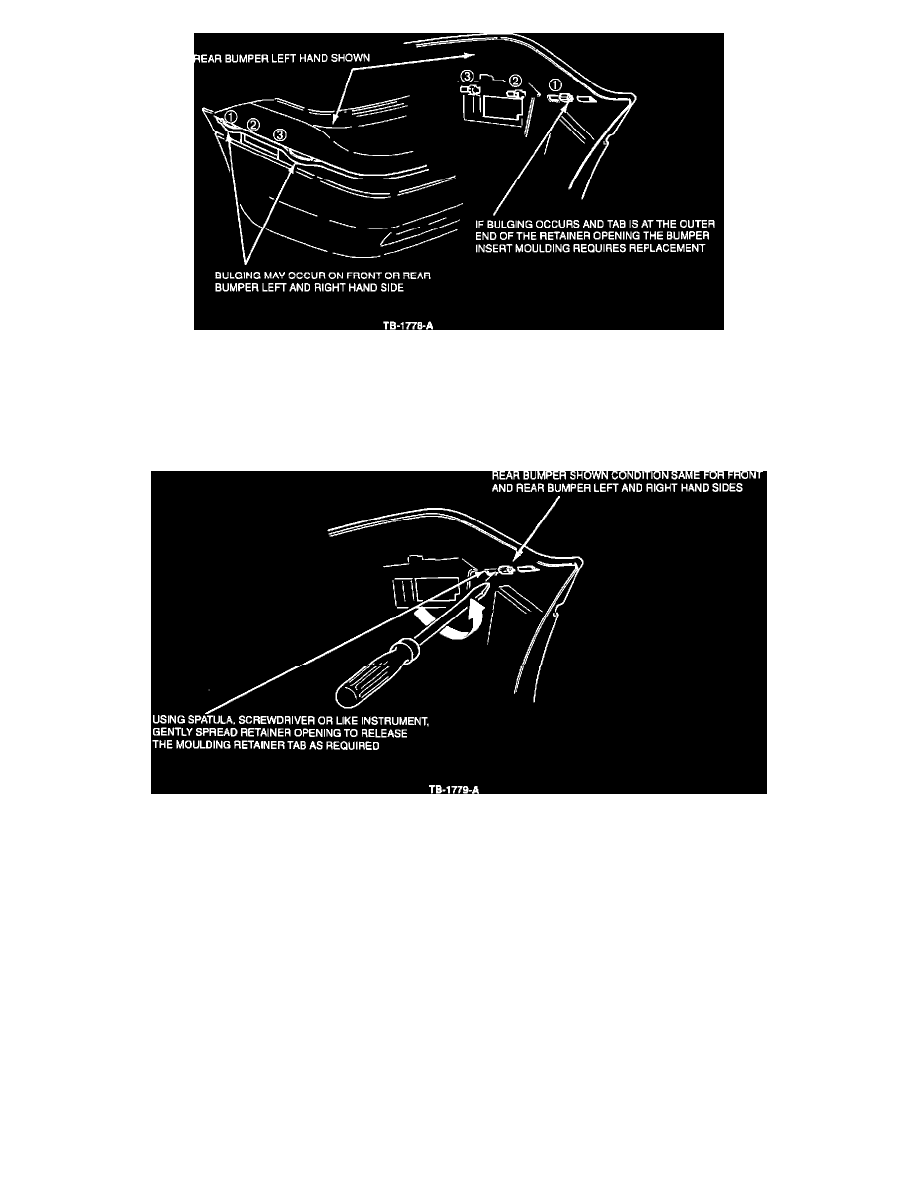
Figure 4
4.
Replace the insert moulding if the bulge is between the first and second or subsequent retaining tabs and the tabs are against the outer end of the
retainer opening, Figure 4. See the following bumper insert replacement procedure.
Bumper Insert Moulding Replacement Procedure
Figure 5
CAUTION: WHEN REMOVING THE BUMPER INSERT MOULDING, WITH THE BUMPER ON THE VEHICLE, MAKE SURE THAT THE
BUMPER SLOTS USED TO RETAIN THE INSERT MOULDING ARE NOT DAMAGED. ALSO BE CAREFUL NOT TO DAMAGE
THE PAINTED SURFACES.
REMOVAL
1.
Beginning from tab # 1, use a thin spatula or similar tool to gently spread the retainer opening on the inner face of the bumper to release the
moulding retainer tab, Figure 5.
2.
Grasp the end of the insert moulding and lightly pull it outward from the bumper.
3.
Using the spatula from the outer surface of the bumper, carefully release each retaining tab from the bumper slots.
4.
After all insert moulding retainers are disengaged from the bumper wings, pull the insert moulding outward from the the center retaining groove.