
Capri L4-1597cc 1.6L DOHC Turbo (1991)
Accumulator: Service and Repair
DISASSEMBLE
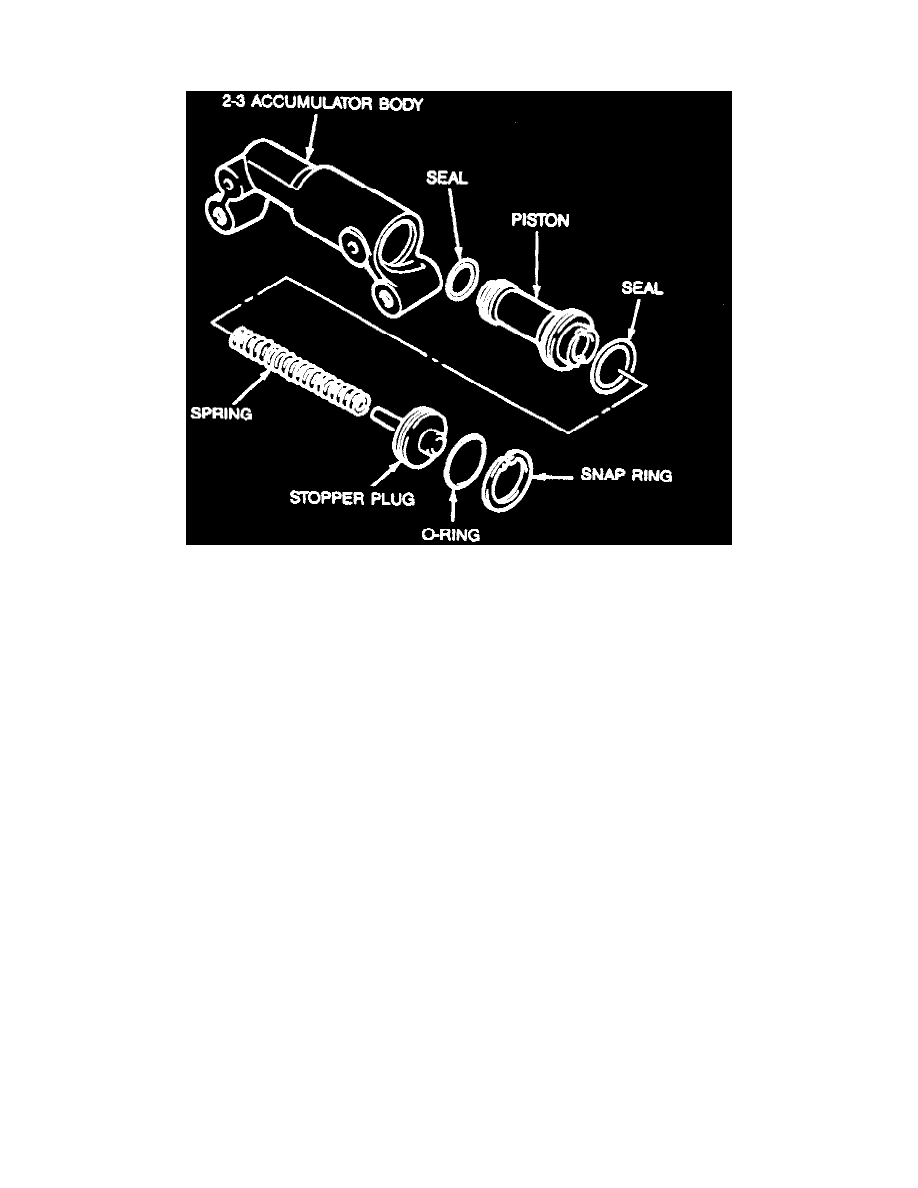
Exploded View Of 2-3 Accumulator
NOTE: Refer to the Exploded View Of 2-3 Accumulator image for disassembly procedure noting the following:
1. Check for damaged or worn piston.
2. Check for worn or damage stopper plug.
3. Ensure snap ring is not worn or broken.
4. Check return spring free length. Free length for turbo models should be 2.968 inch. For models less turbo, 3.280 inch.
ASSEMBLE
1. Apply a small amount of automatic transmission fluid to large and small seals before installation to accumulator piston.
2. Insert 2-3 accumulator, then install spring to piston and stopper plug.
3. While holding stopper plug, install snap ring.