
Capri V8-302 5.0L (1982)
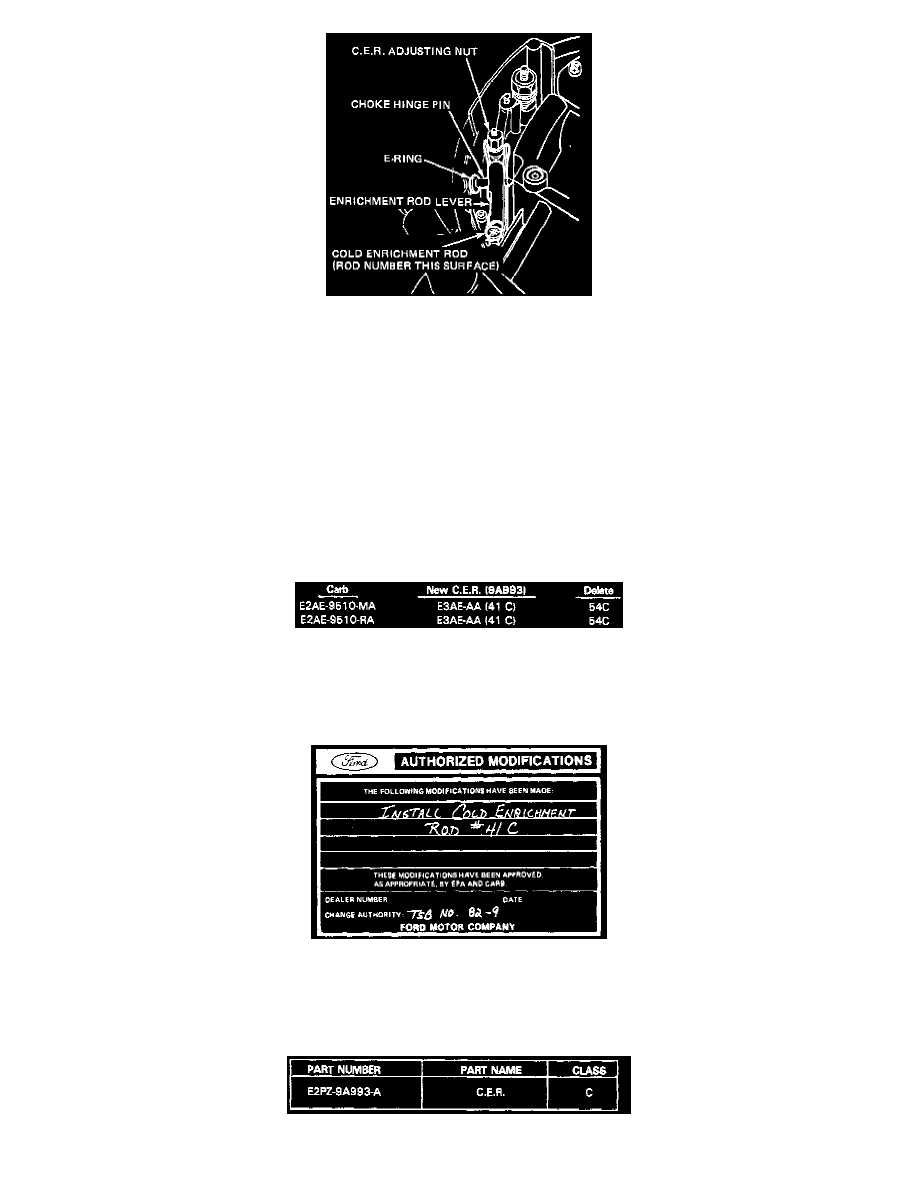
Figure 14
If the concern is caused by a sticking cold enrichment rod (C.E.R.) perform only Step 1, below. If a sticking C.E.R. is not evident, continue from
Step 2 to change the CER rod to a 41C (Figure 14).
1.
To verify a sticking C.E.R. press down on the rod while holding the choke diaphragm rod back in the diaphragm housing. Gently depress the
C.E.R. adjusting nut, the C.E.R. should move up and down off its seat without any bind or interference. If interference is evident, the upper body
must be loosened and recentered. Refer to TSB 82-2 for procedure.
2.
Remove the "E" clip from the choke hinge pin. Slide pin out.
NOTE:
Be careful not to drop the "E" clip in the hole below the hinge pin. Cover the hole with cloth.
3.
Disengage the C.E.R. from the lever fork by raising the C.E.R. and remove the rod.
4.
Install a new C.E.R. as indicated.
5.
Engage the C.E.R. in the lever fork and lower into position. Install the hinge pin and "E" clip. Remove cloth covering the opening.
6.
Check/adjust carb idle speed if necessary.
7.
Obtain an Authorized Modifications decal and list the date, dealer number and alterations performed as shown below. Select a prominent place
adjacent to the Vehicle Emission Control Information decal suitable for installing the Authorized Modifications decal. Clean the area, install the
decal and cover it with a clear plastic decal shield.
Parts Block
Warranty Status:
Reimbursable within the provisions of the Warranty and Policy Manual.