
Capri V8-302 5.0L (1982)
Axle Shaft: Service and Repair
6 3/4 INCH RING GEAR
1.
Remove wheel and tire from brake drum.
2.
Remove attaching nuts that secure brake drum to axle flange and remove brake drum.
3.
Working through hole in each axle flange, remove nuts that secure wheel bearing retainer plate. Then pull the axle shaft assembly out of the
housing being careful not to cut or rough up the seal. The brake backing plate must not be dislodged. Replace one nut to hold the plate in
place after shaft is removed.
4.
If wheel bearing is to be replaced, loosen inner retainer ring by nicking it deeply with a chisel in several places. It will then slide off.
5.
Remove bearing from shaft.
7 1/2 INCH RING GEAR
1.
Raise and support vehicle.
2.
Remove wheel and tire assembly, then the brake drum.
3.
Clean all dirt from carrier cover area.
4.
Remove housing cover to drain lubricant from rear axle.
5.
Remove differential pinion shaft lock bolt and the shaft.
6.
Move flanged end of axle shafts toward center of vehicle and remove ``C'' clip from button end of shaft.
7.
Remove axle shaft from housing. Use care to avoid damaging the oil seal.
8.
Remove bearing and seal as an assembly using a suitable slide hammer.
9.
Reverse procedure to install. Lubricate new bearing with rear axle lubricant prior to installation. Apply suitable grease between lips of oil seal.
The bearing should be installed using tool No. T78P-1225-A or equivalent, and the seal using tool No. T78P-1177-A or equivalent. If
proper tools are not used, early bearing or seal failure may result. If seal becomes cocked in the bore during installation, it must be
removed and replaced with a new one.
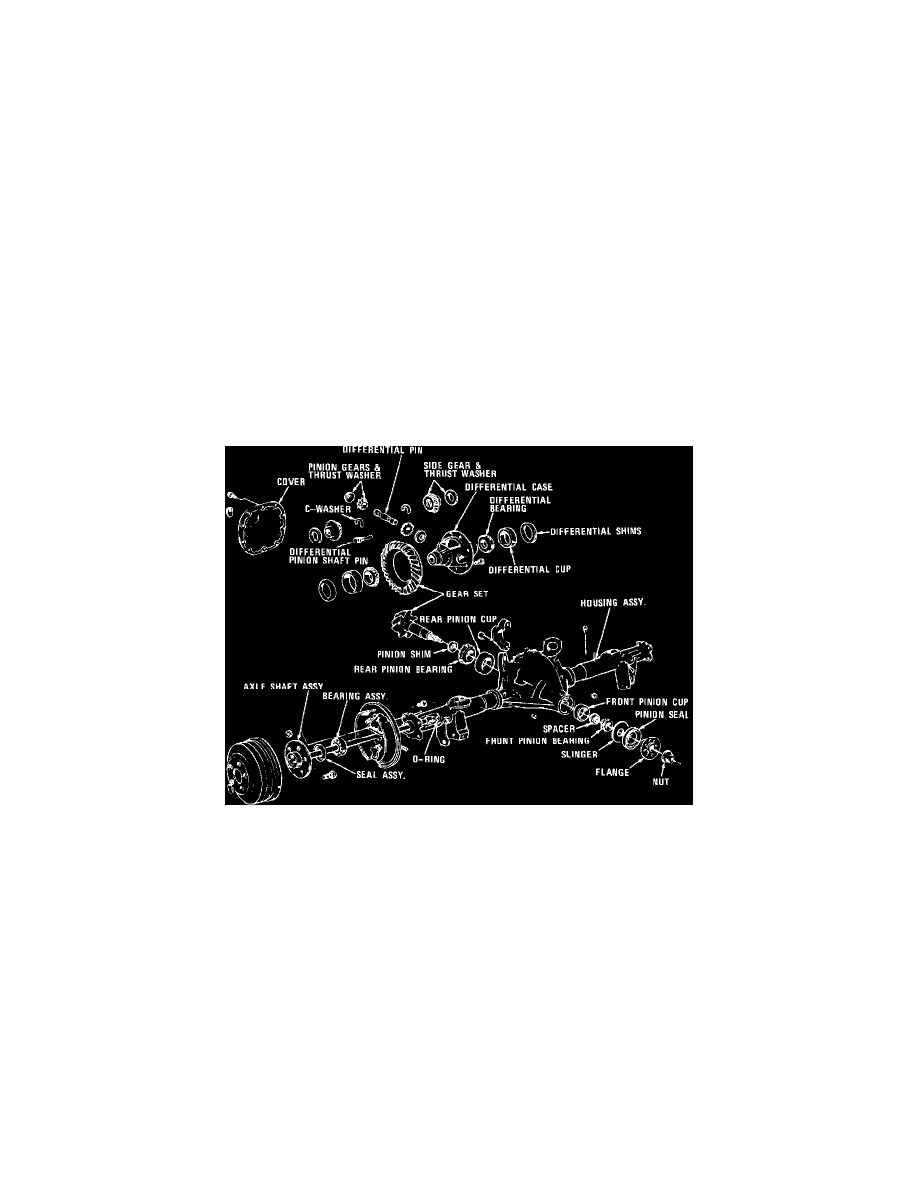
Fig. 2 Disassembled integral rear axle. 8.8 inch ring gear
8.8 INCH RING GEAR
1.
Raise and support vehicle, then remove rear wheel and tire assembly.
2.
Clean all dirt from carrier cover area with a wire brush and/or cloth.
3.
Remove axle housing cover and drain lubricant from axle, Fig. 2.
4.
Remove differential pinion shaft lock bolt and differential pinion shaft.
5.
Push flanged end of axle shaft toward center of the vehicle, then remove C-lock from button end of axle shaft assembly.
6.
Remove axle shaft from housing. Ensure not to damage oil seal.
7.
Insert tool 1175-AC or equivalent, into housing bore and position it behind bearing so tangs on tool engage bearing outer race. Using slide
hammer tool T50T-100-A or equivalent, remove bearing and seal as a unit.
8.
Reverse procedure to install, noting the following:
a. Lubricate new bearing with lubricant E0AZ-19580-A or equivalent, and install bearing into housing bore using tool T78P-1225-A or
equivalent.
b. Install axle shaft seal using tool T78P-1177-A or equivalent. Apply lubricant C1AZ-19590-B or equivalent, between the lips of the seal.
Installation of bearing or seal assembly without proper tool may result in an early bearing or seal failure. If seal becomes cocked in
bore during installation, remove it and install a new one.
c. Check for presence of axle shaft O-ring on the spline end of the shaft and install if not present.