
Cougar V6-153 2.5L DOHC VIN L SFI (2001)
Wiper Motor: Testing and Inspection
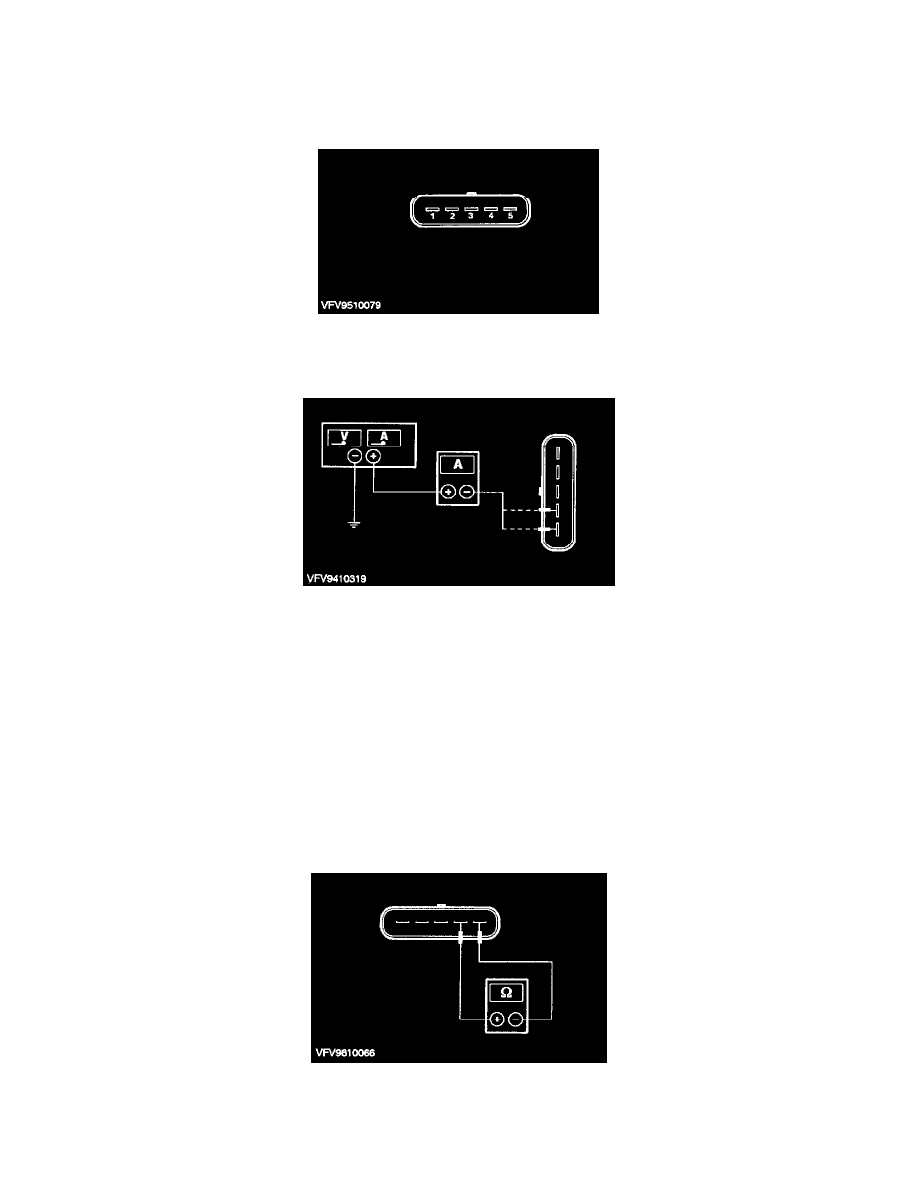
Windshield Wiper Motor
CAUTION:
^
The magnets in the wiper motor can be damaged if it is dropped or knocked.
^
The measuring range must be at least 10 A to avoid damage to the ammeter.
NOTE:
^
As there are no printed pin numbers on the windshield wiper motor connector, pin numbering is assumed.
^
Use an external 12 V DC power supply which is able to supply current of at least 10 A or a fused connection to the vehicle battery.
Check current draw of the windshield wiper motor.
1. Switch off the ignition.
2. Remove the windshield wiper motor.
3. Disconnect the connector from the wiper motor.
4. Connect the ammeter negative terminal to wiper motor connector pin 1.
5. Connect the ground terminal of the 12 V power supply to the wiper motor housing.
6. Connect the positive terminal of the 12 V power supply to the positive terminal of the ammeter and switch on the power supply. As the wiper
motor operates at fast speed, take a current input reading from the ammeter. For the required maximum value refer to the specifications table.
7. Switch off the power supply and disconnect the wiper motor connector from the ammeter negative terminal.
8. Connect the ammeter negative terminal to wiper motor connector pin 2 and switch on the power supply. As the wiper motor operates at slow
speed, take a current input reading from the ammeter. For the required maximum value refer to the specifications table.
9. Switch off the power supply.
Check park position end contact ON position.
Measure the resistance at the wiper motor connector between pin 4 and pin 5.
If the resistance is less than 5 ohms, go to the next step. If not, replace the wiper motor.