
Cougar/XR7 L4-140 2.3L SOHC (1982)
25.
Remove the 2 seals from heater core tubes.
26.
Reverse procedure to install.
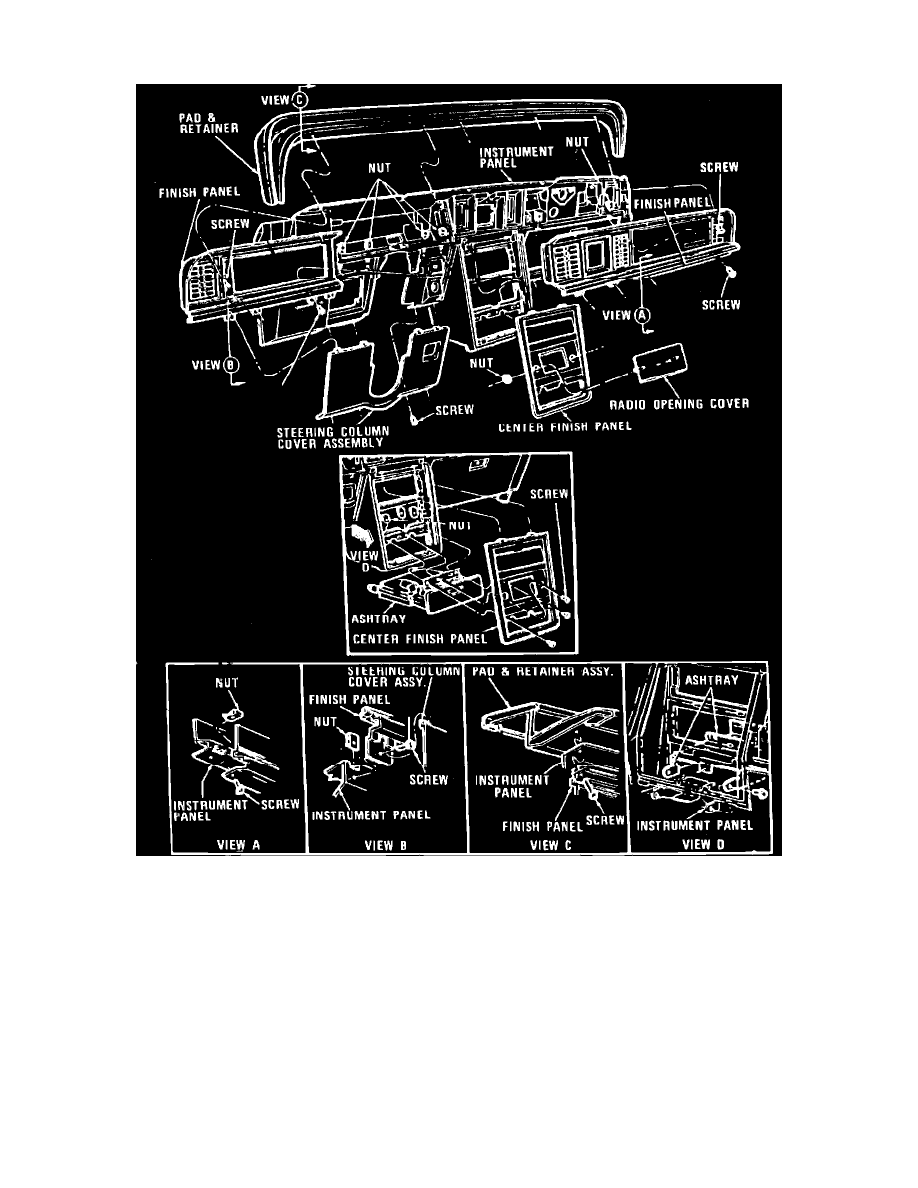
Fig. 9 Instrument panel trim panel (Typical). 1982 Cougar XR-7, Thunderbird & 1983-86 LTD & Marquis
1.
Disconnect battery ground cable.
2.
Remove steering column cover assembly, then remove left and right finish panels, Fig. 9.
3.
Remove two screws from sides of instrument panel pad and retainer assembly.
4.
Remove pad and retainer assembly and upper finish panel.
5.
Remove steering column attaching bolts, then carefully lower steering column just enough to allow access to transmission gear selector lever cable
assembly. Reach between steering column and instrument panel, then carefully lift selector lever cable from lever and remove cable clamp from
steering column tube.
6.
Lower steering column and allow to rest on front seat.
7.
Remove screw attaching instrument panel to brake pedal support through steering column opening.
8.
Disconnect temperature door cable from door and heater/evaporator cable bracket.
9.
Disconnect vacuum hose connectors at evaporator housing.
10.
Disconnect blower motor resistor wire from resistor on heater/evaporator case and blower motor feed wire at in-line connector.
11.
Support instrument panel, then remove three screws attaching top of instrument panel to cowl.
12.
Remove one screw attaching each end of instrument panel to cowl side panels, then remove two screws attaching instrument panel to floor.