
Cougar/XR7 L4-140 2.3L SOHC (1982)
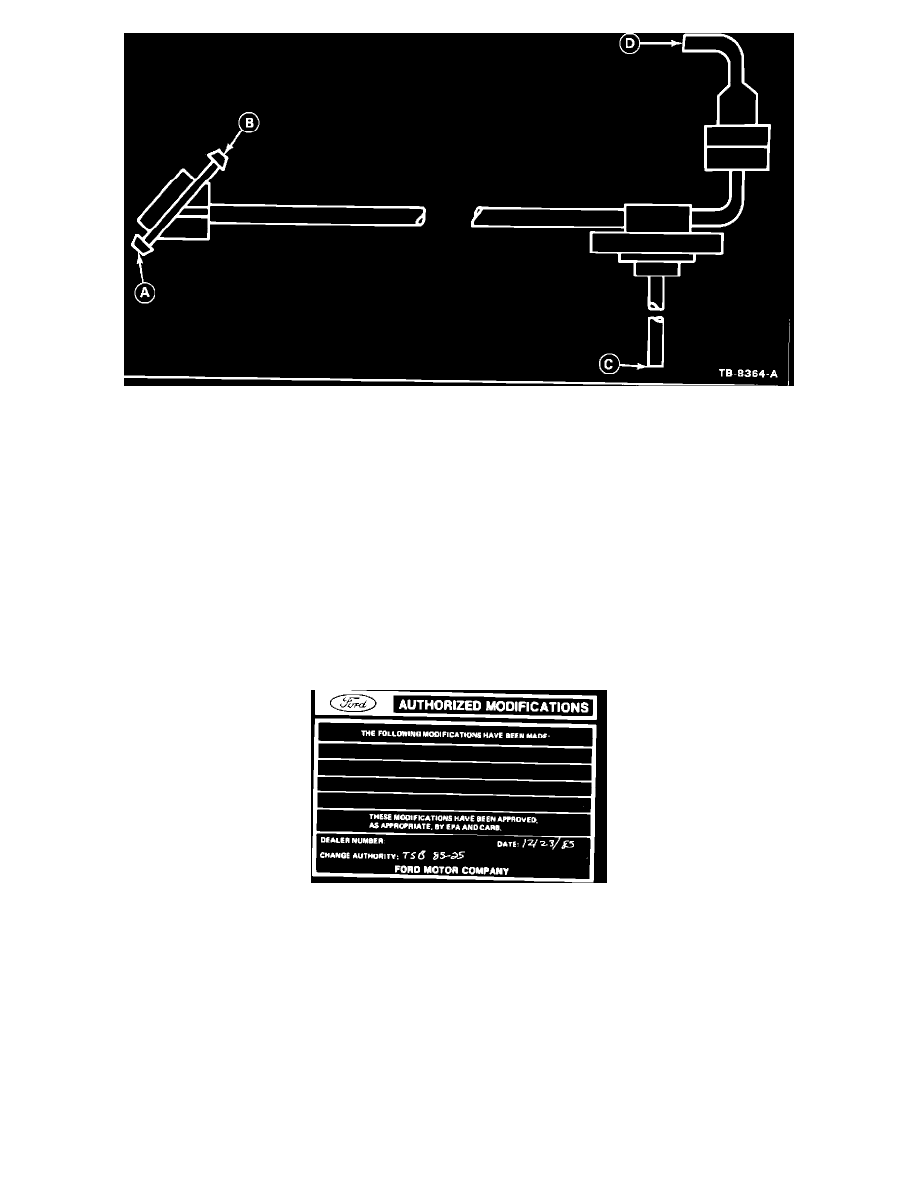
Figure 13 - VACUUM HARNESS (E5PZ-9E455-A)
8.
Cut the vacuum hose 1.5 inches from the plastic line or check valve.
9.
Install the new vacuum harness (E5PZ-9E455-A).
10.
Insert points A and B of the harness into the vacuum hose that was cut. Point A toward the solenoid. (See Figure 13)
11.
Route the long vacuum hose along the rocker cover with the existing vacuum harness.
12.
Connect point D of the harness to the nipple on the air control valve that points toward the front of the vehicle.
13.
Connect point C to the pink vacuum line that was removed from the original air control valve.
14.
Secure the added vacuum harness to the existing harness with several bundling straps.
15.
Verify that no vacuum lines or thermactor hoses are contacting the exhaust manifold so that the valves in the added harness will not rattle.
Authorized Modifications Decal
16.
Add modification decal next to the existing emission decal.
Obtain an Authorized Modifications Decal and list the date, dealer number, and summary of alterations performed. Select a prominent place adjacent to
the Vehicle Emission Control Information Decal suitable for installing the Authorized Modifications Decal. Clean the area, install the decal, and cover it
with a clear plastic decal shield.
PART NUMBER
PART NAME
CLASS
E1AZ-9F491-A
Valve - Air Control
R
E5PZ-9E455-A
Harness - Vacuum
CG
OTHER APPLICABLE ARTICLES: None
WARRANTY STATUS: Reimbursable within the provisions of the Warranty and Policy Manual.