
Cougar/XR7 V8-4.6L VIN W (1997)
CAUTION: Main bearing bolts must be replaced with new bolts. They are torque-to-yield designed and cannot be reused.
8. Tighten crankshaft main bearing cap adjusting screws 11 through 20 in two steps as follows:
a. Tighten crankshaft main bearing cap adjusting screws in sequence to 5 Nm (44 inch lbs.).
b. Tighten crankshaft main bearing cap adjusting screws in sequence to 9-11 Nm (80-97 inch lbs.).
9. Tighten main bearing cap side bolts 21 through 30 in two steps as follows:
a. Tighten main bearing cap side bolts in sequence to 10 Nm (7 ft. lbs.).
b. Tighten main bearing cap side bolts in sequence to 19-23 Nm (14-17 ft. lbs.).
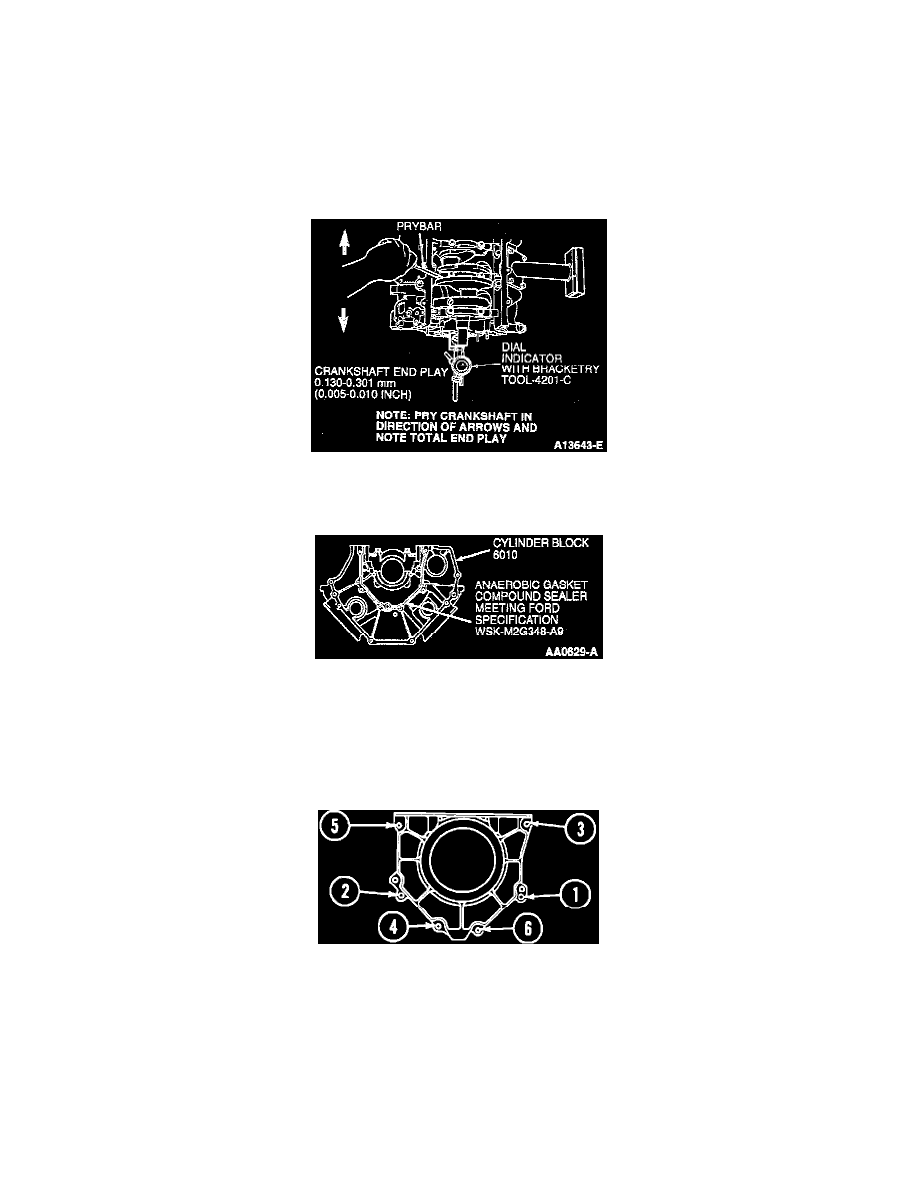
10. Check crankshaft end play in both directions as shown.
NOTE: Pry against number two main bearing cap.
11. Apply a 2.0 mm (0.08 inch) continuous bead of Anaerobic Gasket Compound Sealer or equivalent meeting Ford specification WSK-M2G348-A9
to cylinder blocks as shown.
NOTE:
^
Prior to applying sealer, clean sealing surfaces with Metal Surface Cleaner F4AZ-19A536-RA or equivalent meeting Ford specification
WSE-M5B392-A, to remove all residue that may interfere with the sealer's ability to adhere.
^
The crankshaft rear oil seal retainer must be installed and the bolts tightened to specification within five minutes of sealer application.
Rear Oil Seal Retainer Tightening Sequence
12. Install crankshaft rear oil seal retainer to cylinder blocks. Tighten six bolts in sequence to 8-12 Nm (71-106 inch lbs.).