
Cougar/XR7 V8-4.6L VIN W (1997)
Expansion/Freeze Plug: Service and Repair
REMOVAL
To remove a large core plug, drill a 12.70 mm (0.5 inch) hole in the center of the plug and remove with an Impact Slide Hammer T59L-100-B or
T50T-100-A. On a small core plug, drill a 6.35 mm (0.25 inch) hole in the center of the plug and pry it out with a small pin punch. Clean and inspect
the plug bore.
INSPECTION
Inspect the plug bore before installation for any damage that would interfere with the proper sealing of the plug. If the bore is damaged, true the
surface by boring for the next specified oversize plug.
Oversize plugs are identified by the "OS" stamped in the flat located on the cup side of the plug.
INSTALLATION
Coat the plug and/or bore lightly with an oil-resistant (oil galley) sealer such as Stud and Bearing Mount EOAZ-19554-BA or equivalent meeting Ford
specification WSK-M2G349-A1, or Thread Lock 262 E2FZ-19554-B or equivalent meeting Ford specification WSK-M2G351-A6. Install plug
following the procedure for cup-type or expansion-type below:
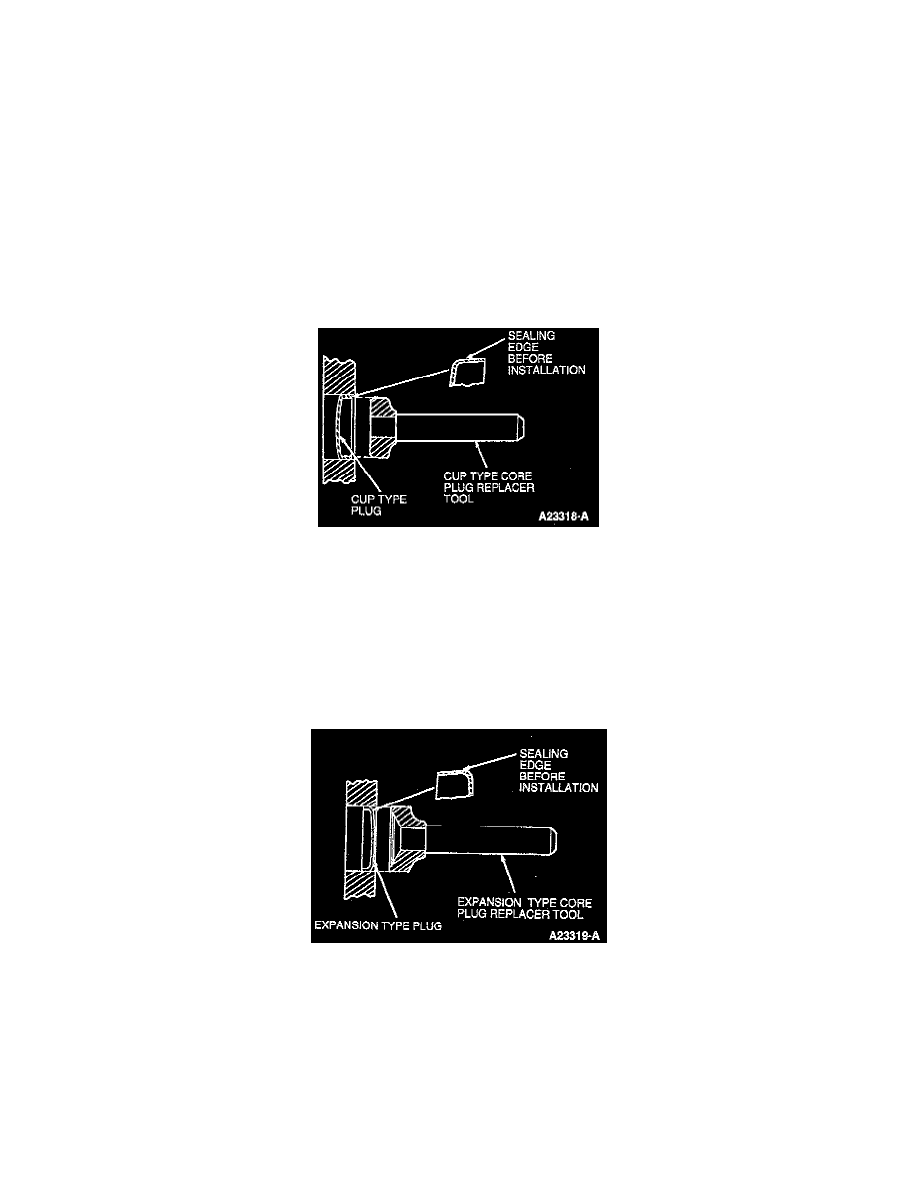
Cup-Type
Cup-type core plugs are installed with the flanged edge outward. The maximum diameter is located at the outer edge of the flange. The flange on
cup-type plugs flares outward with the largest diameter of the outer (sealing) edge.
CAUTION: It is imperative to push or drive the plug into the machined bore by using a properly designed tool. Do not drive the plug into the
bore using a tool that contacts the flange. This will damage the sealing edge and result in leakage and/or plug blowout.
NOTE: If the core plug replacing tool has a depth seating surface, do not seat the tool against a non-machined (casting) surface.
When installed, the flanged (trailing) edge must be below the chamfered edge of the bore to effectively seal the plugged bore.
Expansion-Type
Expansion-type core plugs are installed with the flange edge inward. The maximum diameter of this plug is located at the base of the flange with
the flange flaring inward.
CAUTION:
^
Push or drive the plug into the machined bore using a properly designed tool. Do not drive the plug using a tool that contacts the crowned
portion of the plug. This will expand the plug prior to installation may damage the plug and/or plug bore.
^
Pull the plug into the machined bore by using a properly designed tool. Under no circumstances is the plug to be driven into the bore using
a tool that contacts the flange. This will damage the sealing edge and will result in leakage and/or plug blowout.
NOTE: If the core plug replacing tool has a depth seating surface, do not seat the tool against a non-machined (casting) surface.