
Cougar/XR7 V8-4.6L VIN W (1997)
7. Install transmission range sensor on manual control lever and two shims, then loosely install bolts.
8. Position manual control lever in NEUTRAL.
NOTE: PARK is the last detent when the manual control lever is full forward. Return two detents toward output shaft for NEUTRAL.
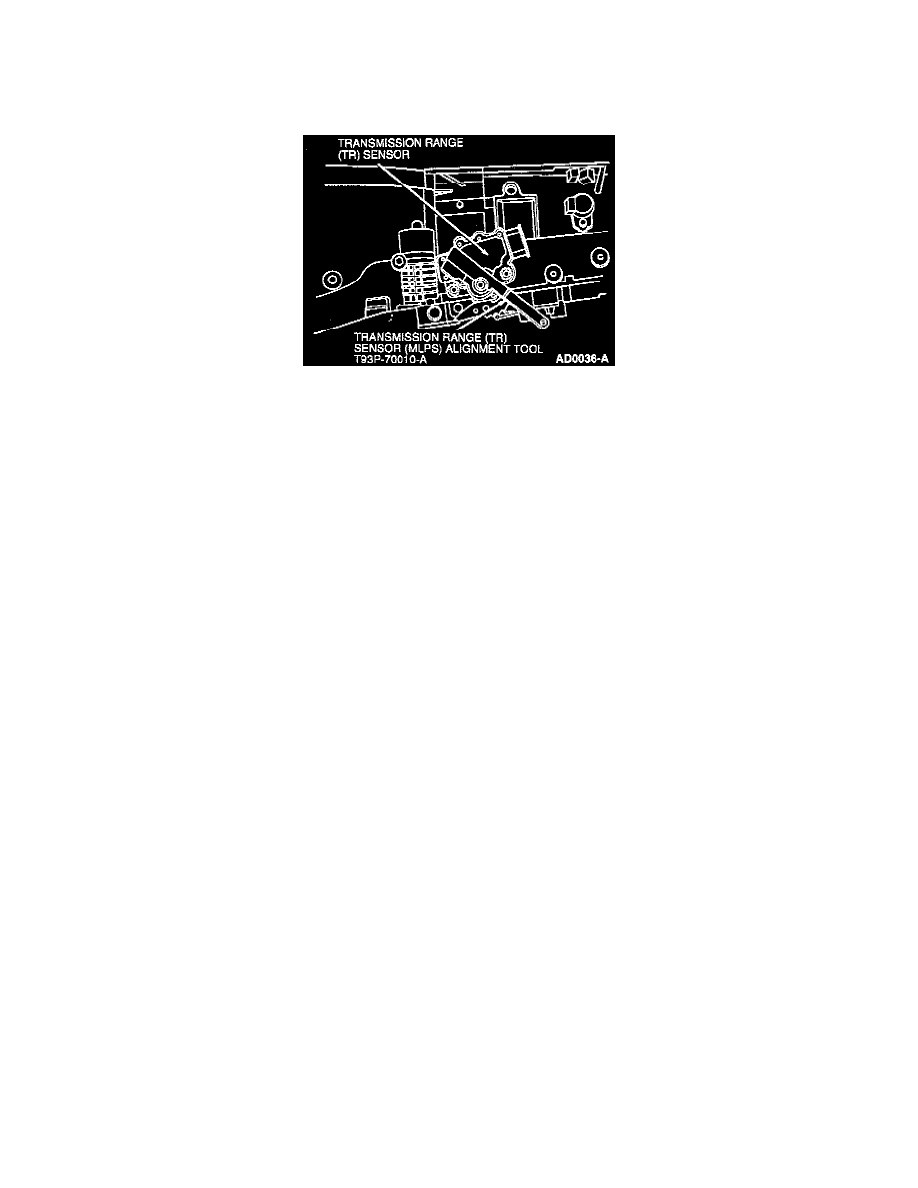
9. Insert Transmission Range (TR) Sensor (MLPS) Alignment Tool T93P-70010-A into slots. Align all three slots on transmission range sensor with
three tabs on tool.
10. Tighten TR sensor bolts to 7-10 Nm (62-88 in. lbs.).
11. Install manual control valve detent lever spring and bolt. Tighten bolt to 11-15 Nm (98-132 in. lbs.).
12. Clean, inspect and install pan to case gasket. Tighten all bolts to 12-15 Nm (107-132 in. lbs.).
NOTE: Transmission pan-to-case gasket is reuseable if not damaged.
13. Attach transmission linkage to manual control lever. Tighten adjusting nut to 19-26 Nm (14-19 ft. lbs.).
14. Pour 4.7 liters (5 quarts) of Motorcraft MERCON or MERCON V Automatic Transmission Fluid or equivalent meeting FORD approved fluid
into oil filler tube.
15. Reconnect battery ground cable.
NOTE: When the battery has been disconnected or reconnected, some abnormal drive symptoms may occur while the Powertrain Control Module
(PCM) relearns its adaptive strategy. The vehicle may need to be driven 16 km (10 miles) or more to relearn the strategy.
16. Start the engine and add specified fluid as required to achieve the proper fluid level.
17. Check the transmission for leaks.