
Cougar/XR7 V8-4.6L VIN W (1997)
Ball Joint: Service and Repair
Ball Joint, Lower
REMOVAL
1. Remove front suspension lower arm.
2. Remove and discard joint boot seal.
3. Clamp front suspension lower arm in a vise.
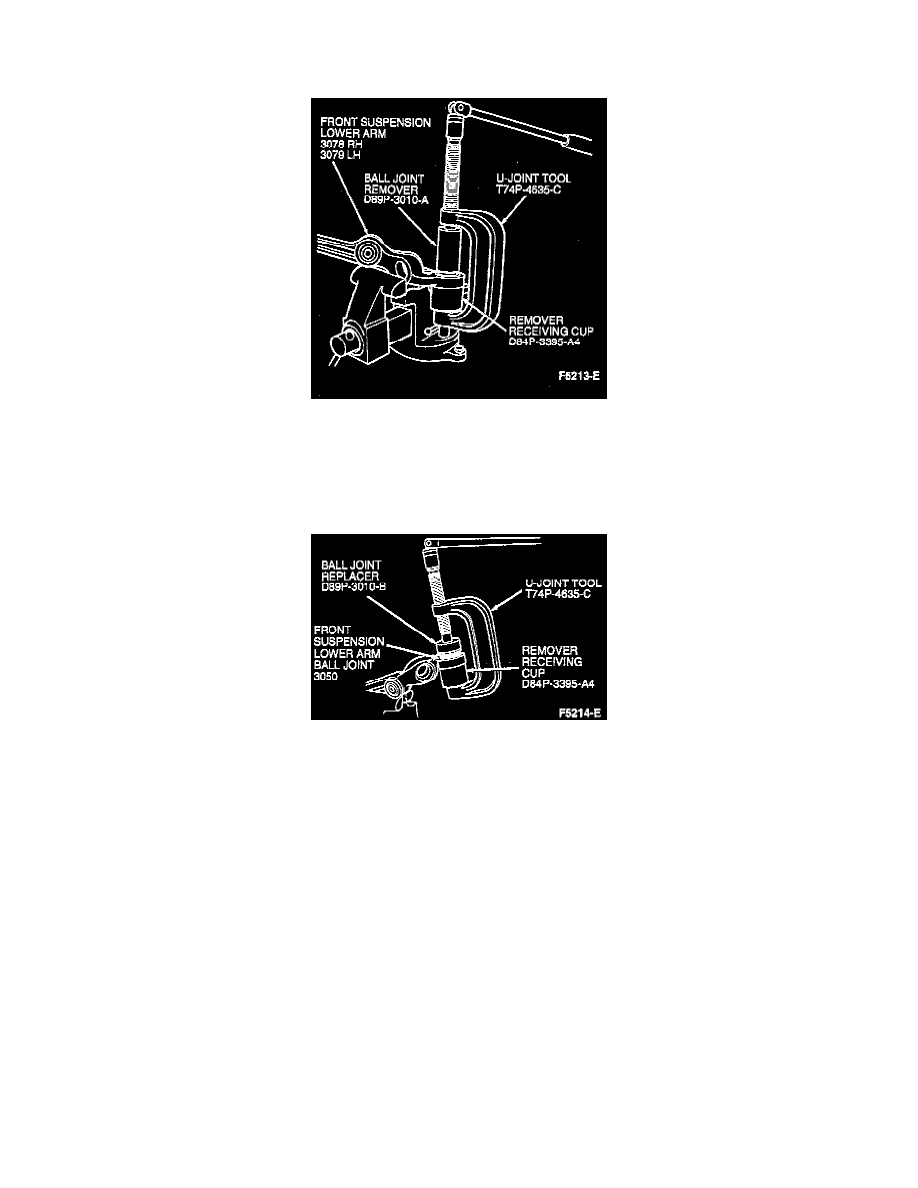
4. Press out front suspension lower arm ball joint using Ball Joint Remover D89P-3010-A and Receiving Cup D84P-3395-A4 or equivalent. U-Joint
Tool T74P-4635-C or a press may be used to press out front suspension lower arm ball joint.
INSTALLATION
1. Install front suspension lower arm ball joint with Ball Joint Replacer D89P-3010-B, Receiving Cup D84P-3395-A4 or equivalent, and U-Joint
Tool T74P-4635-C. A press can be used instead of the U-Joint Tool.
NOTE: When installing a new front suspension lower arm ball joint, it is advisable that the protective cover be left in place during installation to
protect the ball joint seal. It may be necessary to cut off the end of the cover to allow it to pass through the receiving cup.
2. Discard the protective cover and check the front suspension lower arm ball joint to make sure it is fully seated in the front suspension lower arm
and front suspension lower arm ball joint seal is free of cuts or tears.
3. Install front suspension lower arm.
4. Check wheel alignment.