
Cougar/XR7 V8-4.6L VIN W (1997)
Power Window Motor: Service and Repair
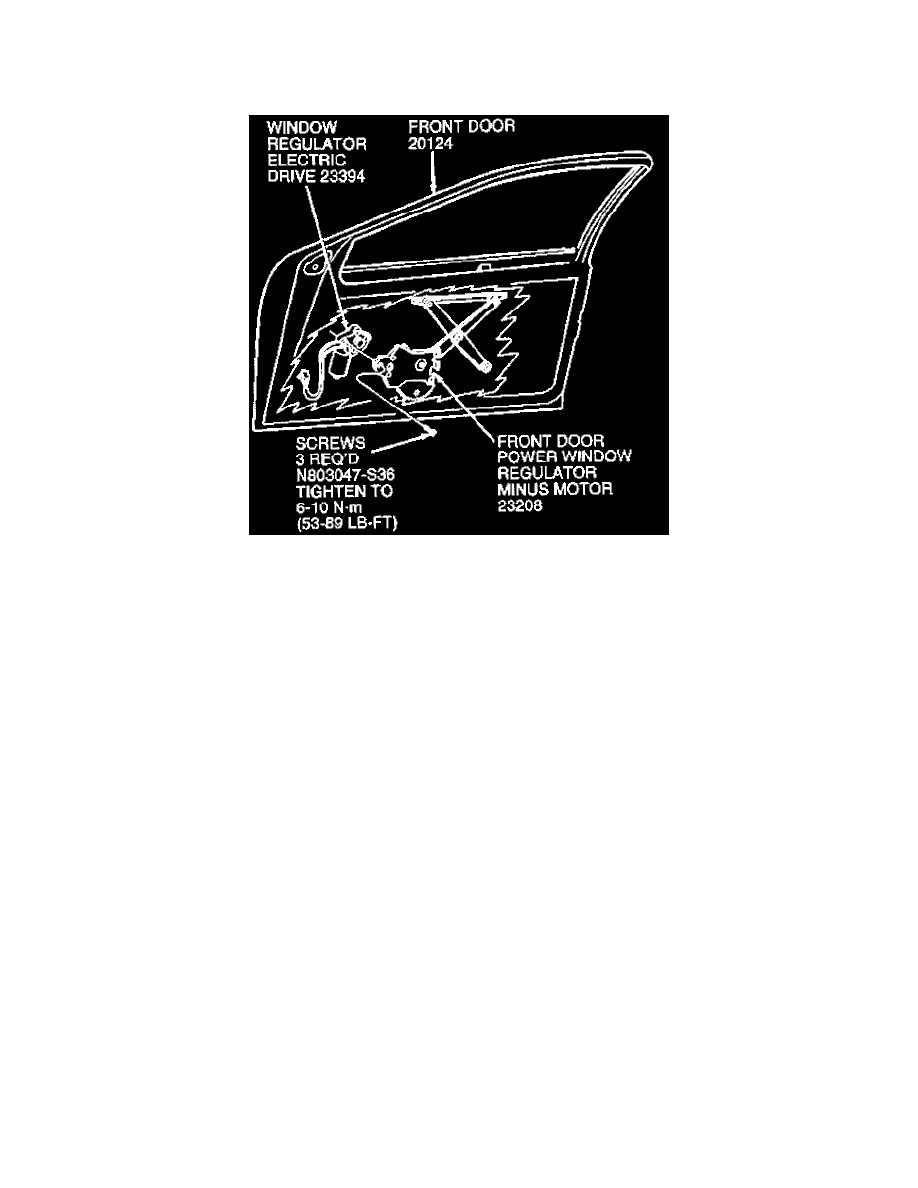
Window Regulator Motor
Removal
Window Regulator Electric Drive
1. Raise the front door window glass to the full-up position if possible. If the front door window glass cannot be raised and is in a partially down
position, it must be supported so that it will not fall into the door when the window regulator electric drive is removed.
2. Disconnect battery ground cable.
3. Remove front door trim panel and front door trim shield. See: Body and Frame/Doors, Hood and Trunk/Doors
4. Disconnect window regulator safety relay switch wiring.
5. Position the body main wiring out of the way. Using a 19 mm (3/4 inch) hole saw with a 1/4 inch pilot, drill three holes at the existing drill dimples
located on the door inner panel adjacent to the window regulator electric drive.
6. Remove the three window regulator electric drive retaining screws and disengage the window regulator electric drive from the front door window
regulator.
CAUTION: Prior to window regulator electric drive removal, make sure that the front door window regulator minus motor is in a fixed position
to prevent counterbalance spring unwind.
Installation
1. Position the window regulator electric drive to the front door window regulator and install the three screws snug, not tight.
2. Connect the body main wiring at the connector and cycle the window regulator electric drive to verify gear engagement. After the gears are
engaged, tighten the three window regulator electric drive retaining screws to 6-10 N-m (53-89 lb-in).
3. Install the front door trim panel and front door trim shield.
4. Connect battery ground cable.
5. Check the drain holes at the bottom of the front doors to make sure that each is open to prevent water build-up over the window regulator electric
drive.