
Grand Marquis V8-281 4.6L SOHC (1992)
INITIAL ADJUSTMENT
1.
Remove adjusting hole cover from brake backing plate and from the backing plate side, turn the adjusting screw upward with a screwdriver or
other suitable tool to expand the shoes until a slight drag is felt when the drums are rotated.
2.
Remove the drum.
3.
While holding the adjuster lever out of engagement with the adjusting screw, fig. 6, back off the adjusting screw about one full turn with the
fingers. If finger movement will not turn the screw, free it up. If this is not done, the adjusting lever will not turn the screw during vehicle
operation. Lubricate the screw during with oil and coat with wheel bearing grease. Any other adjustment procedure may cause damage
to the adjusting screw with consequent self-adjuster problems.
4.
Install brake drum and wheel, and adjusting hole cover. Adjust brakes on remaining wheels in the same manner.
5.
If pedal height is not satisfactory, drive the vehicle and make sufficient reverse stops with a firm pedal effort until proper pedal height is obtained.
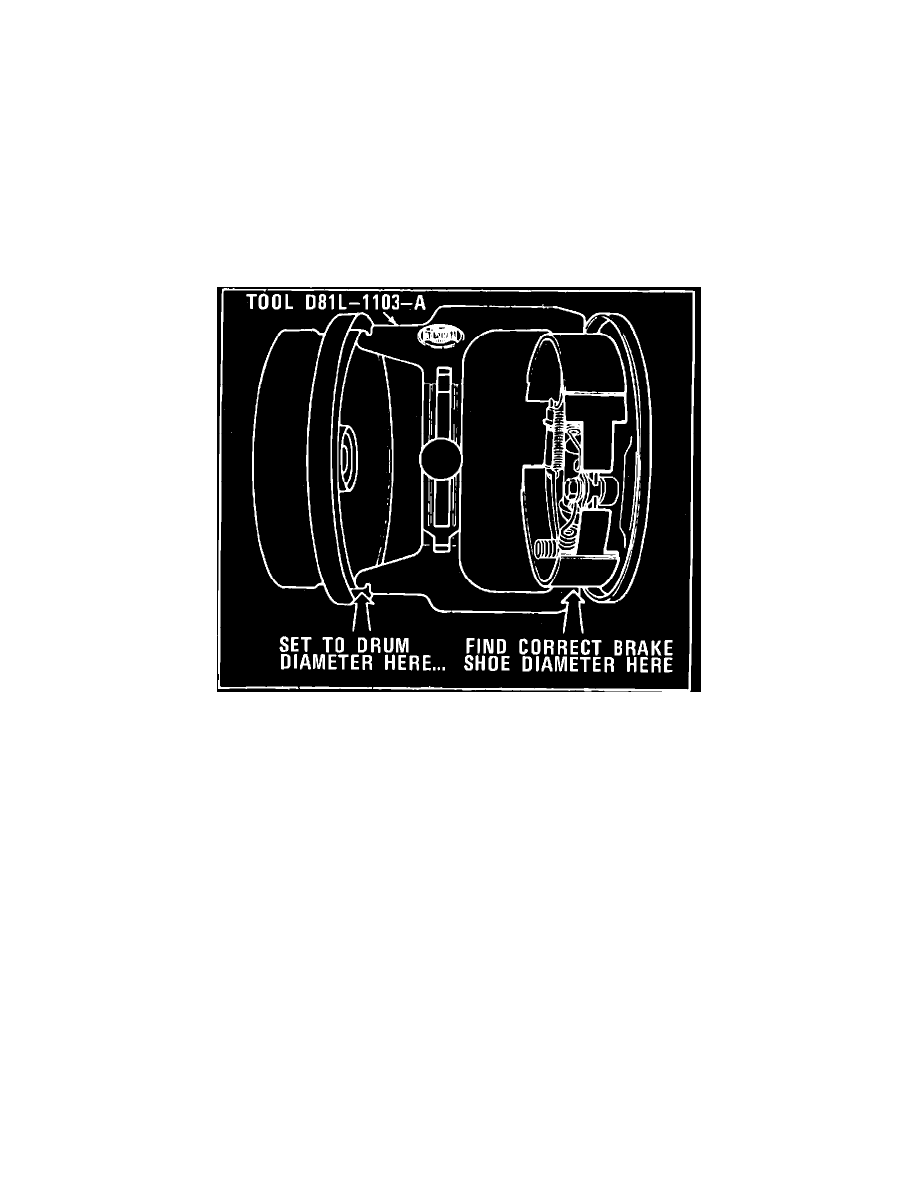
BRAKE SHOE ADJUSTMENT GAUGE
Fig. 5 Brake adjustment with gauge
1.
Use the brake shoe adjustment gauge shown in Fig 4 to obtain the drum inside diameter as shown. Tighten the adjusting knob on the gauge to hold
this setting.
2.
Place the opposite side of the gauge over the brake shoes and adjust the shoes by turning the adjuster screw until the gauge just slides over the
linings. Rotate the gauge around the lining surface to assure proper lining diameter adjustment and clearance.
3.
Install brake drum and wheel, final adjustment is accomplished by making several firm reverse stops, using the brake pedal.