Grand Marquis V8-281 4.6L SOHC (1992)

Camshaft: Service and Repair
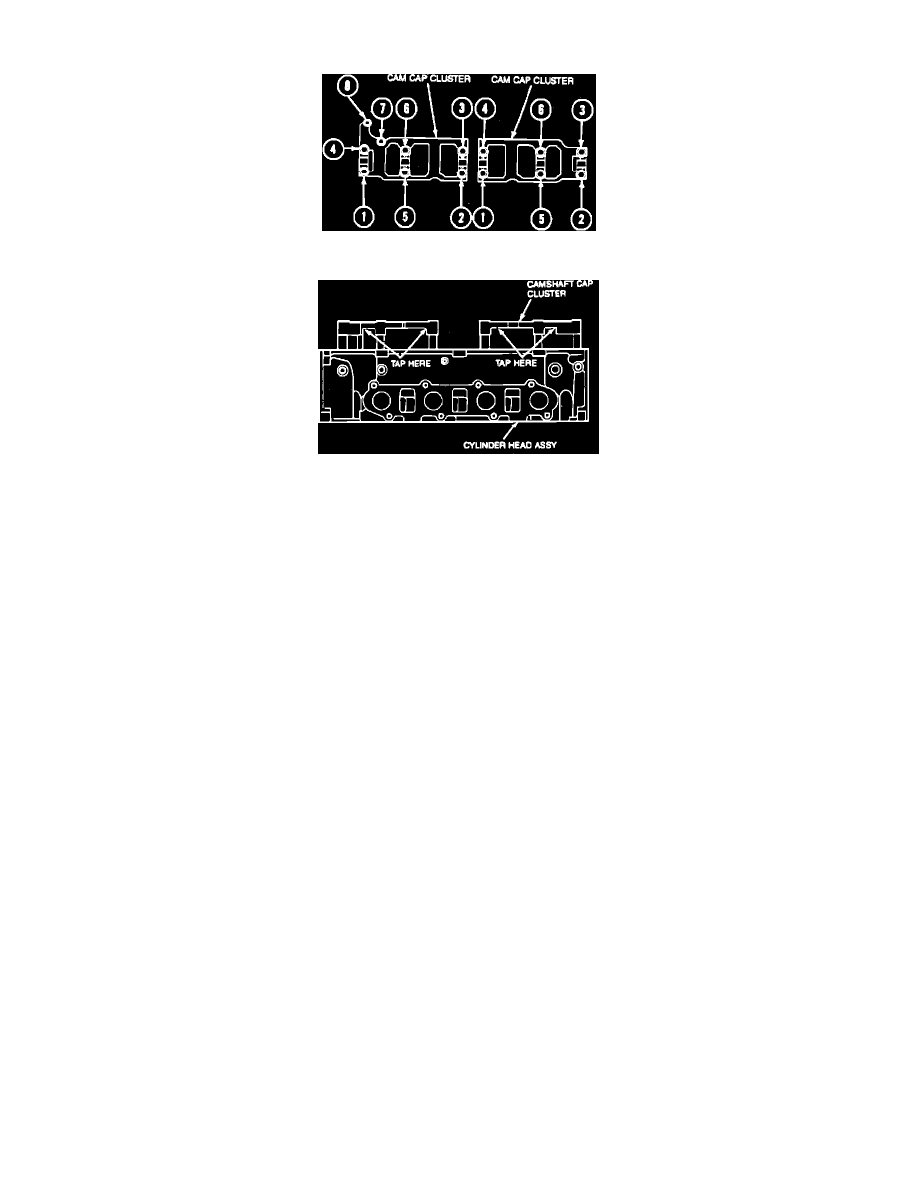
Camshaft Cap Cluster Assembly Tightening Sequence
Camshaft Replacement
1.
Disconnect battery ground cable, then remove cooling fan and shroud.
2.
Relieve fuel system pressure as described under MAINTENANCE PROCEDURES/FUEL SYSTEM PRESSURE RELIEF.
3.
Remove camshaft covers as described under CAMSHAFT COVER.
4.
Remove front cover as described under FRONT COVER.
5.
Remove timing chains as described under TIMING CHAINS, GEARS, TENSIONERS & GUIDES.
6.
Rotate crankshaft counterclockwise 45°. Ensure pistons are below top of engine deck face. Crankshaft must be in position prior to rotating
camshafts or piston and/or valve damage may result.
7.
Install Valve Spring Compressor tool No. T91P-6565-A or equivalent, under camshaft and on valve spring retainer.
8.
Install .40 inch shim between spring coils and camshaft to prevent damage.
9.
Camshaft must be at base circle before compressing valve spring, then rotate camshaft, as required, until roller followers are removed.
10.
Compress valve spring, then remove roller follower.
11
Repeat steps 7 through 10 until all roller followers are removed.
12.
Remove camshaft cap cluster assembly attaching bolt, Fig. 12.
13.
Tap upward on camshaft cap, Fig. 13, then carefully remove camshaft cap and camshaft.
14.
Reverse procedure to install, noting the following:
a. Refer to Fig. 12, for camshaft cap cluster bolt tightening sequence.
b. Tighten attaching nuts and bolts to specifications.
