
Grand Marquis V8-281 4.6L SOHC (1992)
Intake Manifold: Service and Repair
Installation
INSTALLATION
NOTE: If a new intake manifold is being installed, transfer all necessary components onto new manifold.
1.
Clean sealing surfaces of intake manifold and cylinder heads.
2.
Position intake manifold gaskets on cylinder heads.
NOTE: Before installation, inspect intake manifold gaskets for nicks, cuts and/or deformation. If gaskets show no sign of damage they may be
reused.
3.
Position intake manifold on cylinder heads.
NOTE: Ensure alignment tabs on gasket are aligned with holes in cylinder head.
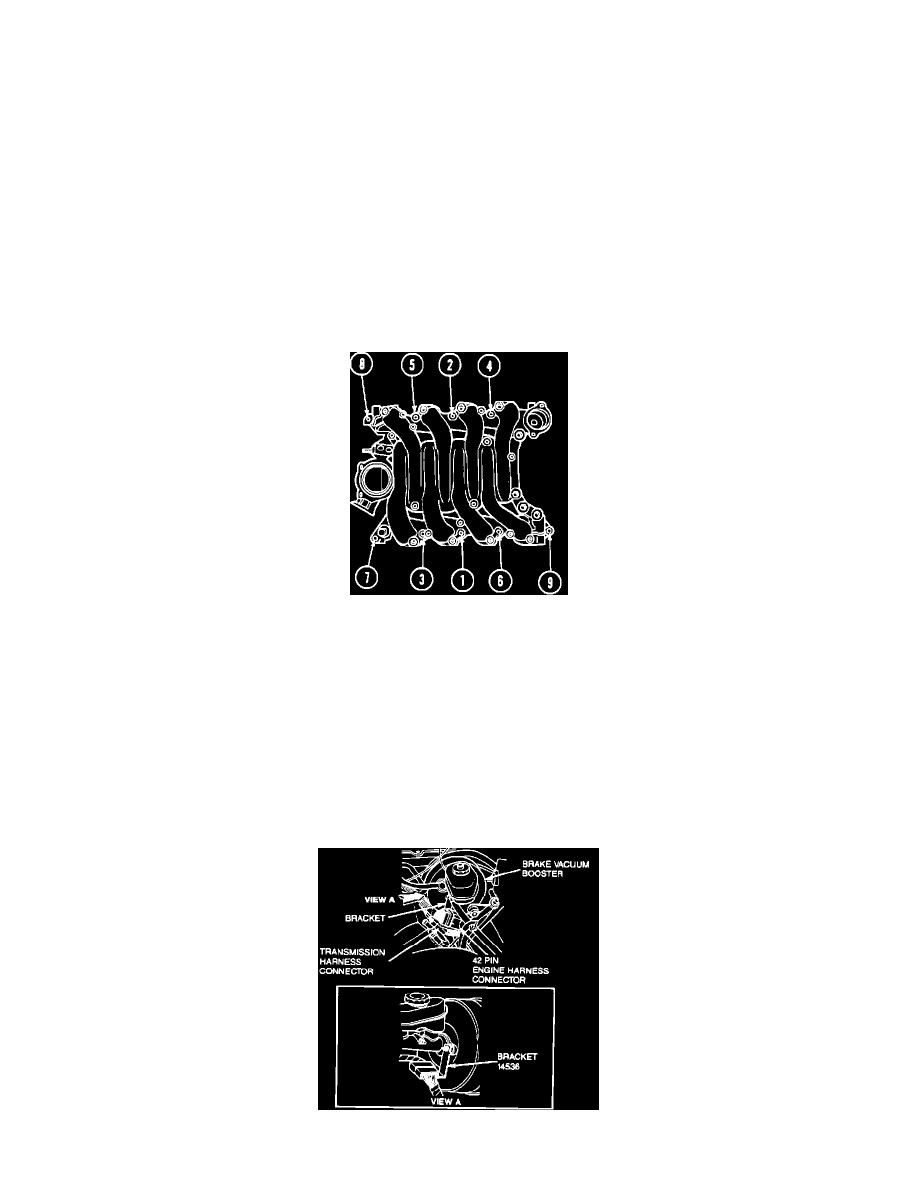
4.
Install and tighten nine bolts in sequence shown to 20-30 Nm (15-22 lb ft).
Intake Manifold
5.
Inspect and if necessary replace O-ring seal on thermostat housing. Position thermostat housing and upper hose and install two bolts and tighten to
20-30 Nm (15-22 lb ft).
6.
Connect heater supply hose.
7.
Connect both HO2S sensors.
8.
Connect vacuum hose to throttle body elbow vacuum port.
9.
Connect and if necessary adjust throttle valve cable.
10.
Install accelerator cable bracket on intake manifold and connect accelerator and speed control cables to throttle body.
11.
Install PCV valve in camshaft cover and connect canister purge solenoid vent hose.
12.
Connect air conditioning compressor, HDR sensor, and purge solenoid.
13.
Connect 42-pin connector on retaining bracket on vacuum brake booster.
14.
Install 42-pin connector on retaining bracket on vacuum brake booster.
42-Pin Connector Bracket