
Grand Marquis V8-281 4.6L SOHC (1992)
NOTE: Inspect friction material on tensioner arms and chain guides. If worn or damaged remove and clean oil pan and replace oil pickup tube.
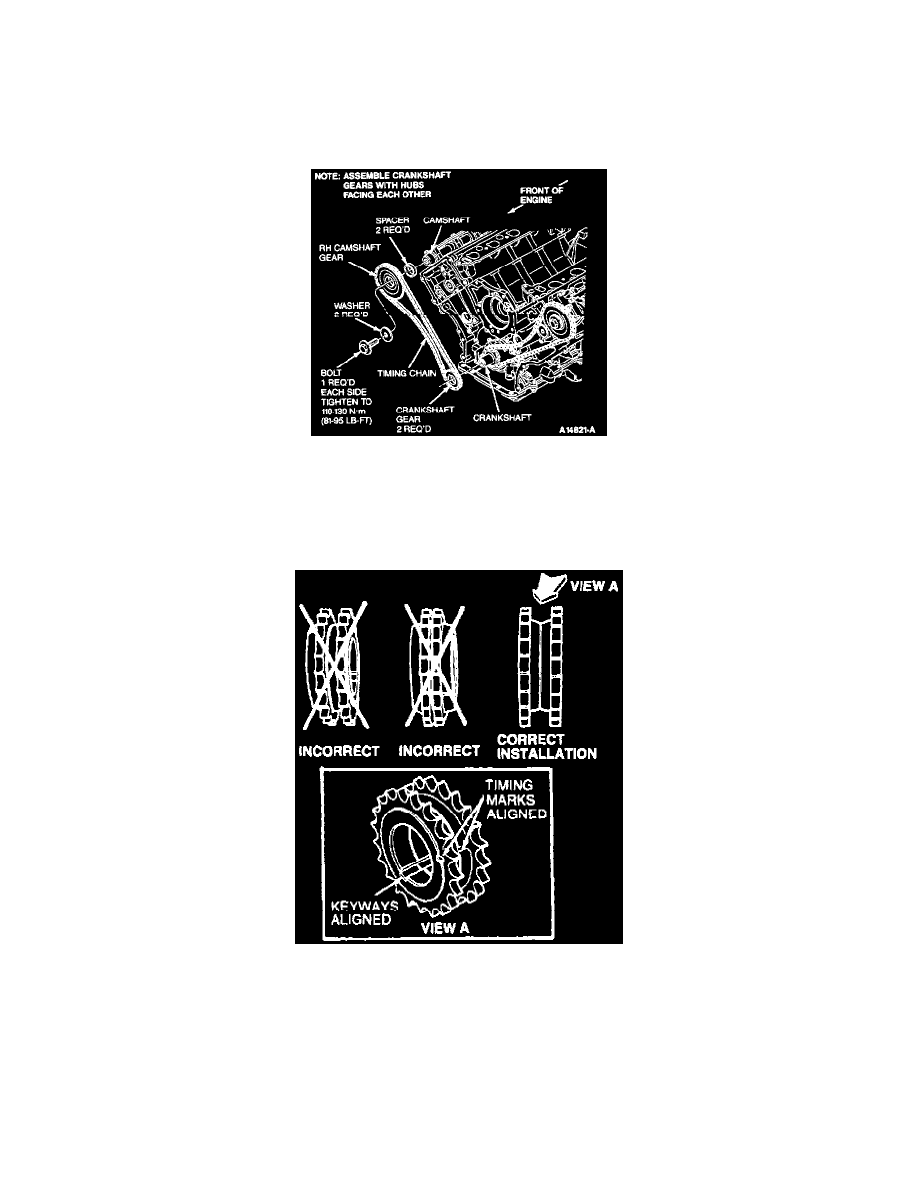
Installation
NOTE: If engine has "jumped time," ensure that all repairs to engine components and/or valve train have been made. Then ROTATE engine
COUNTERCLOCKWISE 45 degrees. This will position all pistons BELOW top of deck face. Install cylinder heads and begin with Step 5.
1. If removed, position Left Hand camshaft spacers and gears on camshaft.
2. Install washer and camshaft gear retaining bolt. Tighten to 110-130 Nm (81-95 ft-lbs).
3. If removed, position Right Hand camshaft spacer and gear on camshaft.
4. Install washer and camshaft gear retaining bolt. Tighten to 11O-13O Nm (81-95 ft-lbs).
NOTE: Cam Positioning Tools or equivalent must be installed on camshaft(s) to prevent camshaft(s) from rotating.
Fig. 26 Crankshaft Sprocket Position
NOTE: Crankshaft gears are identical. They may only be installed one way. Refer to the illustration for proper gear installation.
5. Install Left Hand crankshaft gear.
NOTE: Ensure tapered part of gear faces AWAY from engine block.