
Grand Marquis V8-281 4.6L SOHC (1992)
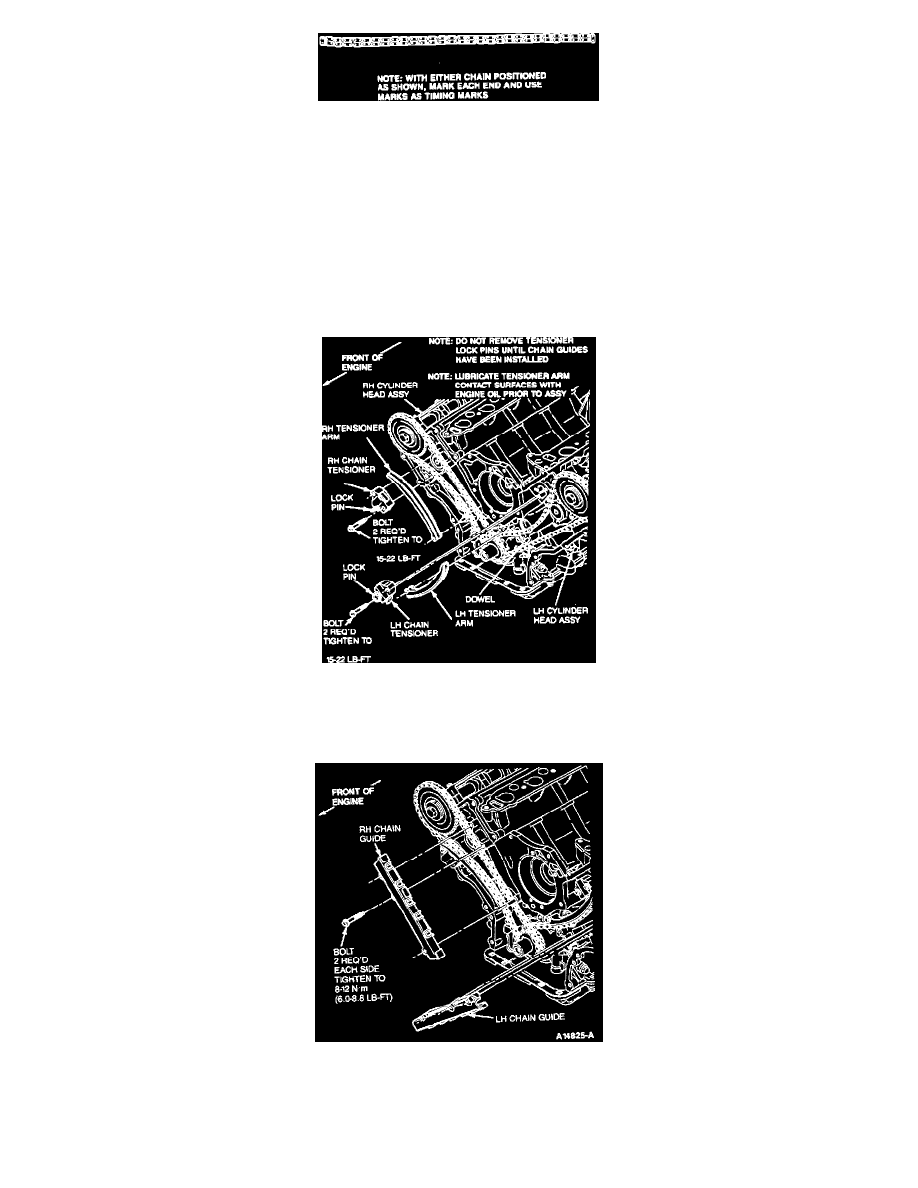
Timing Chain Marks
NOTE: If copper links of timing chain are not visible, split both chains in half and mark the two opposing links as shown.
6. Install Left Hand timing chain on camshaft gear. Ensure copper link of chain lines up with timing mark of camshaft gear.
7. Install Left Hand timing chain on crankshaft gear. Ensure copper link of chain lines up with timing mark of crankshaft gear.
8. Install Right Hand crankshaft gear.
NOTE: Ensure tapered part of gear faces TOWARD engine block.
9. Install Right Hand timing chain on camshaft gear. Ensure copper link of chain lines up with timing mark of camshaft gear.
10. Install Right Hand timing chain on crankshaft gear. Ensure copper link of chain lines up with timing mark of crankshaft gear.
11. Lubricate tensioner arm contact surfaces with engine oil and install Right Hand and Left Hand tensioner arms on their dowels.
12. Install Right Hand and Left Hand timing chain tensioners and secure with two bolts on each. Tighten bolts to 20-30 Nm (15-22 ft-lbs).
NOTE: Do not remove lock pins until timing chain guides are installed.
13. Install Right Hand and Left Hand chain guides and secure with two bolts on each. Tighten bolts to 8-12 Nm (6.0-8.8 ft-lbs).
14. Remove lock pins from timing chain tensioners and ensure all timing marks are aligned.
15. Remove Camshaft Positioning Tools or equivalent.
16. Install all components that were removed to access timing chains.
17. Start engine and check for leaks and proper operation.