
Grand Marquis V8-281 4.6L SOHC (1992)
Evaporator Core: Service and Repair
CAUTION: If an evaporator core leak is suspected, the core must be leak tested before it is removed from the vehicle.
Removal
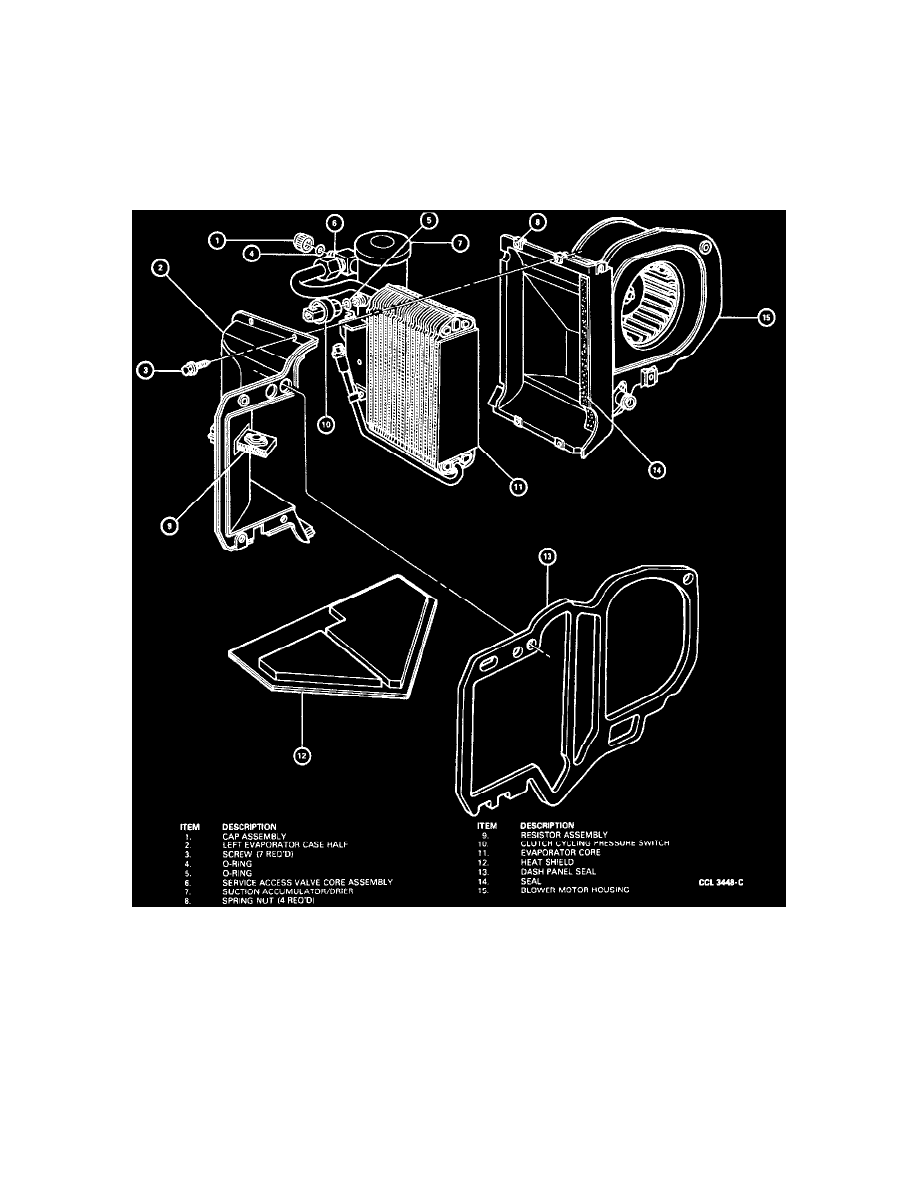
1. Remove the evaporator case from the vehicle. See: Evaporator Case/Service and Repair
NOTE: Whenever the evaporator core is replaced, it will be necessary to replace the suction accumulator/drier.
2. Remove dash panel seal.
3. Remove the heat shield from the bottom of the evaporator case.
4. Remove six screws retaining the two halves of the evaporator case together.
5. Separate the two halves of the evaporator case and remove the evaporator core and suction accumulator/drier assembly.
6. Disconnect the suction accumulator/drier inlet from the evaporator core outlet tube.
7. Remove the retaining screw from the suction accumulator/drier and evaporator core mounting brackets and remove the accumulator/drier from the
evaporator core.
Installation
NOTE: When replacing an evaporator core in a refrigerant system that contains a six cylinder aluminum compressor, a measured quantity of 500
viscosity refrigerant oil should be added to the core to ensure that the total oil charge in the system is correct before the system is operated. Three fluid
ounces of clean refrigerant oil should be poured directly into the inlet pipe of the replacement core with the pipe held VERTICALLY so the oil will
drain into the core.