
Grand Marquis V8-281 4.6L SOHC (1992)
Governor: Service and Repair
Disassembly and Assembly
DISASSEMBLY
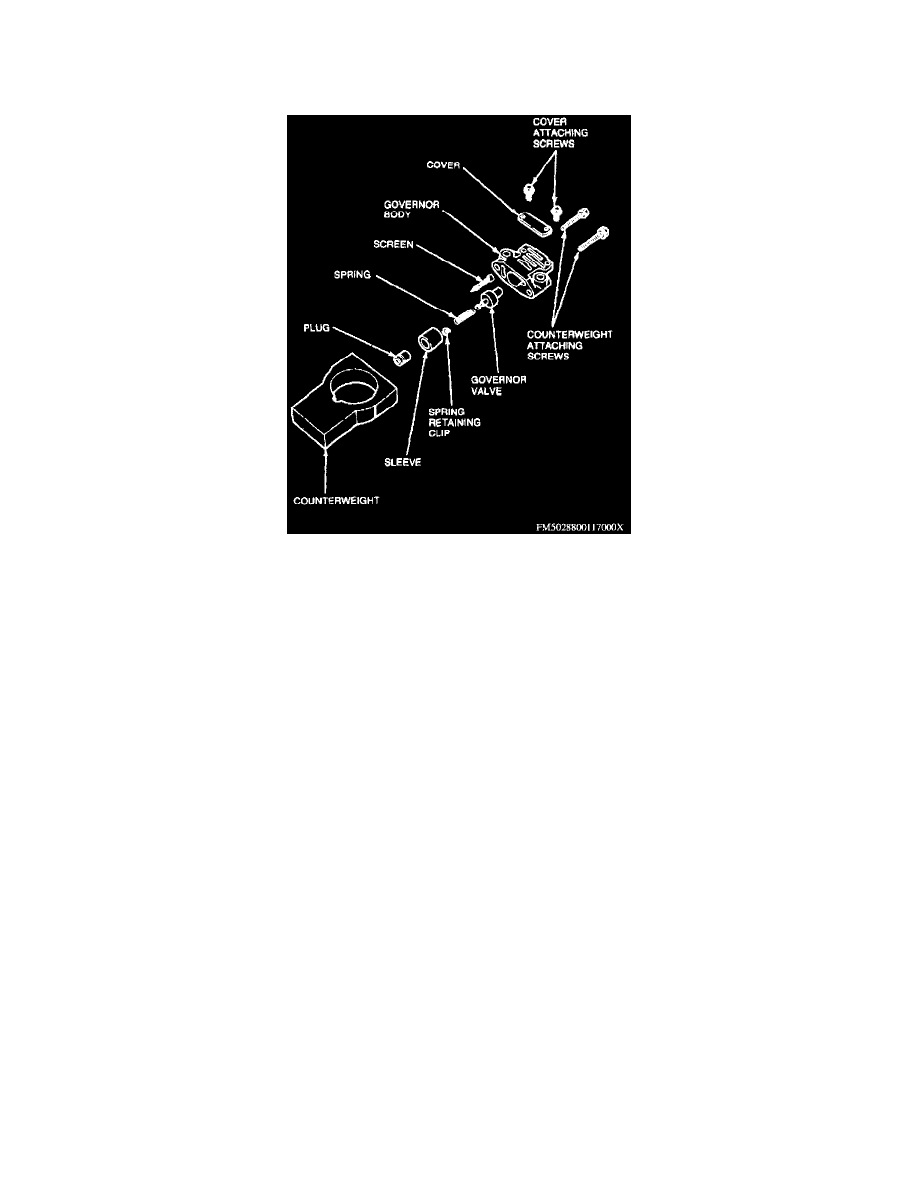
Exploded View Of Governor Assembly
1. Remove screws attaching counterweight to governor body.
2. Remove cover screws and cover.
3. Remove plug, sleeve and governor valve from governor body.
4. Remove screen from governor body.
ASSEMBLY
1. Install clip and spring on governor valve.
2. Install governor valve in governor body.
3. Install sleeve in governor body with points outward.
4. Install plug in sleeve with knurled face inward.
5. Position cover and install attaching screws, torque to specification.
6. Install screen in body with brass colored steel band inward and top of screen facing outward.
7. Position governor body on counterweight and install attaching screws, tightening to specification.
NOTE: Finished face of body should be flush with face of counterweight. Otherwise, body is installed backward.