
Grand Marquis V8-302 5.0L VIN F TBI (1984)
3. Install the self-adjusting clip on the temperature blend door crank arm.
4. Connect the other end of the control cable to the temperature lever arm on the control assembly. Snap the cable housing into place at the control
assembly.
5. Install a new push nut to retain the cable end loop on the temperature lever arm.
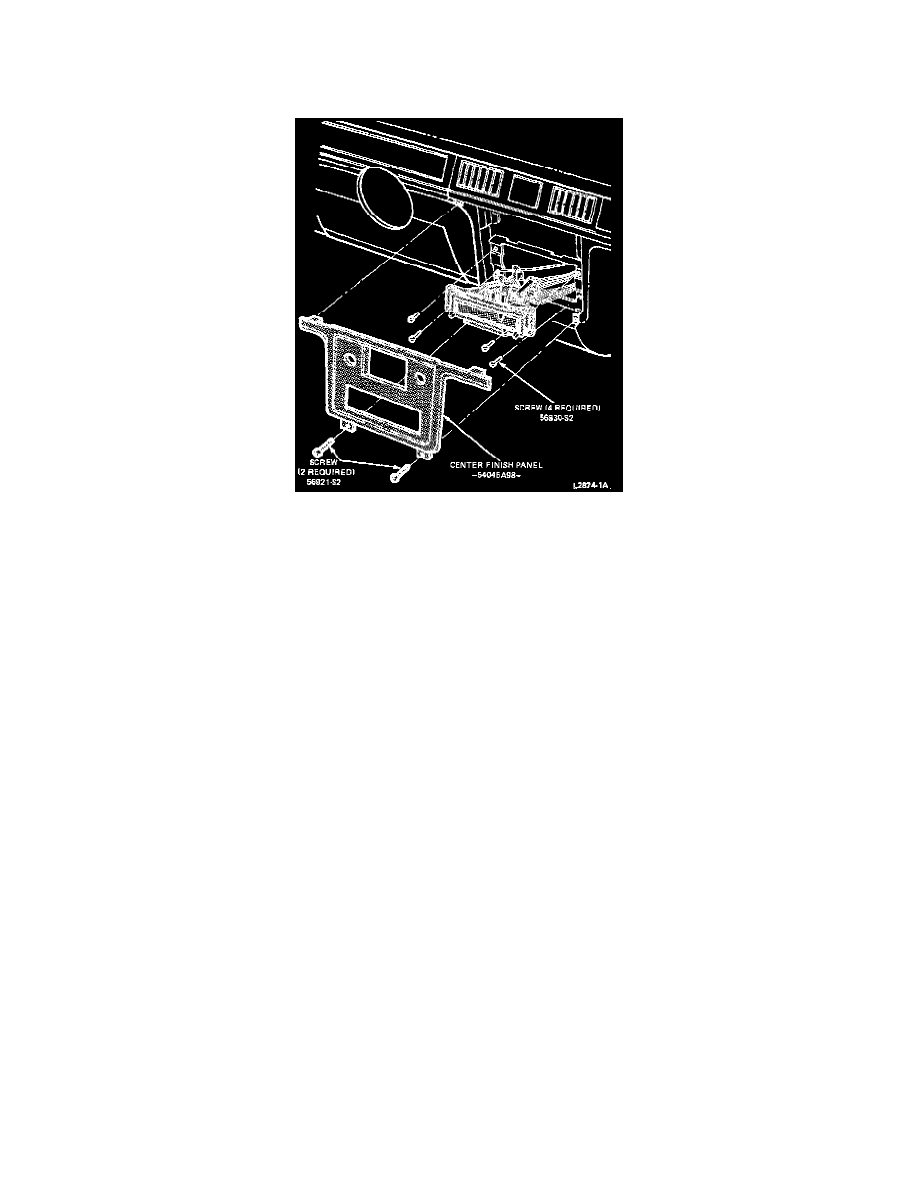
Control Assembly/Center Finish Panel
6. Position the control assembly to the instrument panel and install the four attaching screws.
7. Position the center finish panel to the instrument panel and install the two attaching screws.
8. Install the knobs on the radio control shafts.
9. Force the temperature lever to the extreme right end of the slot (WARM) to position the self-adjusting clip on the control cable.
10. Check the temperature selector lever for proper operation.
11. Install the glove compartment door stop.
12. Connect the ground cable to the battery negative (-) terminal.
NOTE: On vehicles equipped with Electronic Engine Control (EEC), when the battery has been disconnected and reconnected, some abnormal
drive symptoms may occur while the EEC processor relearns its adaptive strategy. The vehicle may need to be driven 10 miles or more to relearn
the strategy.
13. Check the system for proper operation.