
Grand Marquis V8-302 5.0L VIN F TBI (1984)
Heater Core Case: Service and Repair
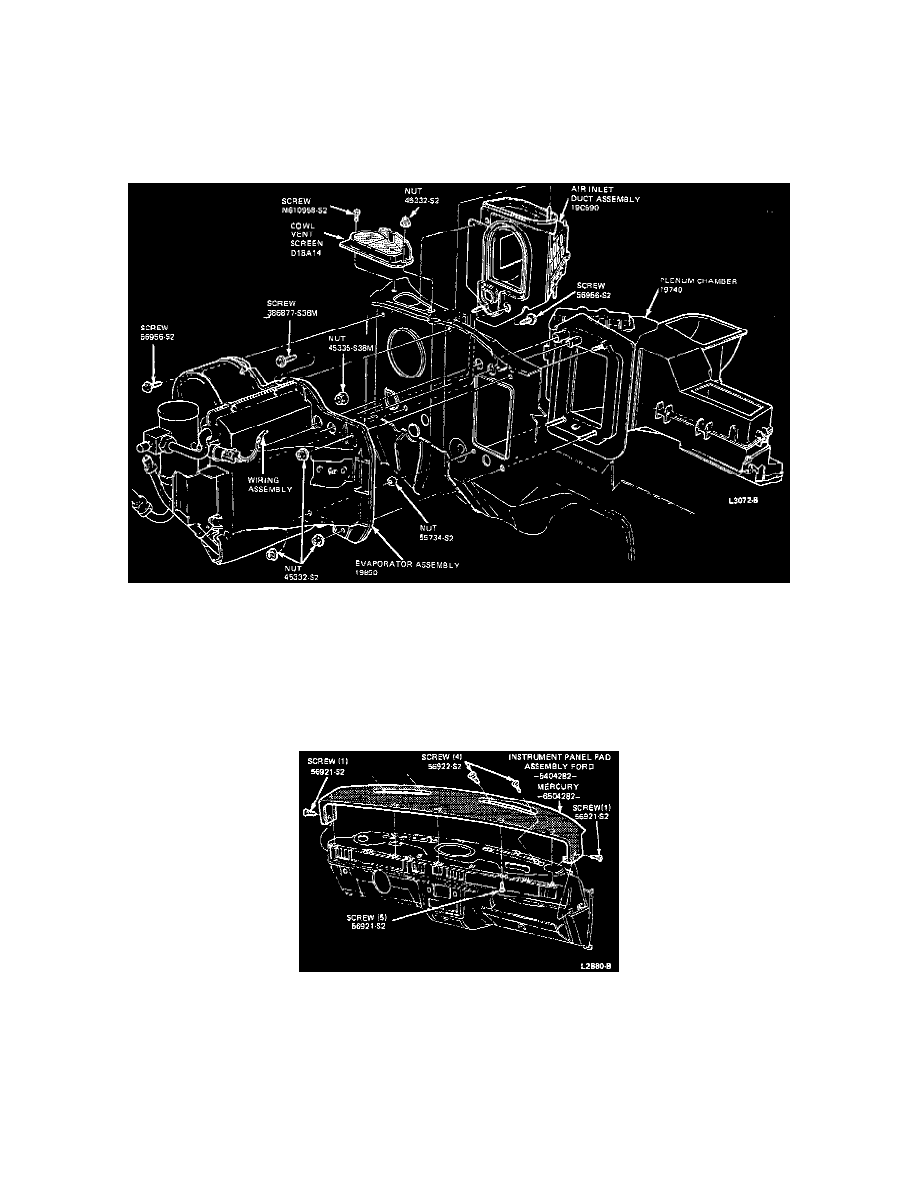
With Air Conditioning
REMOVAL
1. Disconnect the negative (ground) cable from the battery negative (-) terminal.
2. Disconnect the heater hoses from the heater core tubes. Plug the ends of the heater hoses to prevent coolant loss.
3. Plug the heater core tubes securely to prevent coolant leakage from the heater core during plenum removal.
Evaporator Case/Plenum Removal
4. Remove one bolt located below the windshield wiper motor attaching the left end of the plenum to the dash panel.
5. Remove one nut retaining the upper left corner of the heater case to the dash panel.
6. Disconnect control system vacuum supply hose from vacuum source and push grommet and vacuum supply hose into passenger compartment.
7. Remove the three glove compartment hinge screws, disconnect the check strap, and remove the glove compartment.
8. Loosen the right door sill plate and remove the right side cowl trim panel.
9. Remove the bolt attaching the lower right end of the instrument panel to the side cowl.
Instrument Panel Pad Removal And Installation
10. Remove the instrument panel pad.
11. Disengage the temperature control cable housing from the bracket on top of the plenum. Then, disconnect the cable from the temperature blend
door crank arm.
12. Disconnect the vacuum jumper harness at the multiple vacuum connector near the floor air distribution duct.
13. Disconnect the white vacuum hose from the outside air door vacuum motor.
14. Remove two screws attaching the passenger (rear) side of the floor air distribution duct to the plenum. It may be necessary to remove the two
screws attaching the panel door vacuum motor to the mounting bracket to gain access to the right screw.