
Grand Marquis V8-351 5.8L (1982)
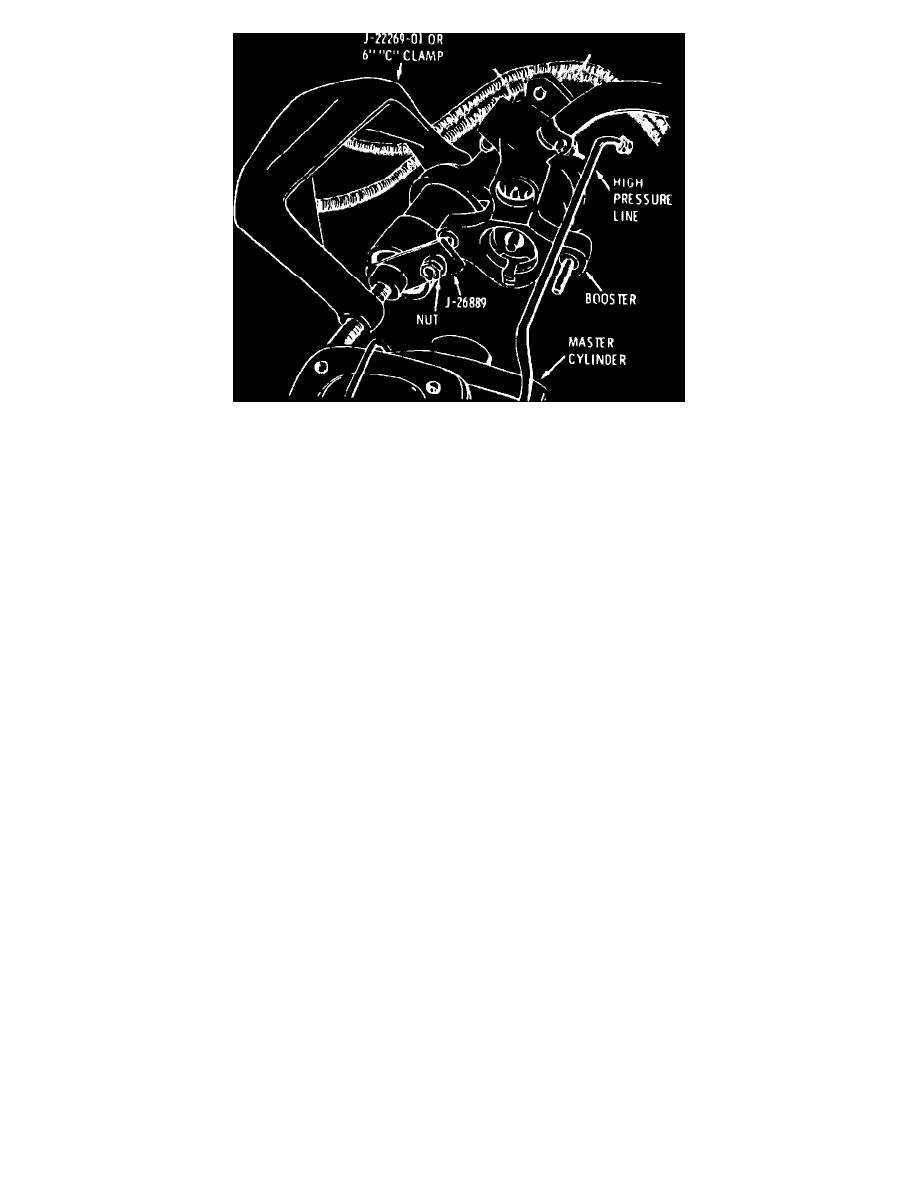
Fig. 5 Removing accumulator. HB-II
CLEANING & INSPECTIONKeep all disassembled parts clean until assembly. Lubricate all seals and metal friction points with power steering fluid.
When unit is disassembled, all seals and tube inserts should be replaced. These parts are available in replacement kits. If any accumulator valve
components are damaged or lost, replace all valve components.
1.
Inspect spool valve and spool valve bore for corrosion, nicks, scoring or other damage. Discoloration of the spool or bore, particularly in the
groove areas, is not harmful and replacement is not necessary.
2.
If spool valve or bore has nicks or scoring that can be felt with a fingernail, the entire booster should be replaced as an assembly. The clearance
between the spool valve and the spool valve bore is important. Because of this, the spool valve and the housing make up a selective
assembly. The spool valve is selected to match the spool valve bore.
3.
Inspect piston for scratches and nicks. If scratches on the outside surface can be felt with a fingernail, replace piston.
ACCUMULATOR SERVICE
Do not attempt to repair or apply heat to the accumulator. Before discarding an inoperative accumulator, drill a {1-16} in. in diameter hole through the
end of the accumulator pan. Do not drill through the piston end. Always wear safety glasses when performing service on the accumulator.
1.
Pump pedal rod several times to ensure accumulator is depleted.
2.
Secure brake booster mounting bracket in a vise with pedal rod facing downward.
3.
Place tool No. J-26889 over master cylinder stud and install retaining nut, Fig. 5.
4.
Using a C-clamp, depress accumulator can, then insert a punch into hole in housing to unseat retaining ring. Remove ring from housing using a
small screwdriver. If can cannot easily be depressed approximately .10 in., the accumulator is still charged. This indicates an internal
problem with the accumulator valves and the brake booster must be disassembled.
5.
Slowly back off C-clamp until tension is relieved, then remove C-clamp, retaining cap and accumulator.
6.
Reverse procedure to assemble. Lubricate accumulator can seal with power steering fluid. Ensure accumulator can retaining ring is completely
seated in housing groove.