
Grand Marquis V8-351 5.8L (1982)
Power Window Switch: Testing and Inspection
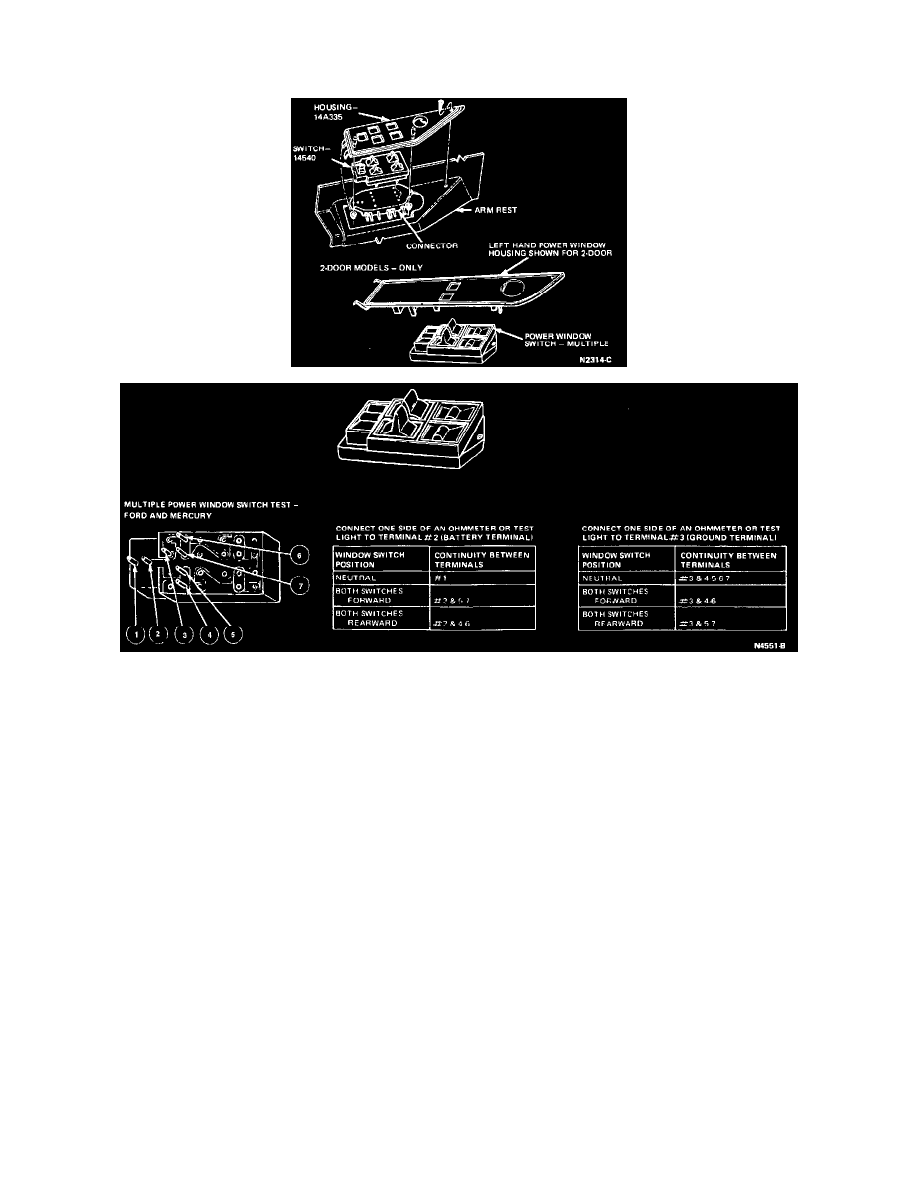
LH Front Master Switch (2 Door)
Testing the power window master switch should be performed with the switch removed from the vehicle. Use a self-powered test lamp or an ohmmeter
such as Rotunda Digital Volt Ohm Meter 007-00001 or equivalent.
Test Procedure
Except Low Series (see below)
1. Clip one test lead probe on pin 3 which is grounded.
2. With both switches in the NEUTRAL position, pins 4 through 7 should have continuity to pin 3.
3. Push either or both window switches forward and hold in that position (toward front of vehicle when in installed position).
Pins 5 and 7 of the switch pushed forward should lose continuity to pin 3.
4. Push either or both window switches rearward and hold in that position (toward rear of vehicle when in installed position).
Pins 4 and 6 of the switch pushed rearward should lose continuity to pin 3.
5. Remove the test lead from pin 3 and connect it to pin 2 (hot feed pin).
Push either or both switches forward.
Pins 5 and 7 should have continuity to pin 2.
6. Pull either or both switches rearward.
Pins 4 and 6 should have continuity to terminal 2.
7. If either switch does not test as stated, replace the complete switch assembly.
Low Series
Note: Low Series 2-Door models use two of the single switches as a master switch instead of the multiple switch. They are tested in the same way as
the standard single switch. See: RH Front and Rear - Single Switch