
Grand Marquis V8-4.6L Flex Fuel (2010)
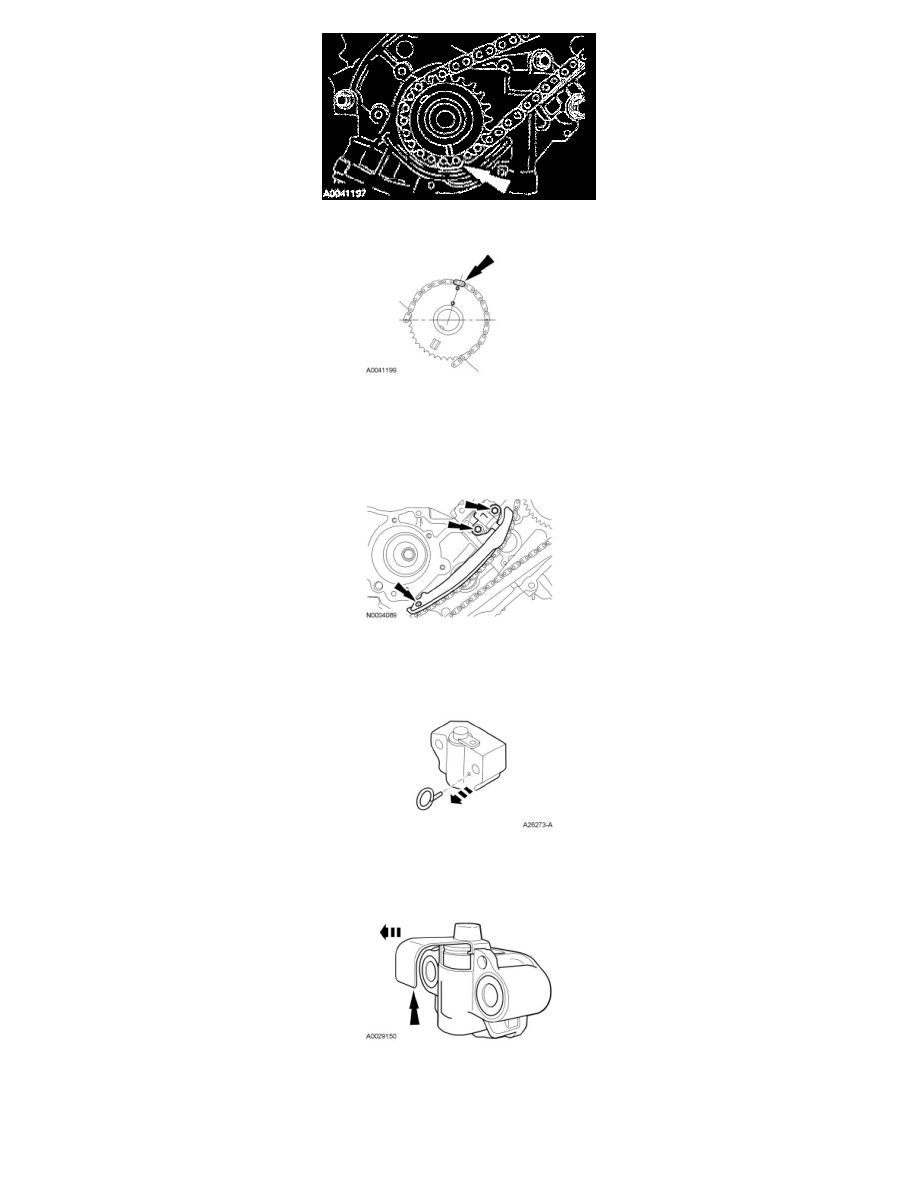
15. Install the LH timing chain on the sprocket, aligning the colored (marked) link with the timing marks on the sprocket.
16. NOTE: The LH timing chain tensioner arm has a bump near the dowel hole for identification.
Position the LH timing chain tensioner arm on the dowel pin and install the LH timing chain tensioner.
-
Tighten to 25 Nm (18 lb-ft).
Engines with ratcheting timing chain tensioners
17. Remove the paper clip from the LH timing chain tensioner.
Engines with non-ratcheting timing chain tensioners
18. Remove the Hydraulic Chain Tensioner Retaining Clip from the LH timing chain tensioner.
All engines
19. Position the RH (outer) timing chain on the crankshaft sprocket, aligning the colored (marked) link with the timing mark on the sprocket.