
Grand Marquis V8-4.6L Flex Fuel (2010)
Accumulator HVAC: Service and Repair
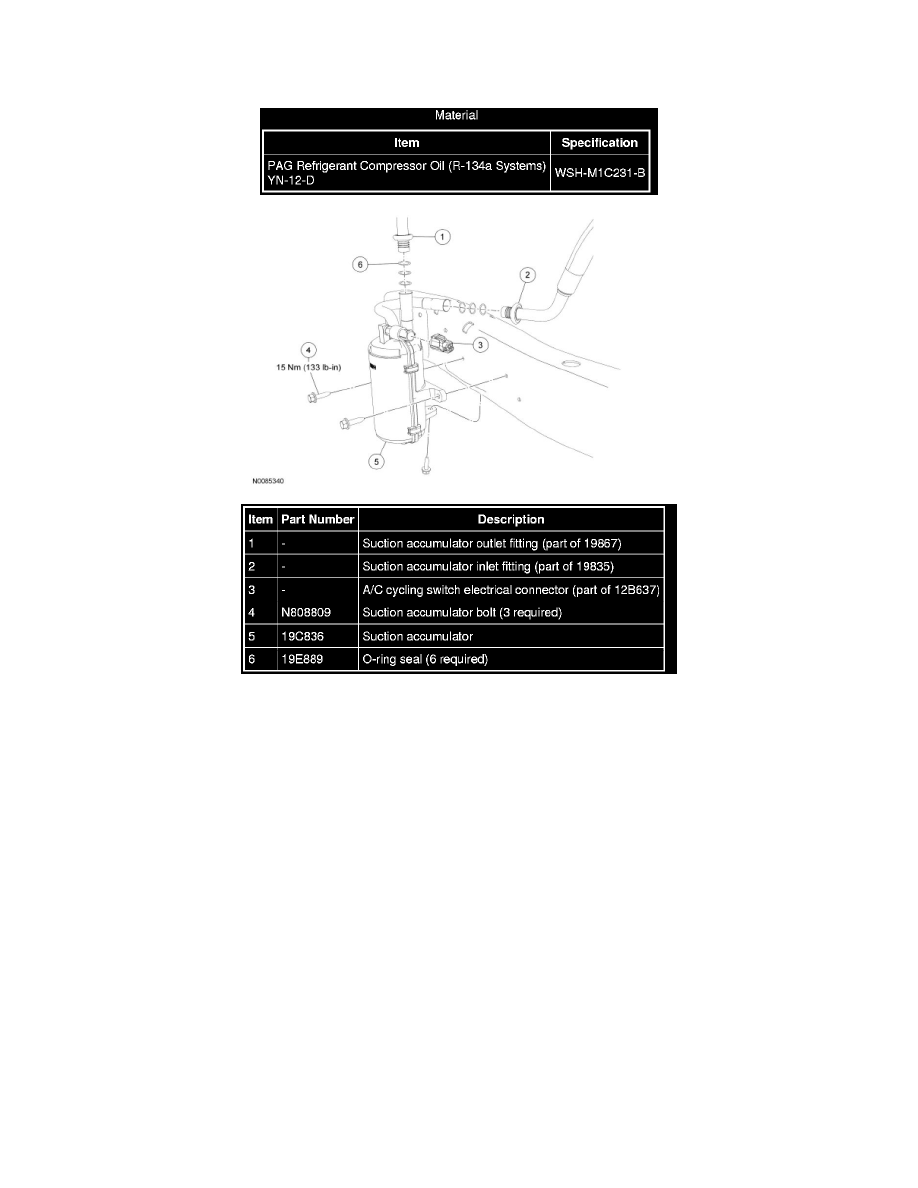
Suction Accumulator
Removal and Installation
NOTE: Installation of a new suction accumulator is not required when repairing the A/C system, except when there is physical evidence of
contamination from a failed A/C compressor or damage to the suction accumulator. Damage to the suction accumulator includes leaks in the suction
accumulator, physical damage to the suction accumulator shell or desiccant, or moisture contamination. Moisture contamination results only from a
complete loss of refrigerant and equalization of the refrigerant system pressure with atmospheric pressure for a period longer than one hour. If even a
slight amount of positive refrigerant pressure is present in the system before repairs are carried out, the suction accumulator should not be replaced.
1. WARNING: Before servicing a vehicle equipped with a fire suppression system, depower the system by following the procedure in
Vehicle Jacking and Lifting. Failure to follow the instructions may result in serious personal injury.
With the vehicle in NEUTRAL, position it on a hoist. For additional information, refer to Vehicle Jacking and Lifting.
2. Recover the refrigerant.
3. Disconnect the suction accumulator outlet fitting.
-
Discard the O-ring seals.
4. Disconnect the suction accumulator inlet fitting.
-
Discard the O-ring seals.
5. Disconnect the A/C cycling switch electrical connector.
6. Remove the 3 suction accumulator bolts.
-
To install, tighten to 15 Nm (133 lb-in).
7. Remove the suction accumulator.