
Grand Marquis V8-4.6L Flex Fuel (2010)
4. Release the front and rear door B-pillar weatherstripping.
5. Pull out to release the retaining clips and remove the lower B-pillar trim panel.
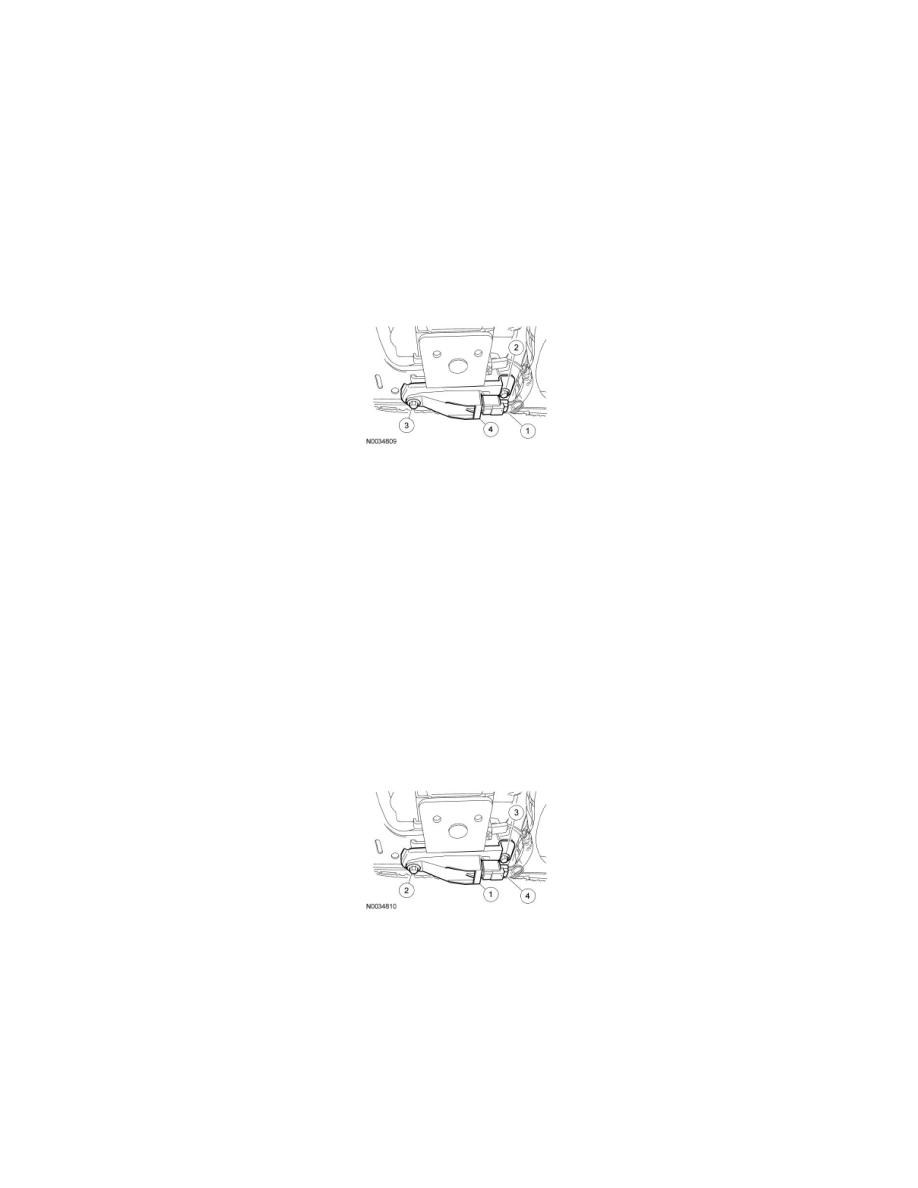
6. NOTE: The side impact sensor bolts must be removed in the sequence shown.
Remove the side impact sensor with bracket.
1. Disconnect the electrical connector.
2. Remove the bolt.
3. Remove the bolt.
4. Remove the side impact sensor with bracket.
Installation
1. WARNING: Always tighten the fasteners of the restraints control module (RCM) and impact sensor (if equipped) to the specified torque.
Failure to do so may result in incorrect restraint system operation, which increases the risk of personal injury or death in a crash.
NOTE: The side impact sensor bolts must be installed in the sequence shown.
Install the side impact sensor with bracket.
1. Position the side impact sensor with bracket.
2. Install the bolt.
-
Tighten to 12 Nm (106 lb-in).
3. Install the bolt.
-
Tighten to 12 Nm (106 lb-in).
4. Connect the electrical connector.
2. Align the lower B-pillar lower trim panel and push in, seating the retaining clips.
3. Attach the front and rear door B-pillar weatherstripping.
4. Install the rear door scuff plate.
5. Install the front door scuff plate.
6. Repower the SRS. For additional information, refer to Supplemental Restraint System (SRS) Depowering and Repowering See: Air Bag
Systems/Air Bag(s) Arming and Disarming/Service and Repair/Supplemental Restraint System (SRS) Depowering and Repowering in the General
Procedures portion.